21 Landscaping Ideas Around Tree Roots That Won't Hurt Your Tree
Grass quits, roots surface, and the usual fix is to pour soil over the problem. These 21 ideas work with the root plate instead, covering plantings, mulch rings, rock, edging, and seating, each with the reason it stays safe for the tree.
The grass under that maple gave up three summers ago. What's left is a bald ring of packed dirt, a few roots humping through it, and a mower that scalps them on every pass. The trouble with most landscaping ideas around tree roots is that they treat the roots as the problem and bury them, and a buried root plate is how a healthy 40-year-old tree becomes a $1,400 removal bill.
Everything below works the other way. The 21 ideas are grouped into plantings, mulch rings, rock, edging, and seating features, and each one carries the reason it stays safe: nothing raised, nothing cut, root flare left visible. There are cheap weekend versions and full redesigns, plus a short list of the ideas that photograph beautifully and quietly kill trees.
One note on the pictures: every image here is an AI-generated design concept rendered from a typical yard photo, the same output AI landscape design produces from a picture of your own tree.
Why the roots surfaced in the first place
Roots do not grow up. The soil goes down. Most feeder roots live in the top 6 to 12 inches of soil because that is where oxygen and water are, and anything that thins that layer brings them into daylight: rain washing soil off a slope, decades of mower compaction squeezing the air out of the ground below, or a shallow layer of topsoil over builder's clay that gives roots nowhere to go. Some species are simply built this way, maples, beeches, poplars and willows most of all.
That matters for design, because it means the roots are not a defect to correct. They are the tree telling you which few inches it is living in.
Ground covers and plantings that live with the roots
1. Carpet the ring with plugs, not potted plants
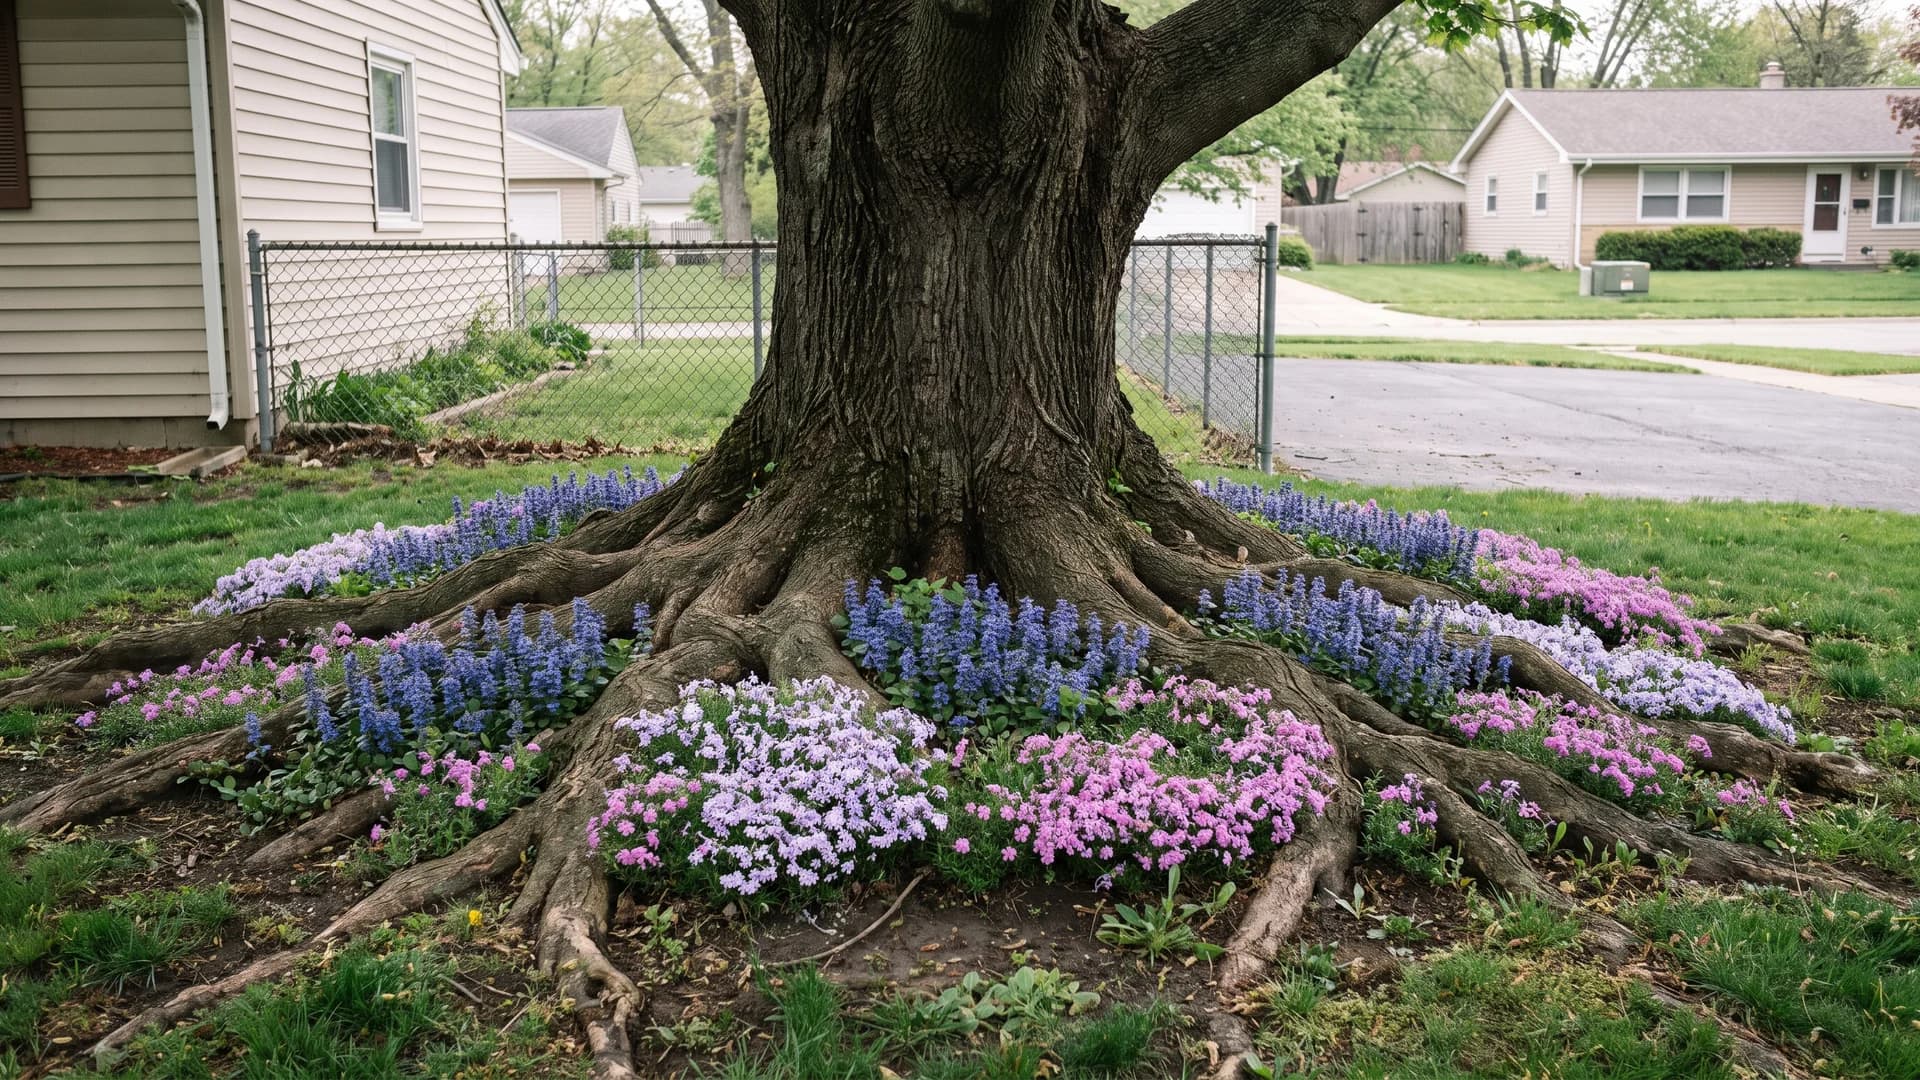
Pot size is what decides whether this works. A 1-gallon plant needs an 8-inch hole, and inside the drip line that hole usually means severing roots. Plugs and 2-inch liners slide into the gaps instead. Ajuga, creeping phlox and Geranium 'Biokovo' knit into a closed mat in two seasons at about a dozen plants per square yard, which makes this the most convincing lawn alternative for a ring where grass has already quit. Fifty plugs run $60 to $90.
2. Put the hosta and fern bed at the drip line
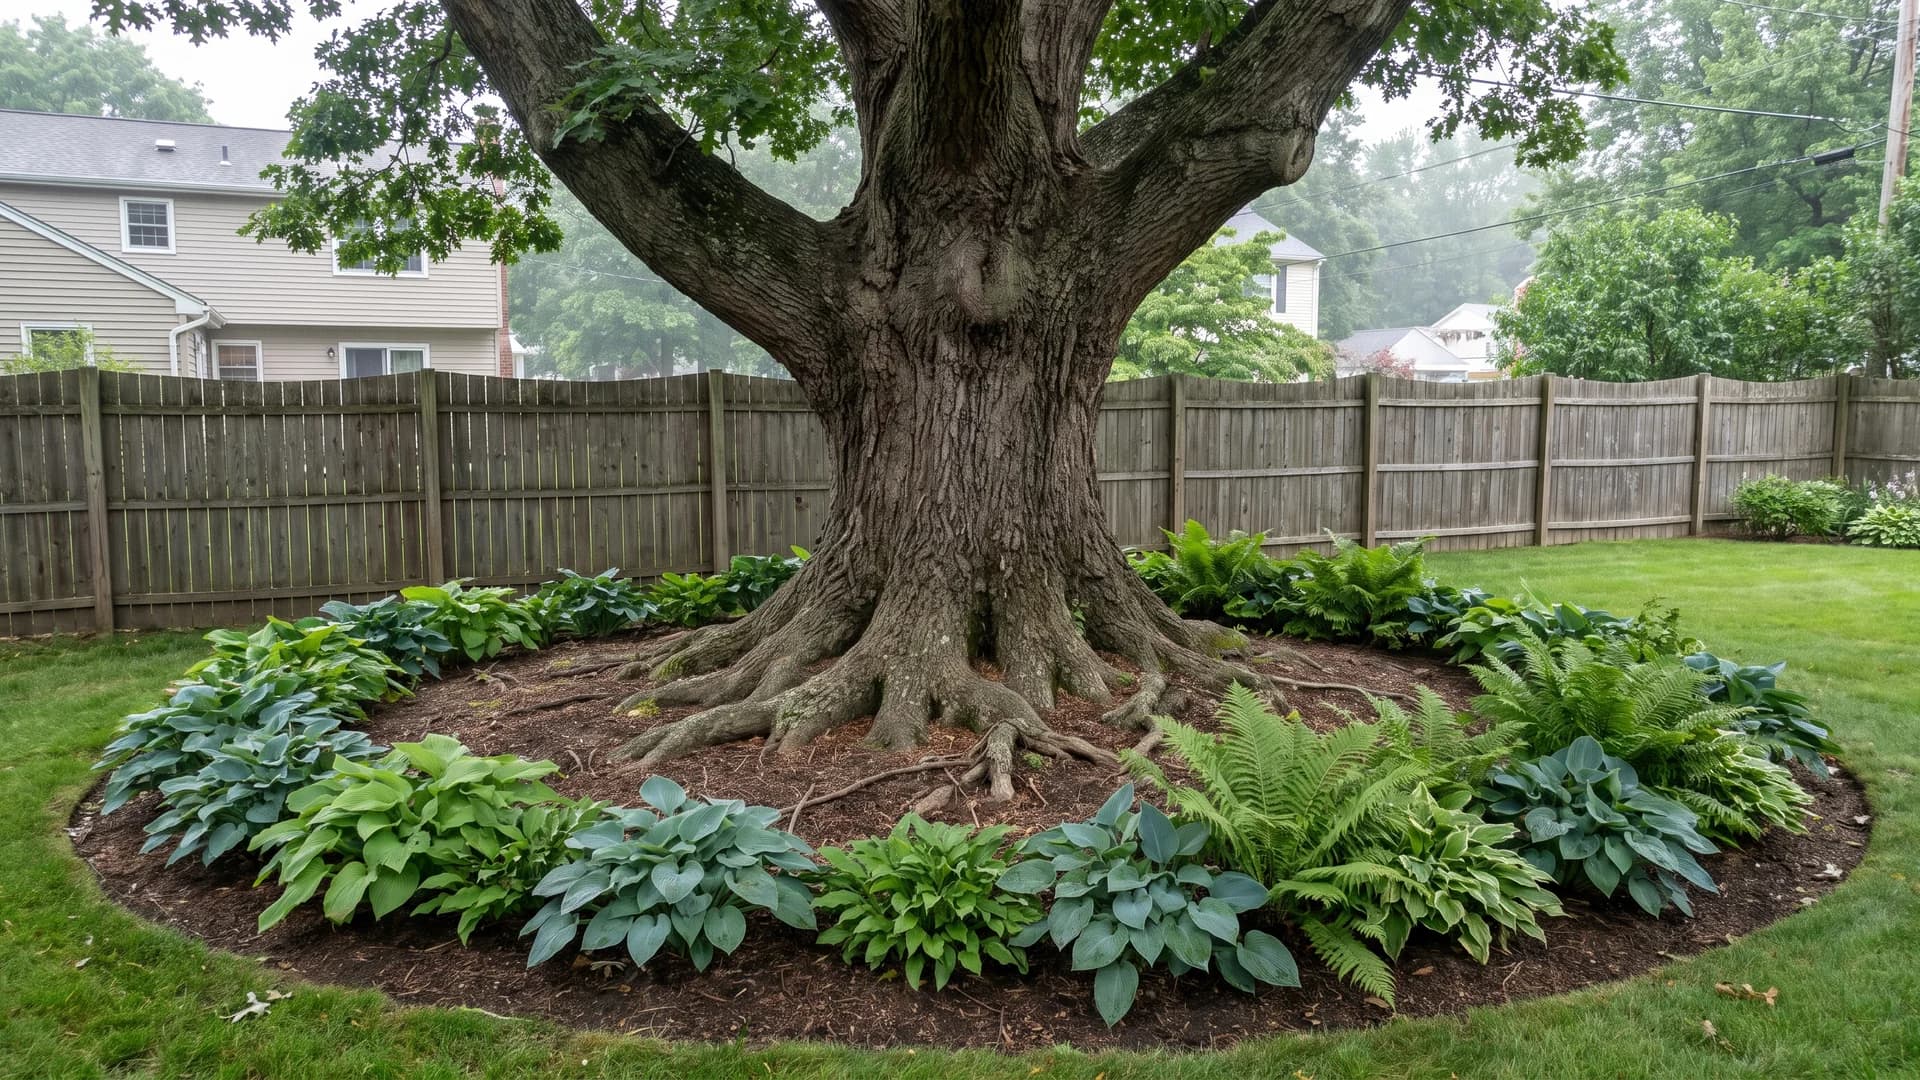
Most hosta rings die by August, and the reason is location rather than care. Competition for water is fiercest in the first three feet from the trunk. Out at the canopy edge the same plants get enough to hold their leaves, and the soil is loose enough to plant without a crowbar. Hostas and Christmas fern run zone 3 to 8 and want one deep soak a week in a dry spell. Set them from 4-inch pots and keep the tiller in the shed.
3. Let spring bulbs finish before the canopy closes
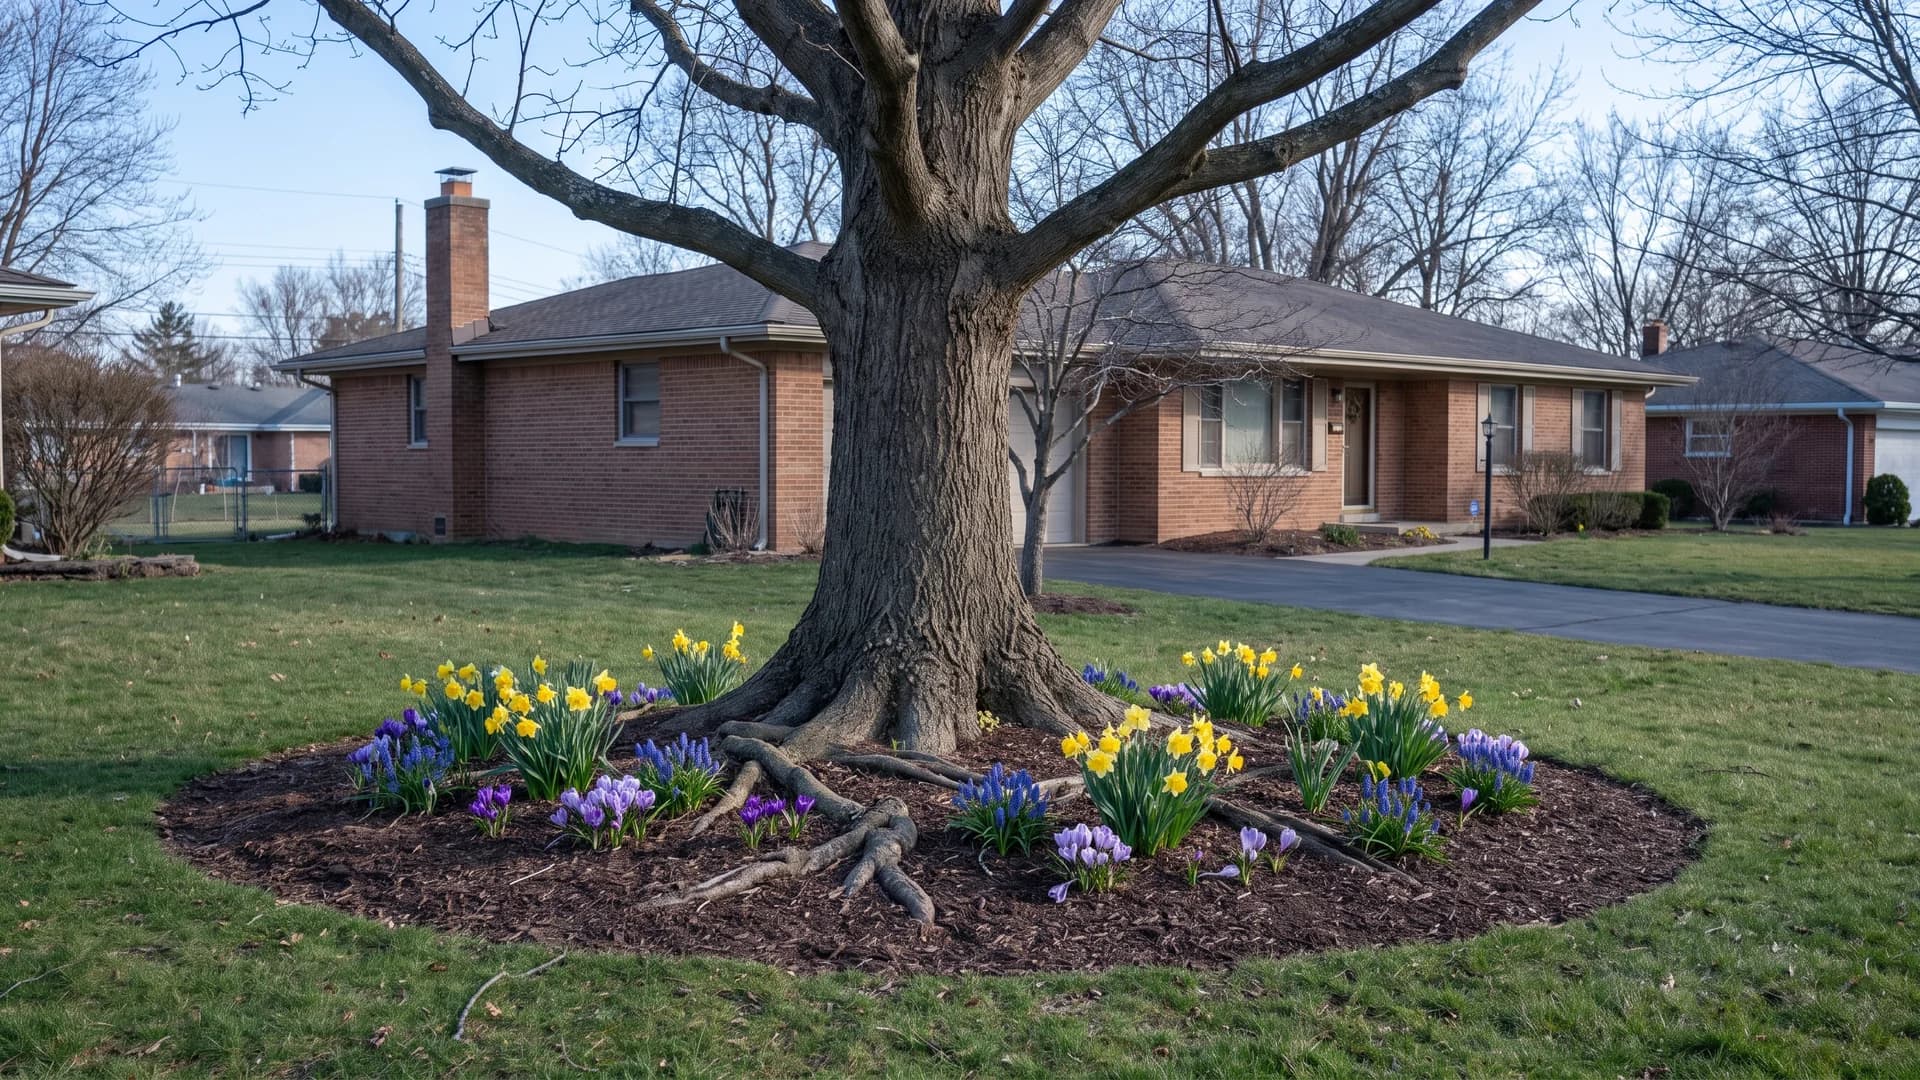
Timing does the work here. Daffodils, crocus and muscari flower and die back before an oak or maple leafs out, so they never fight the canopy for light or the roots for summer water. Small bulbs go in 3 to 4 inches deep with a hand trowel, which stays well above anything structural. This one only works under deciduous trees; under a spruce or pine the shade never lifts. Fifty bulbs cost $25 to $40.
4. Ring the outer edge in coral bells
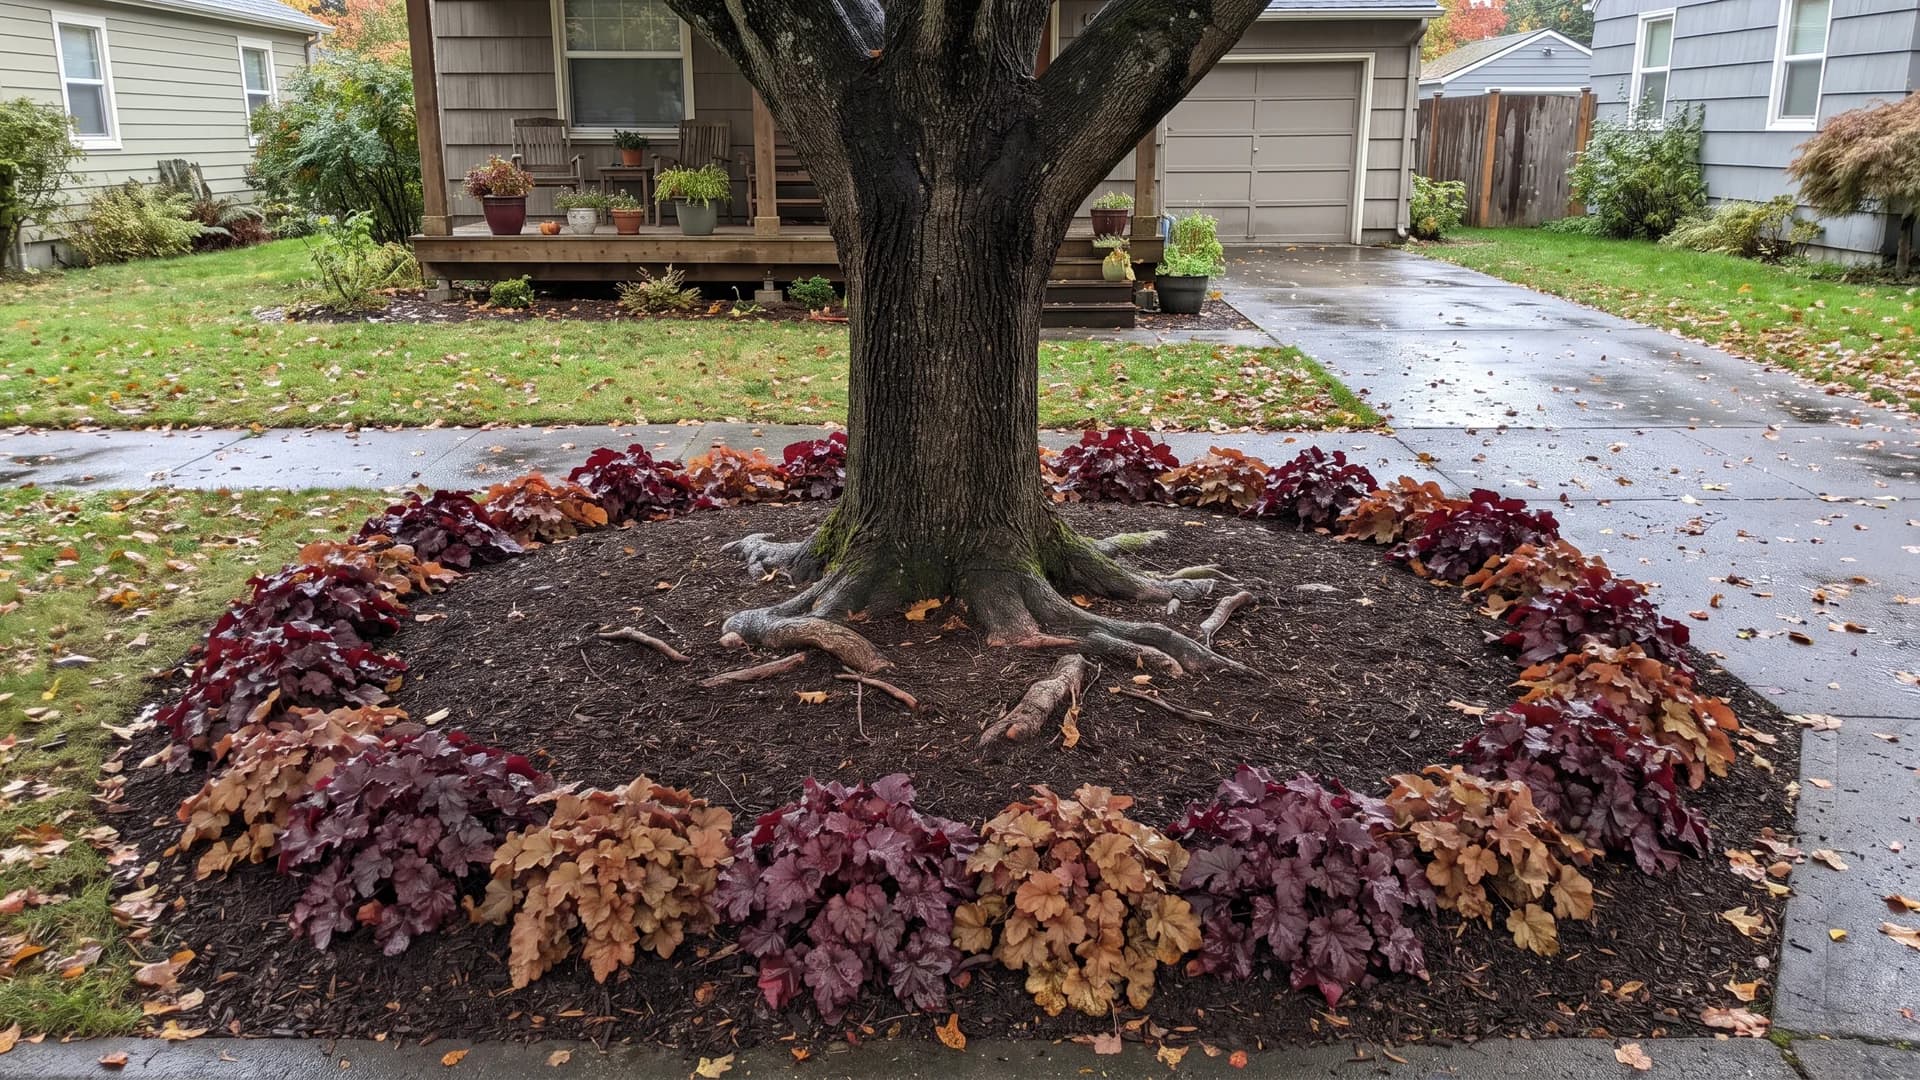
Heuchera earns a front yard spot because the foliage carries the color, so the bed looks finished for eight months instead of two weeks of bloom. 'Caramel' and 'Obsidian' hold through zone 4 to 9 and never get big enough to need a real planting hole. Nine to twelve plants in 4-inch pots will edge the outer half of a 10-foot ring. Leave the inner ring bare mulch and the whole thing reads as intentional.
5. Rebuild the woodland layer the tree expects
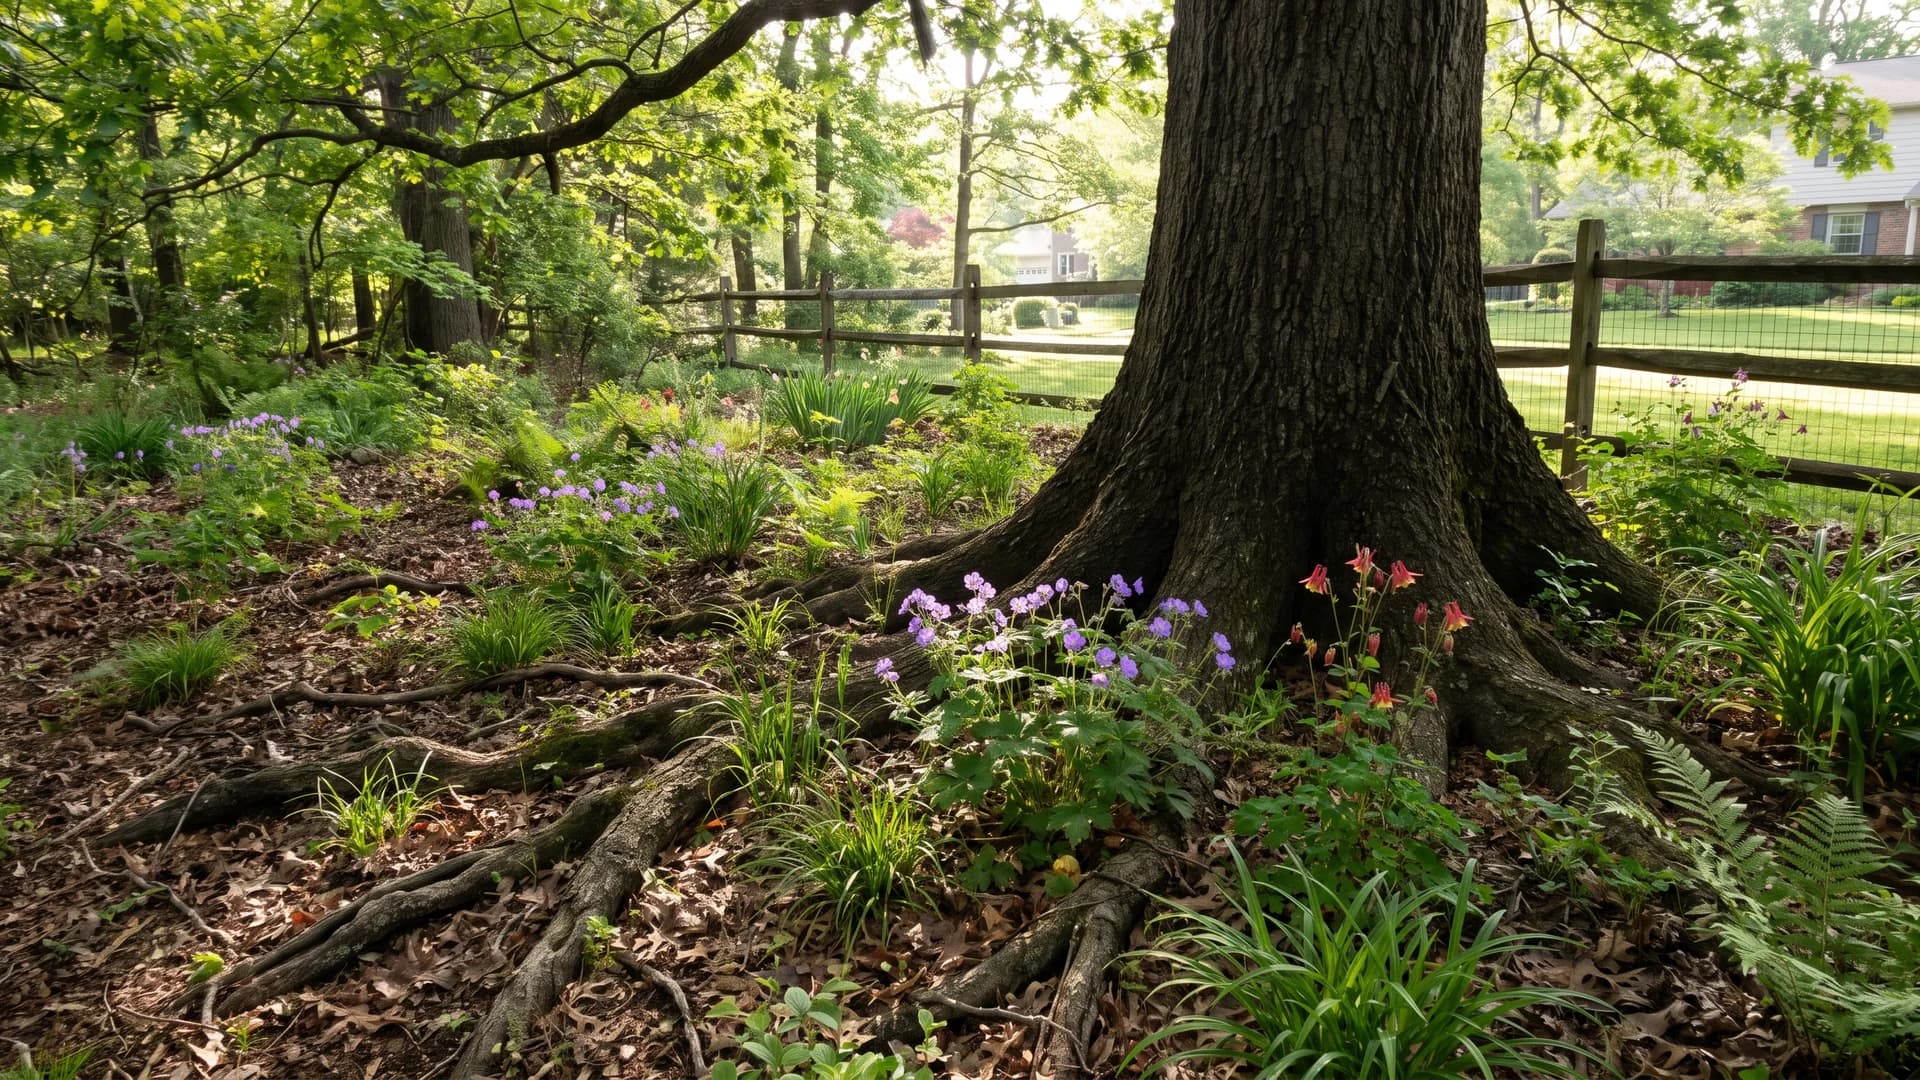
Walk any patch of woods and the understory list is short: wild geranium, Christmas fern, columbine, sedge, foamflower. That layer evolved under root competition and dry shade, so it wants water in year one and very little after. Native plants also feed the early bees that fly before the canopy closes, which turns a dead ring into a working pollinator garden. Plant in fall, plant small, and check your zone on the USDA hardiness map before ordering.
6. Plant sedum into the pockets between roots
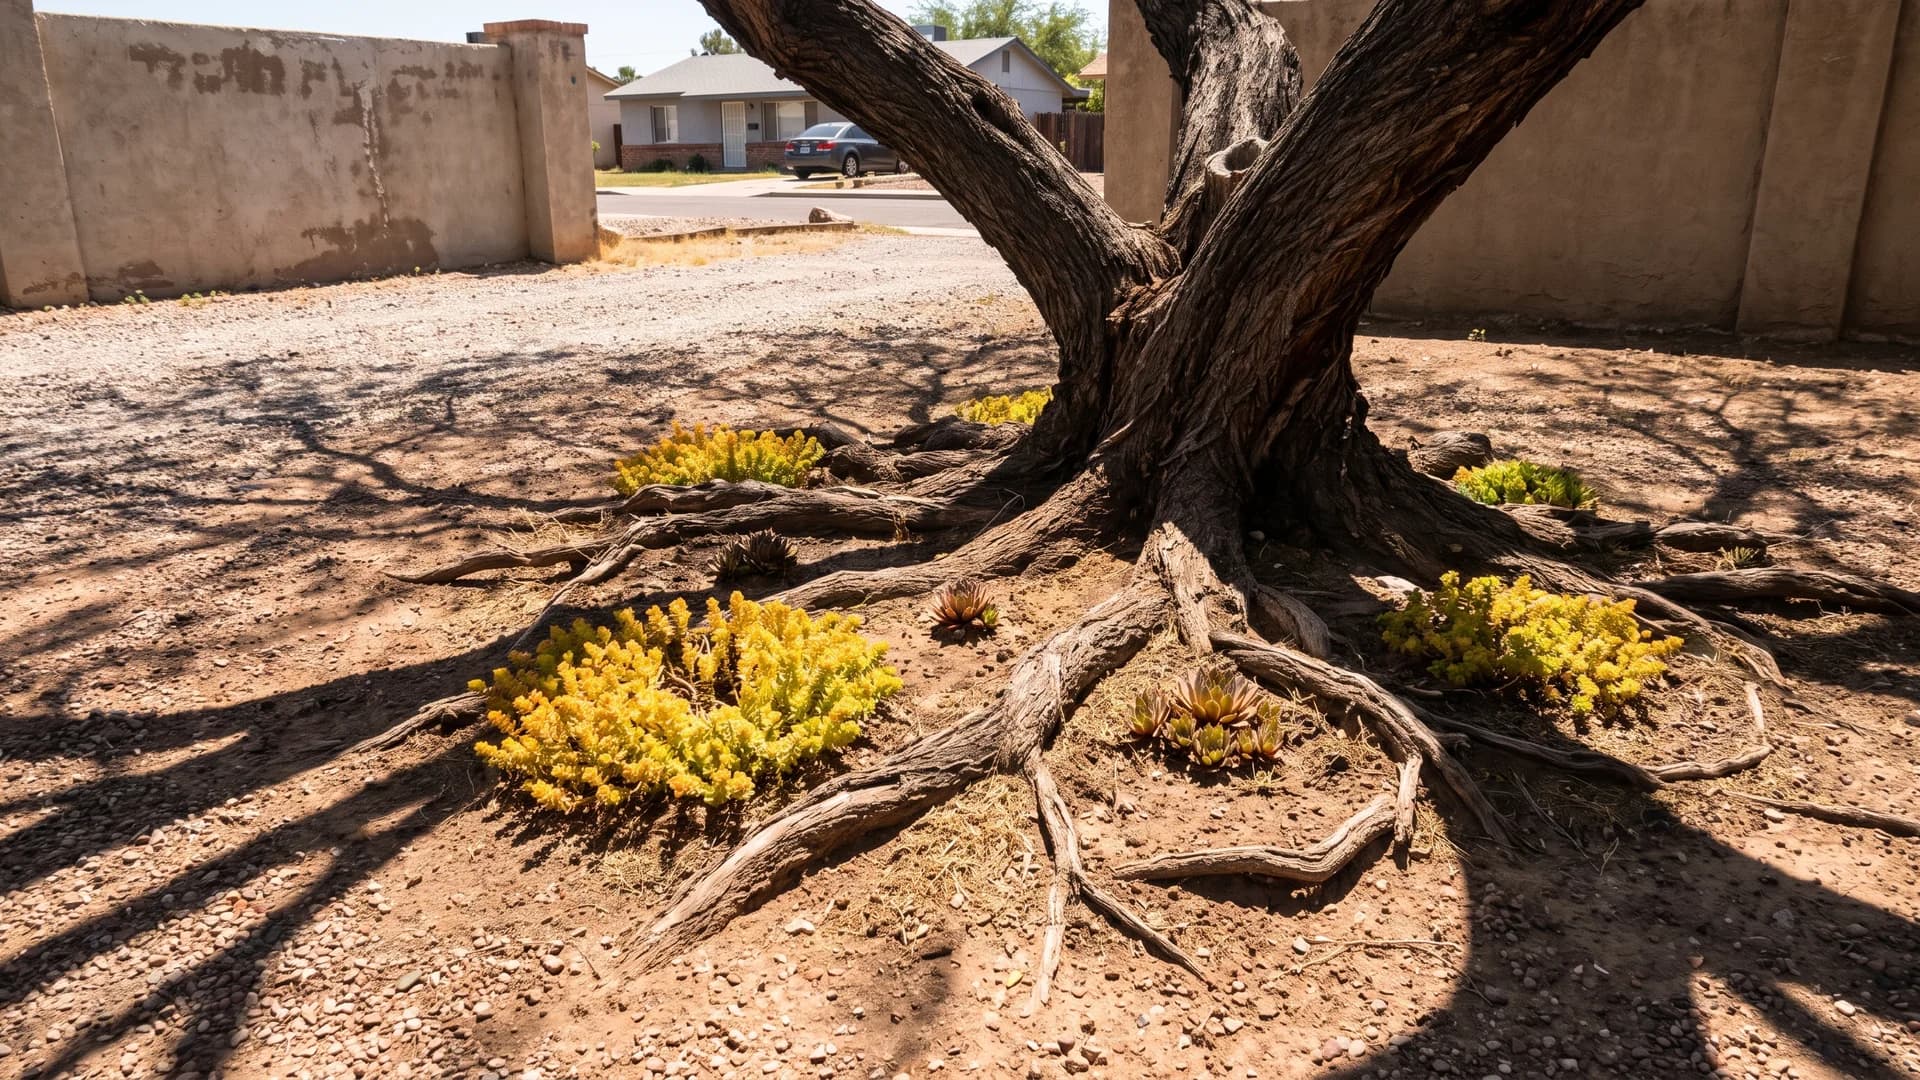
Hot dry shade is where hostas rot and sedum quietly thrives. Find the soil pockets already sitting between exposed roots and plant into those gaps only: sedum 'Angelina', hens and chicks, delosperma in zone 7 and warmer. Each pocket takes a handful of grit worked into the top 2 inches. If there's no pocket, there's no plant, because widening one with a shovel is exactly how roots get cut.
7. Use the three plants that hold in dry shade
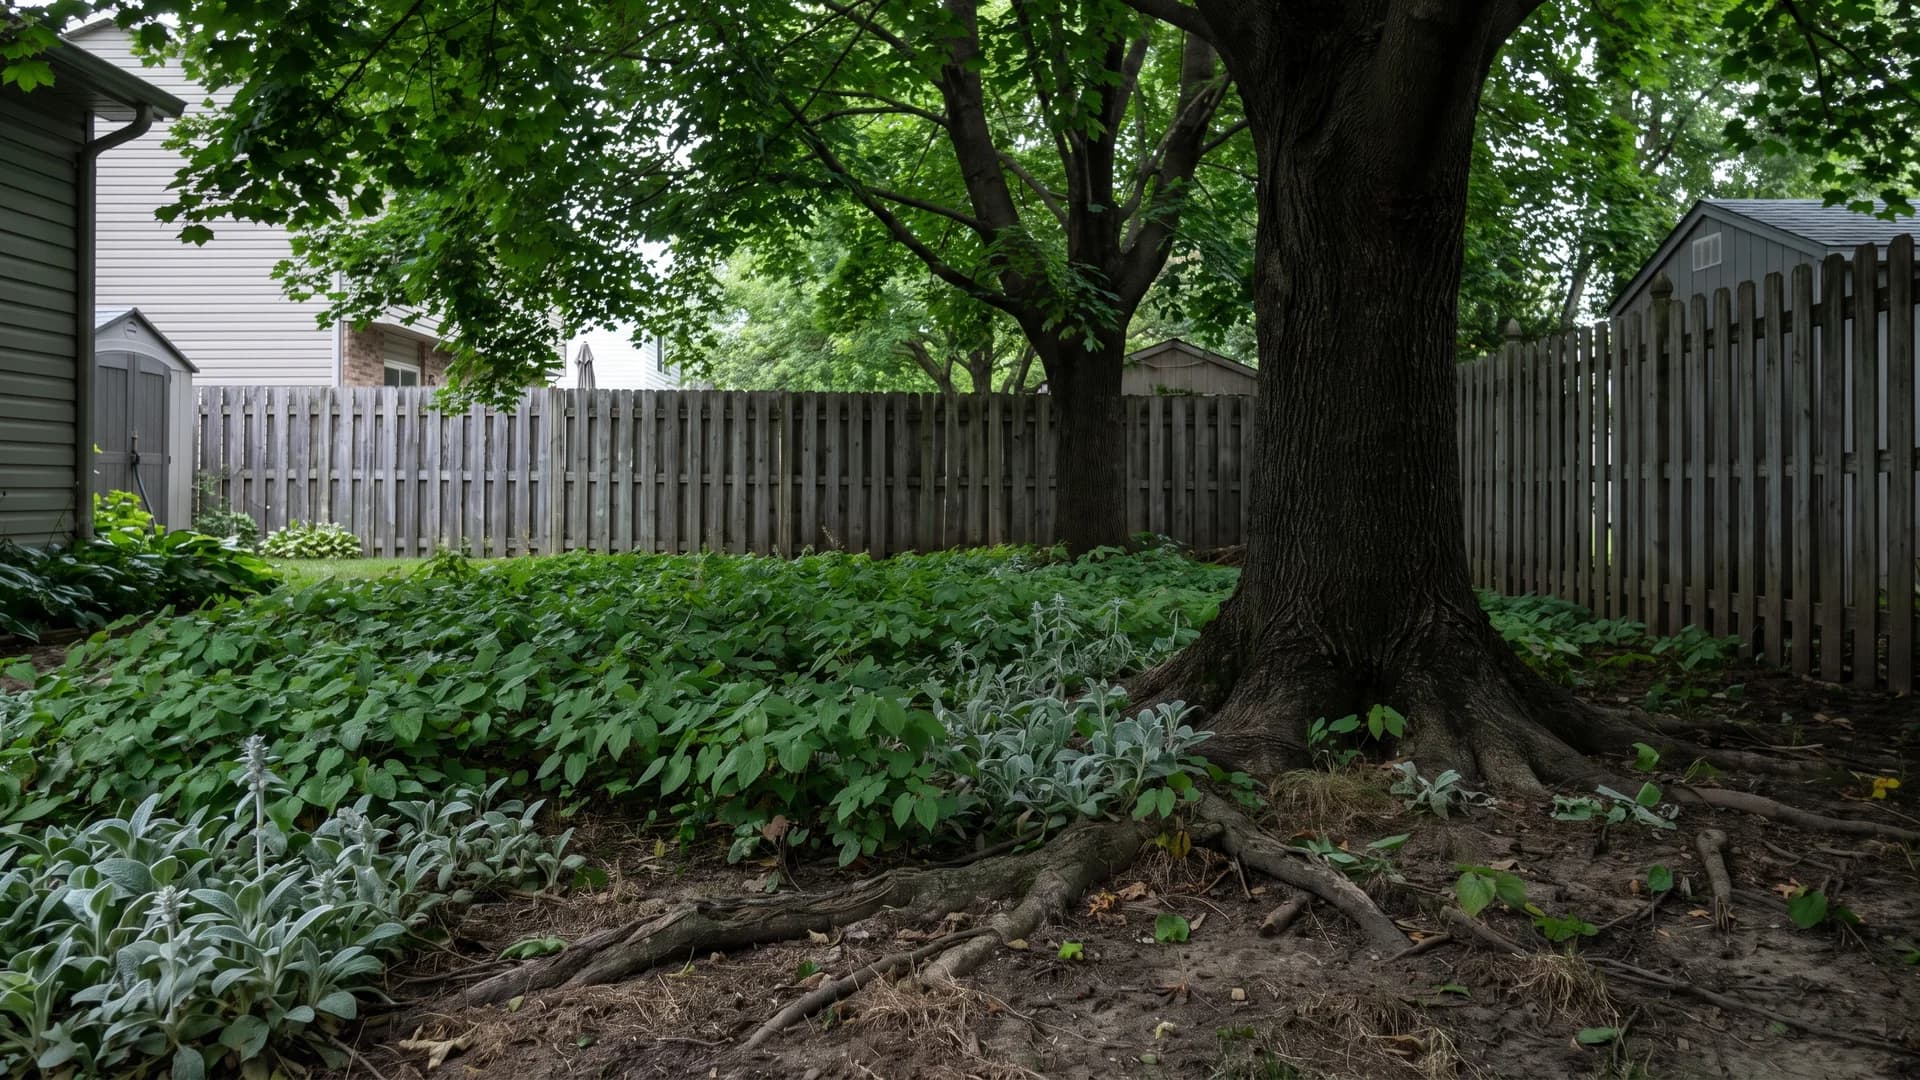
Some spots defeat everything. Epimedium, lamb's ear and yerba buena are the three that hold under dense mature canopy where even hosta thins to nothing. Epimedium takes about three years to look like anything, then spreads on its own and stays evergreen from zone 5 up. Plant it 12 inches apart in fall, water through the first two summers, and then leave it entirely alone. These are the most drought-tolerant plants that still read as a designed bed.
Mulch rings, done the way arborists actually do them
8. Build a mulch donut, never a volcano
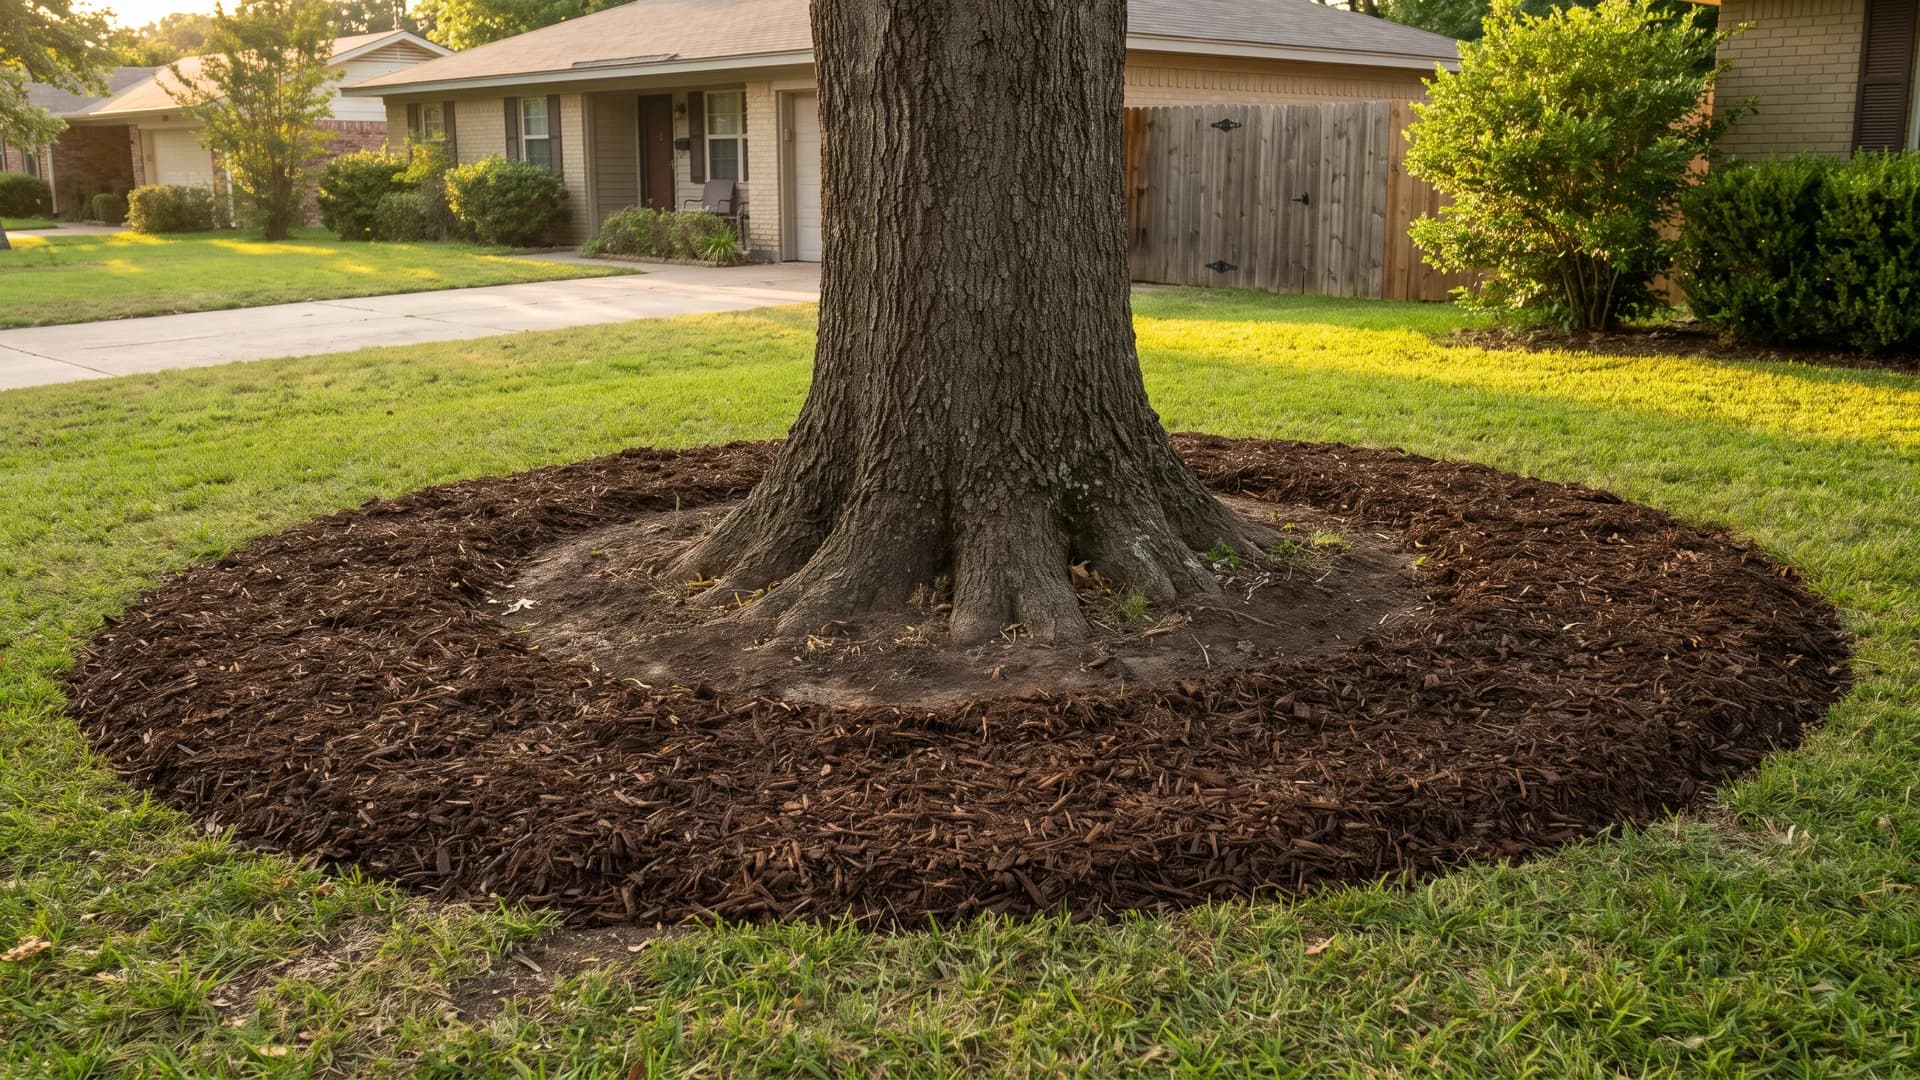
The most repeated idea online is also the most commonly botched. Penn State Extension puts it at 2 to 4 inches of organic mulch, spread flat, with the mulch pulled 8 to 10 inches back from the trunk of a mature tree so the root flare shows. If you cannot see the trunk widen where it enters the ground, it is buried too deep. Run your ring size through the mulch calculator before you buy bags.
9. Widen the ring instead of deepening it
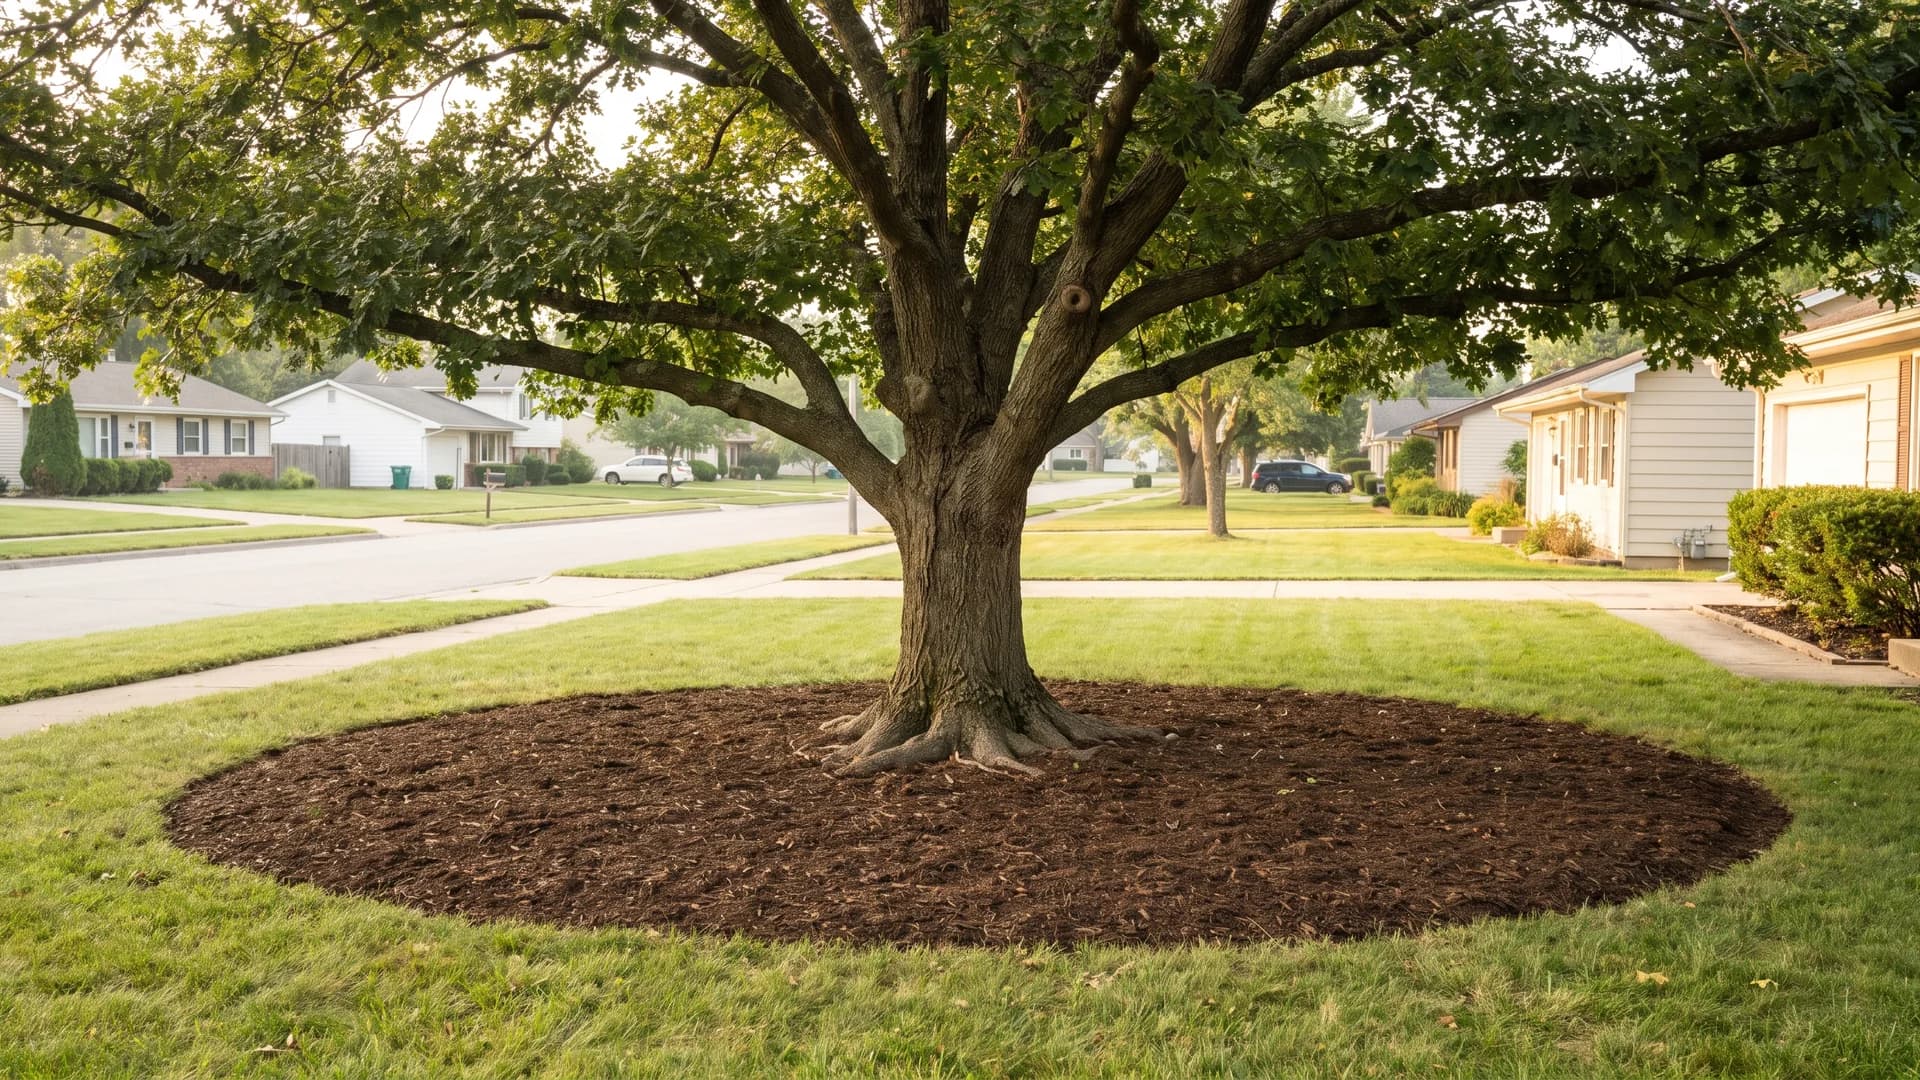
Mulch wide, not deep. Pushing the ring out toward the drip line retires the strip of grass that never grows anyway, keeps the mower and the string trimmer two feet off the bark, and makes the whole thing read as a bed rather than a bald patch. A 10-foot circle at 3 inches deep takes roughly 0.7 cubic yards. Trimmer damage to bark is the slow killer this move prevents.
10. Get arborist chips instead of bagged bark
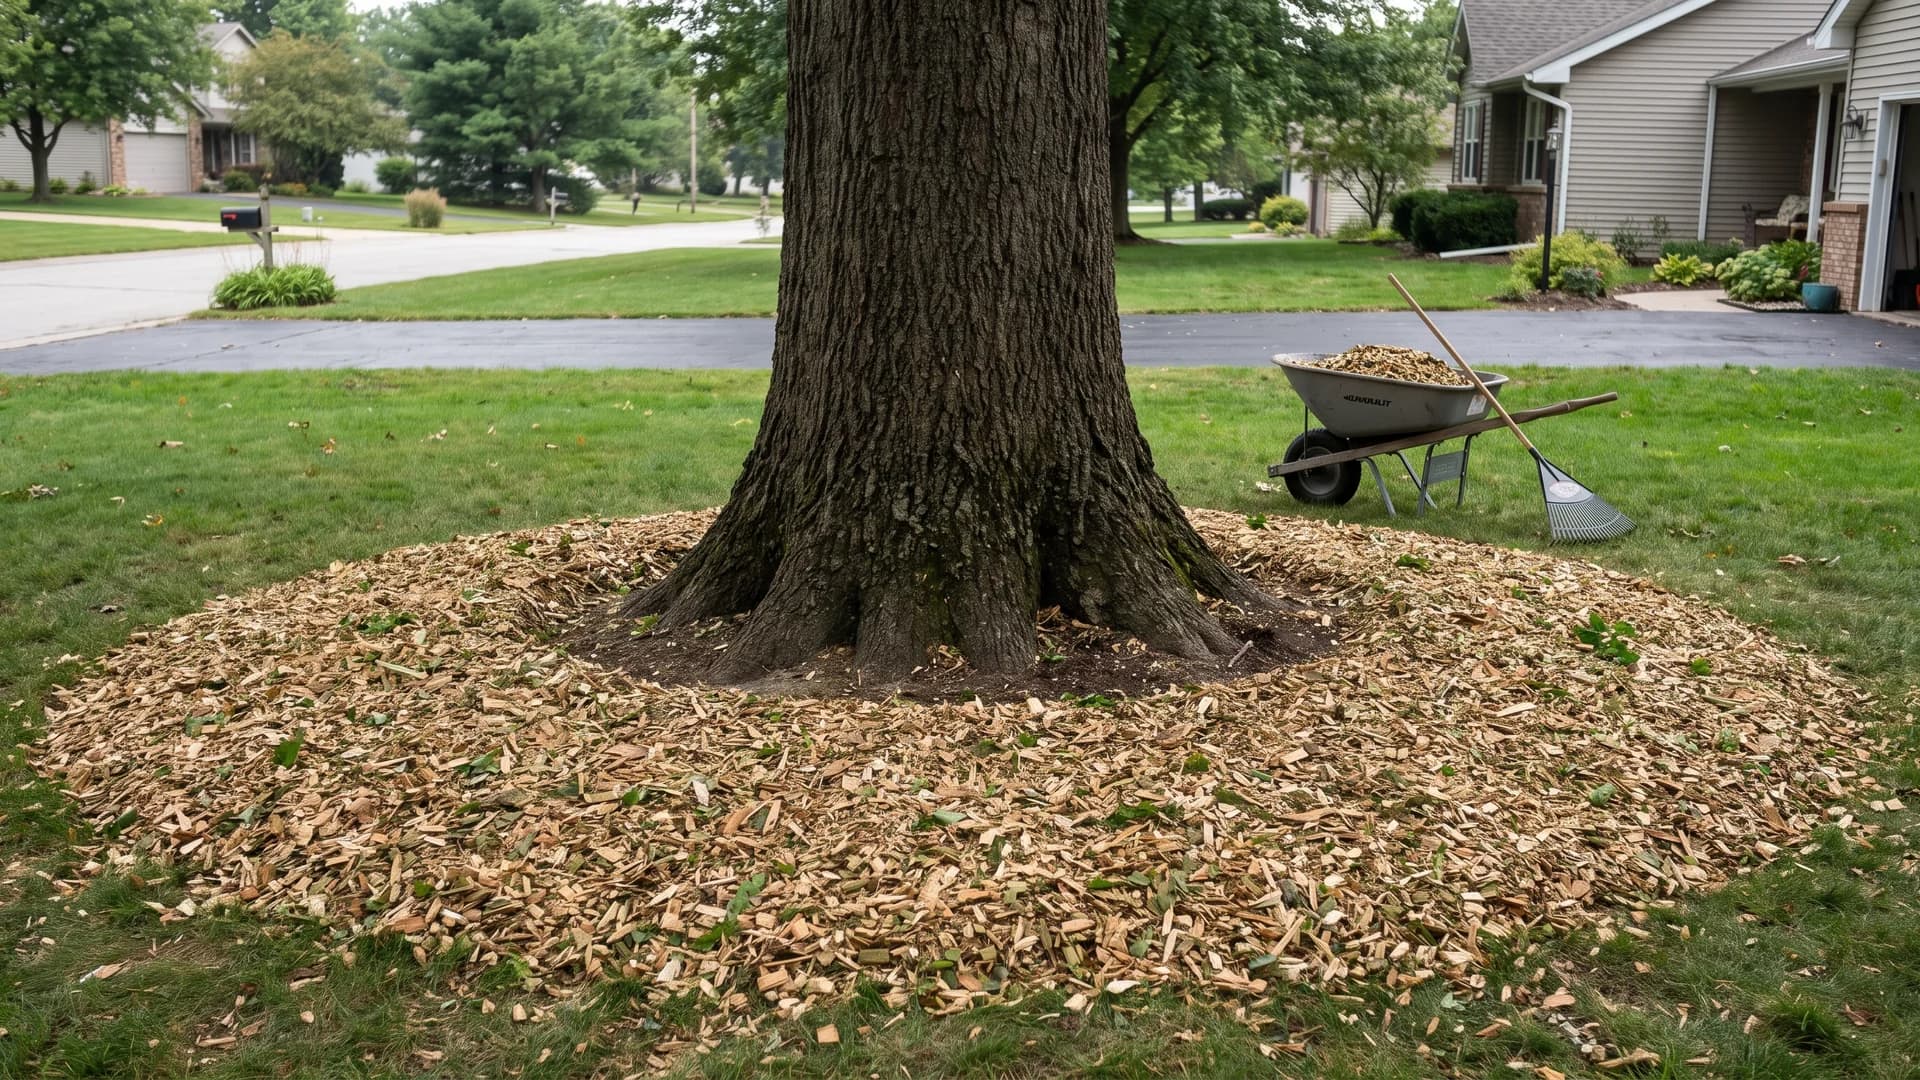
Call a local tree service before you buy anything. Crews often drop fresh chips free rather than pay dump fees, and coarse chips break down into the fungal-rich soil a mature tree actually wants. Leaf mold does the same job for the price of raking. Both look better spread flat than any dyed red bark, and both stay at the same 2 to 4 inches. This is the cheapest idea on the page and close to the best one.
Rock, gravel and stone around exposed tree roots
11. Pour river rock between the roots, not over them
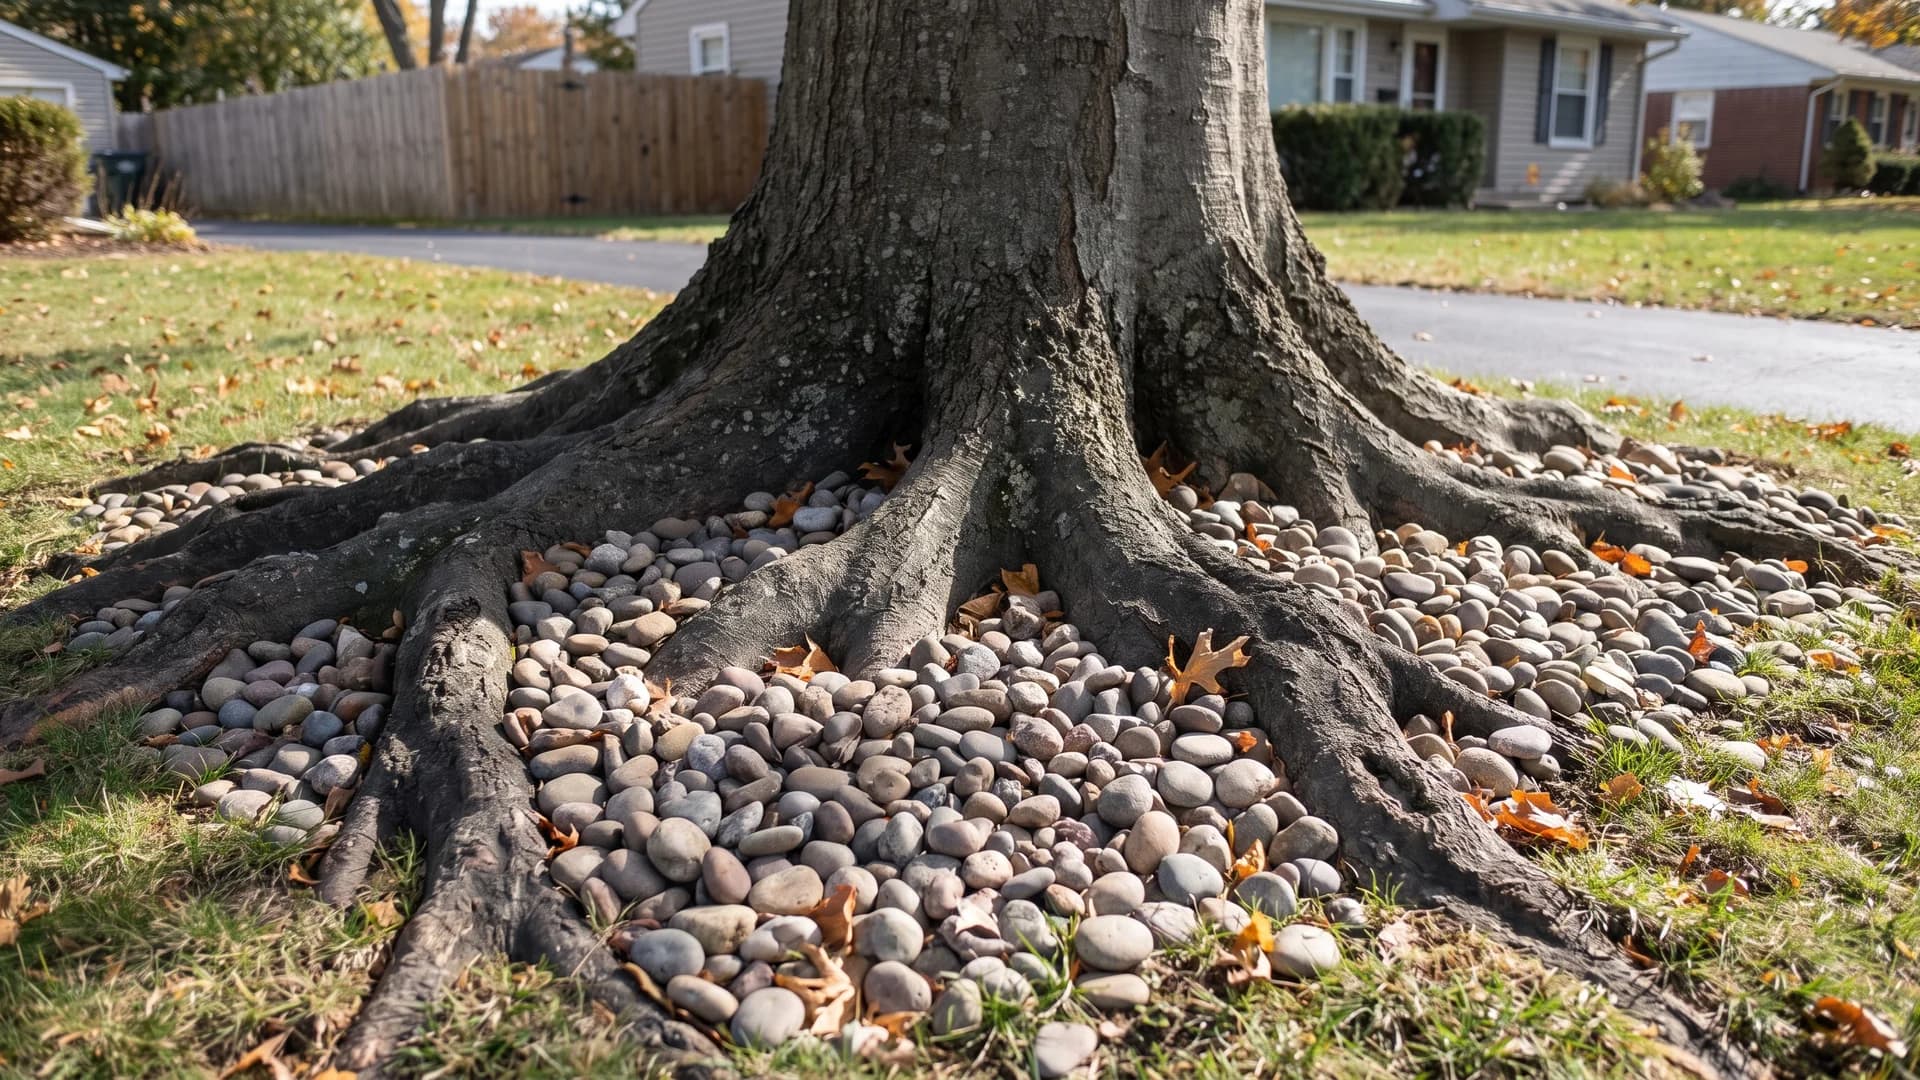
Rock over roots is fine. Rock over four fresh inches of soil is what kills trees, and the two get sold as the same project. Tip 1 to 2 inch river rock loosely into the hollows between surface roots and let the roots stand proud of it, so water and air still move through. Half a ton covers a 5-foot ring at 2 inches, about $60 to $90 delivered. Leave the fabric in the garage.
12. Set pale gravel against dark roots
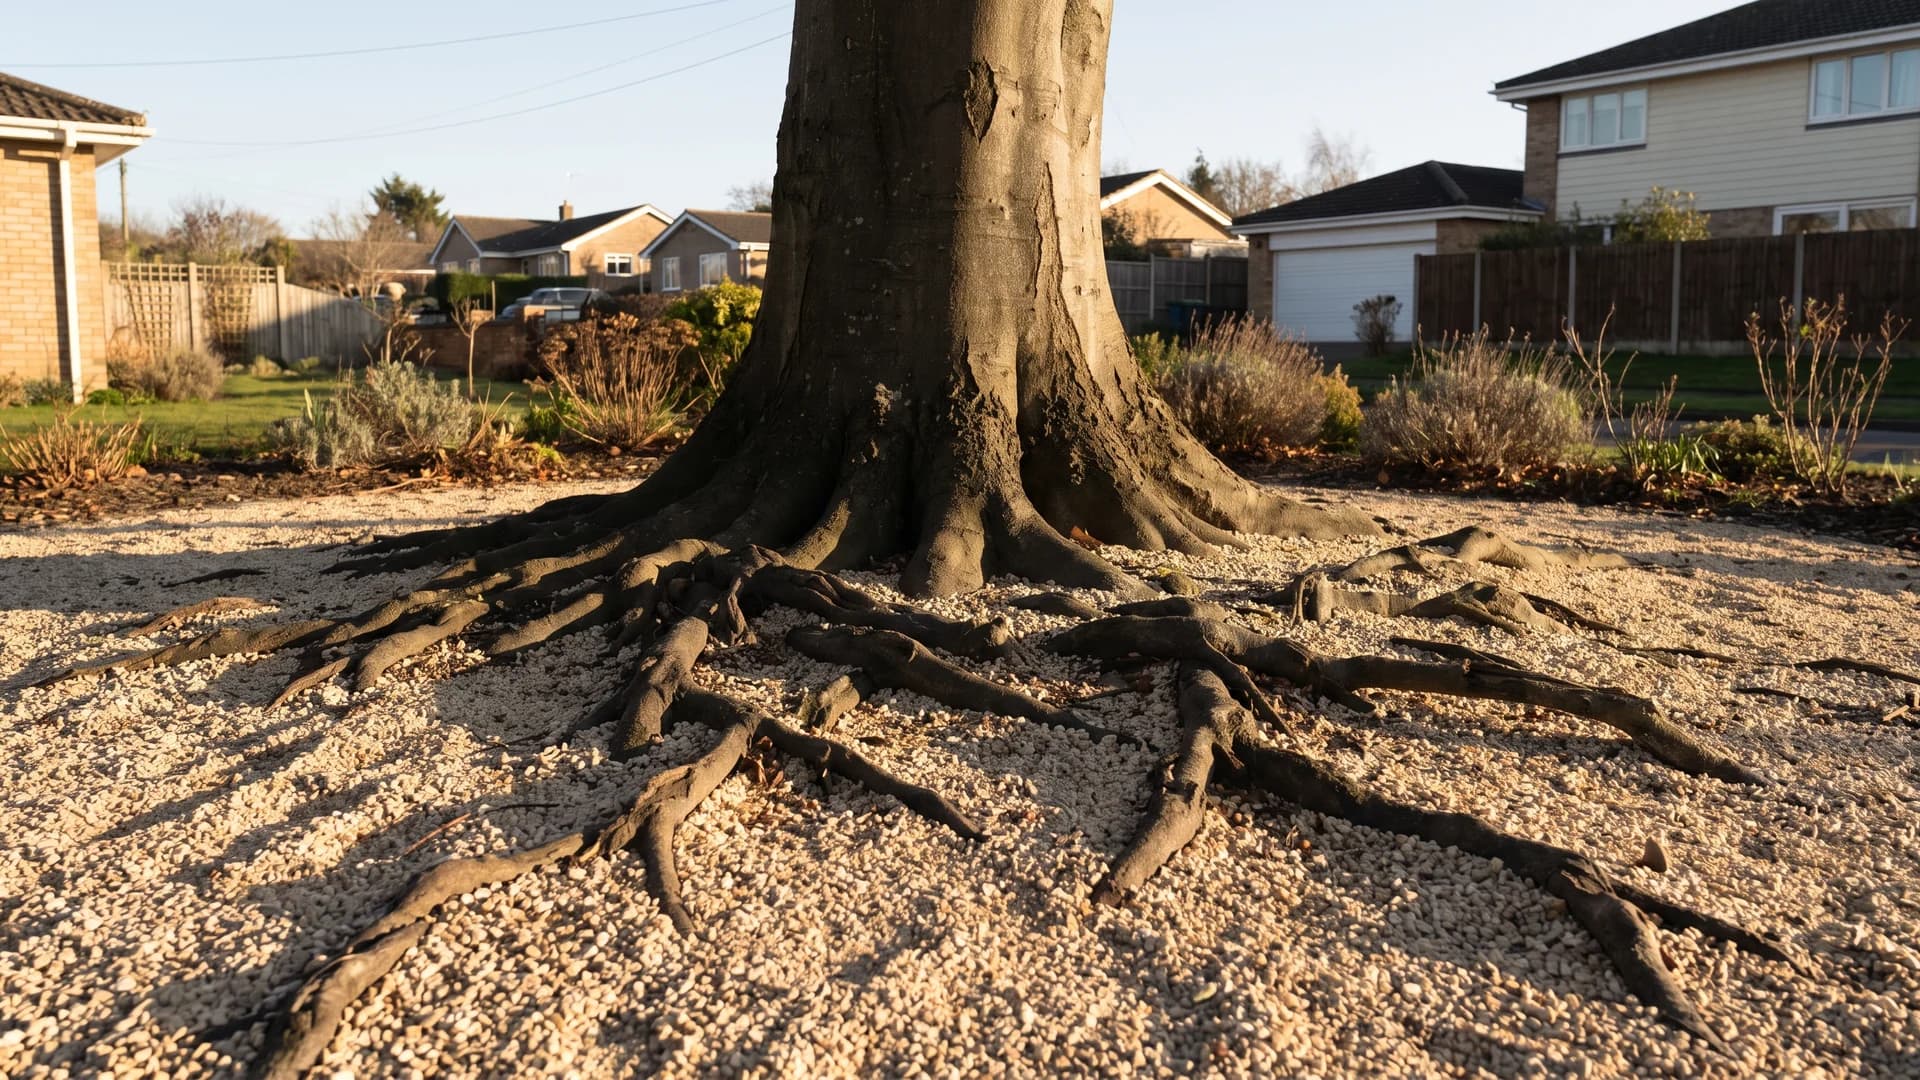
Contrast turns the problem into the feature. Light decomposed granite or pale pea gravel against the dark weathered roots of a beech or maple makes the root plate look sculptural instead of neglected, and it costs about $50 to test on a small ring. Keep the layer at 2 inches and skip fabric underneath so rain still gets down. Of everything here, this is the idea that photographs best.
13. Lay steppers on grade to cross the root plate
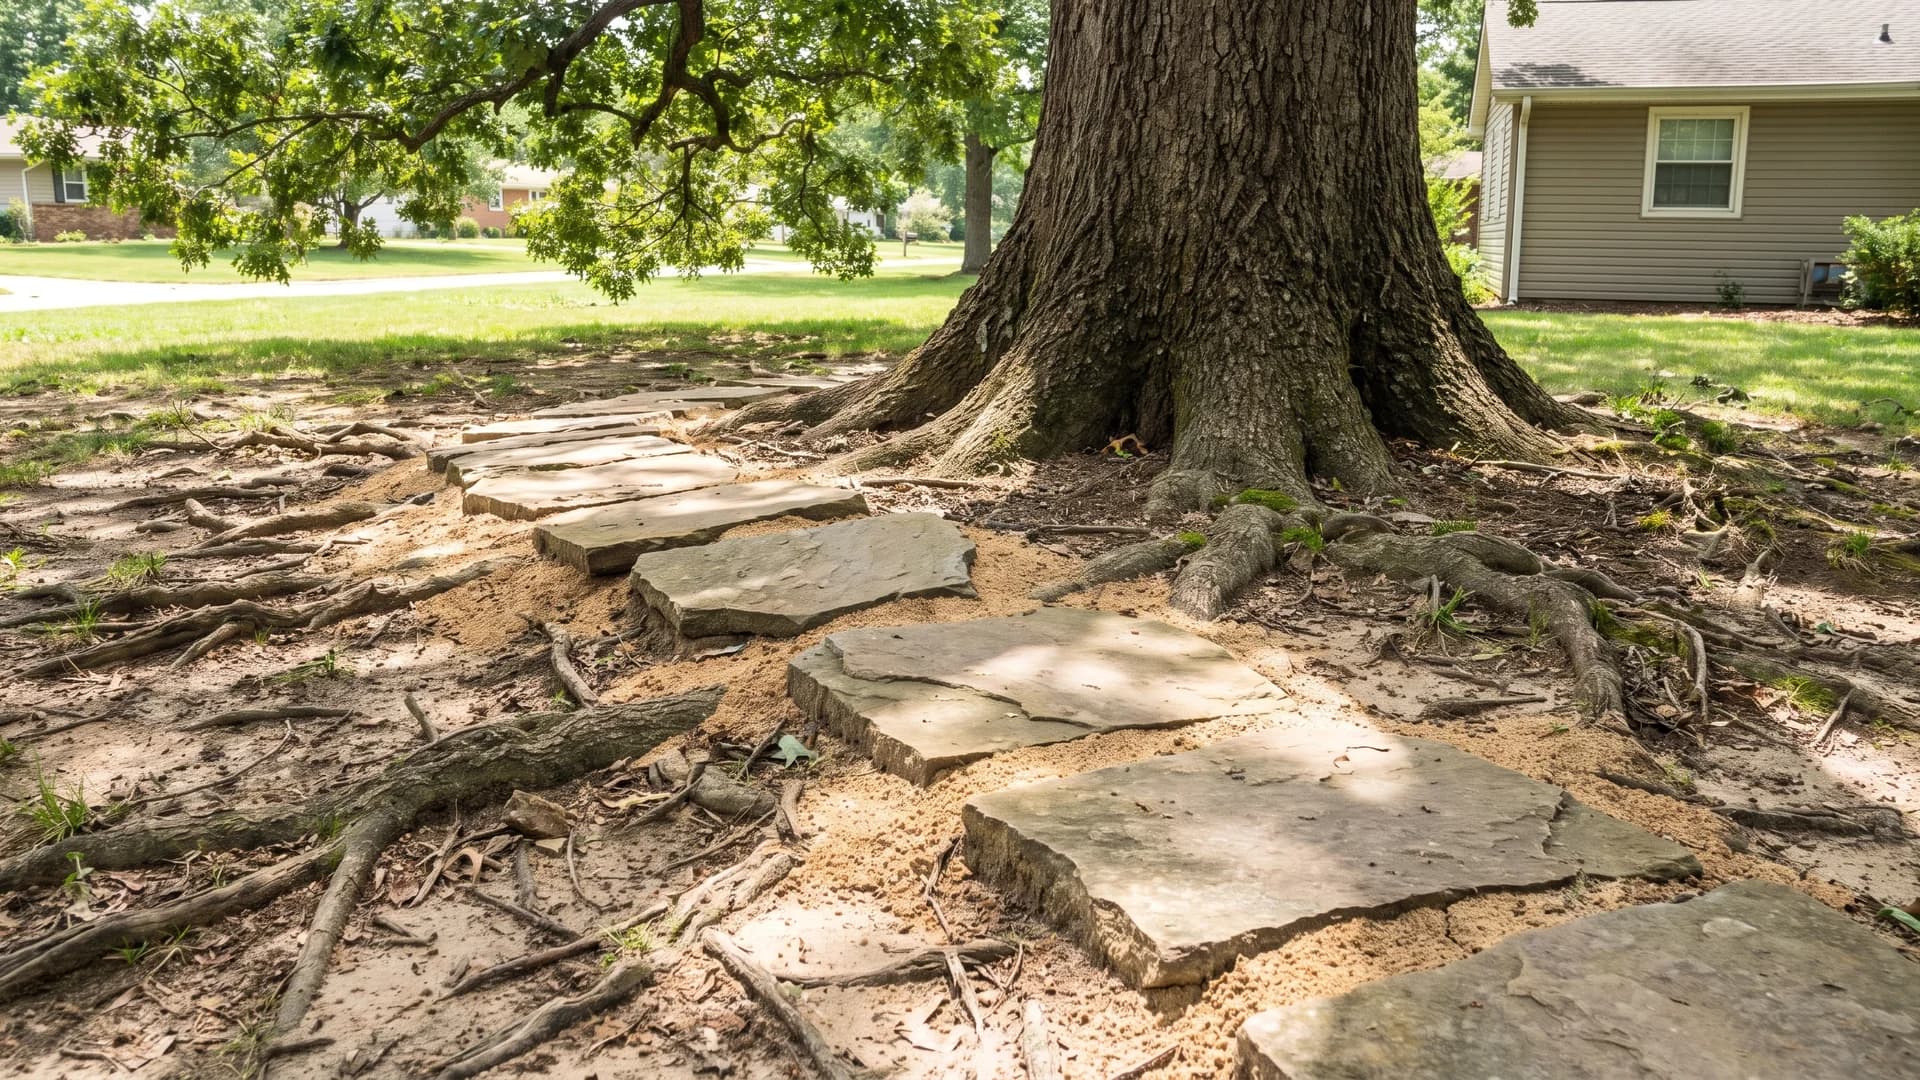
You can walk across a root plate without excavating it. Set flagstone or 18-inch pavers directly on grade, bedded in an inch of coarse sand raked into the existing hollows, spaced 24 inches heel to heel. Nothing gets dug and nothing gets cut, and in five years you can lift and reset the stones the roots have tilted. Flagstone runs $15 to $30 a piece. For hardscaping the rest of the yard in stone, our rock landscaping ideas guide has the tonnage math.
14. Route a dry creek past a rooty slope
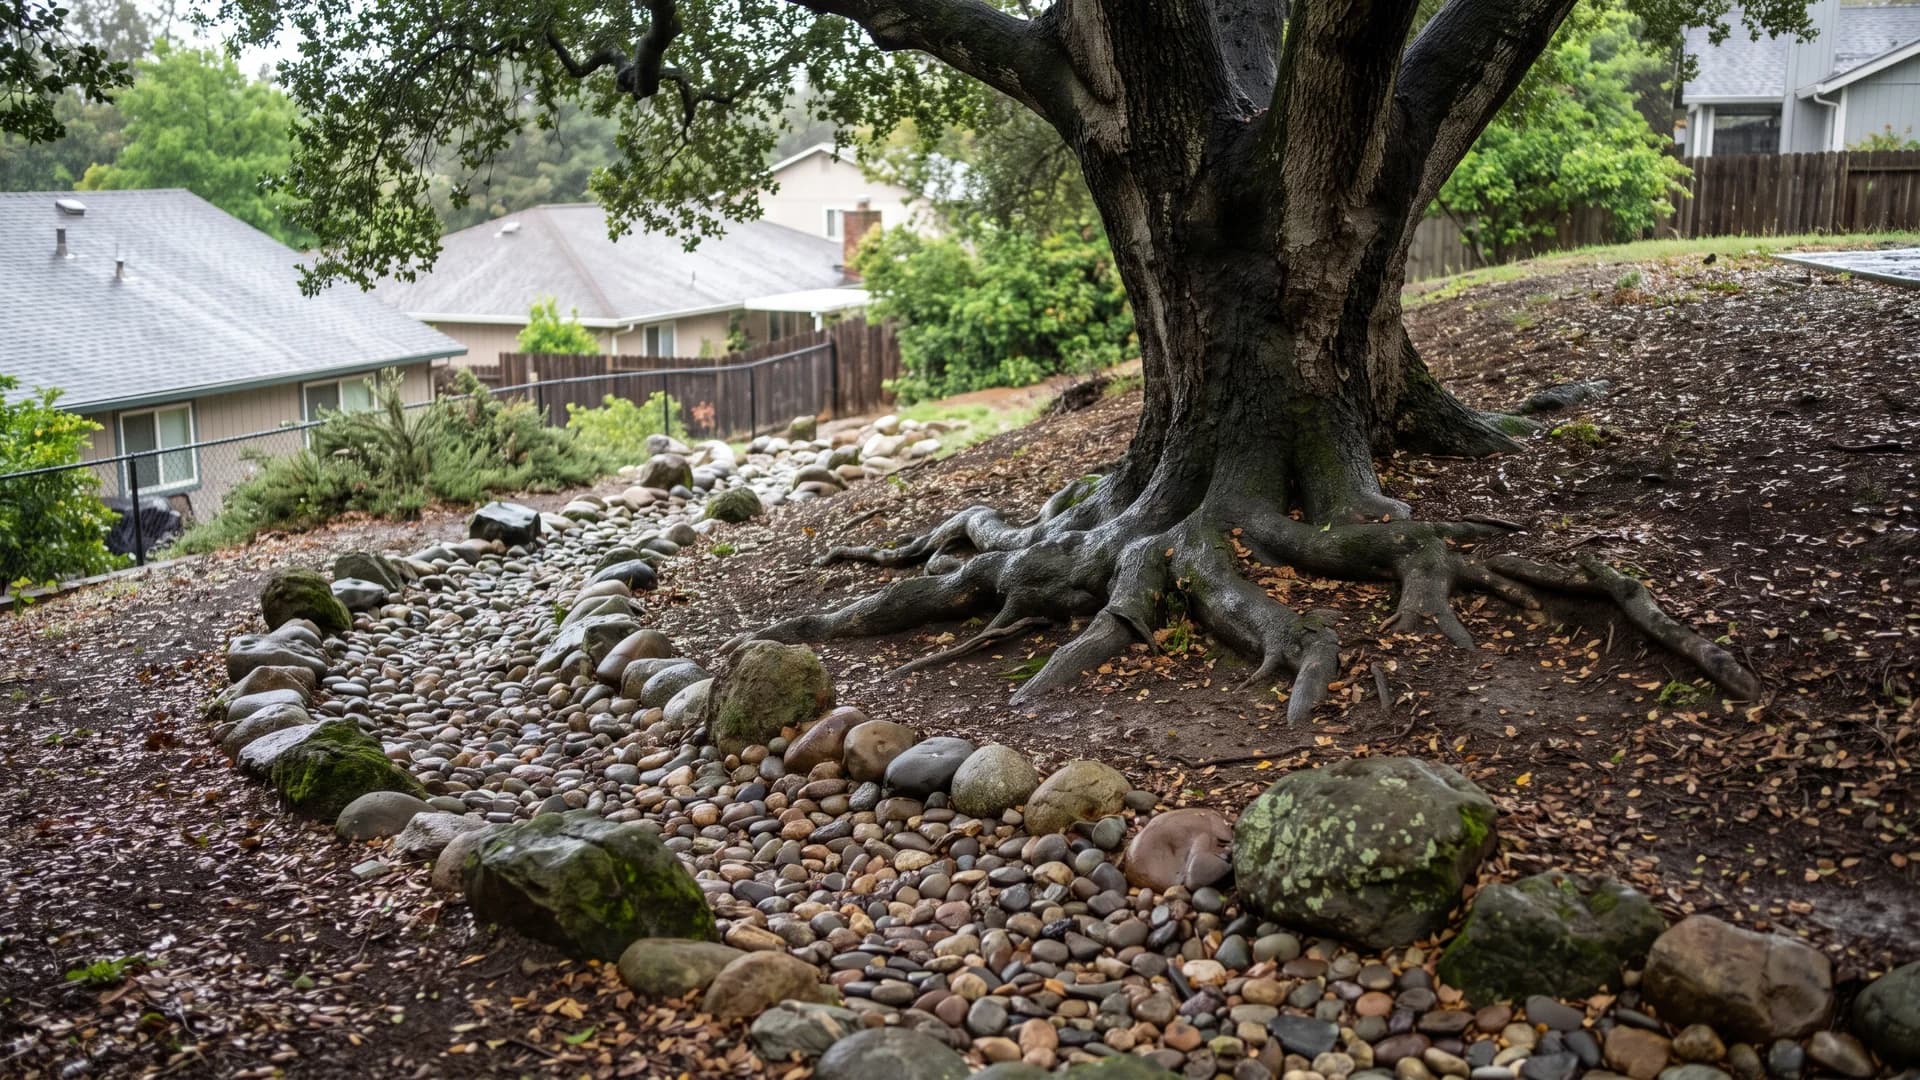
On a slope, the real issue is usually running water stripping soil off the roots year after year. A shallow hand-dug channel routed past the trunk and filled with mixed river rock catches that runoff and slows it down. Dig outside the drip line wherever you can, and where you cannot, follow the natural low line rather than cutting a new one across roots. A 20-foot run takes about 1.5 tons of stone.
Edging and borders that don't smother the roots
15. Cut the edge with a spade and nothing else
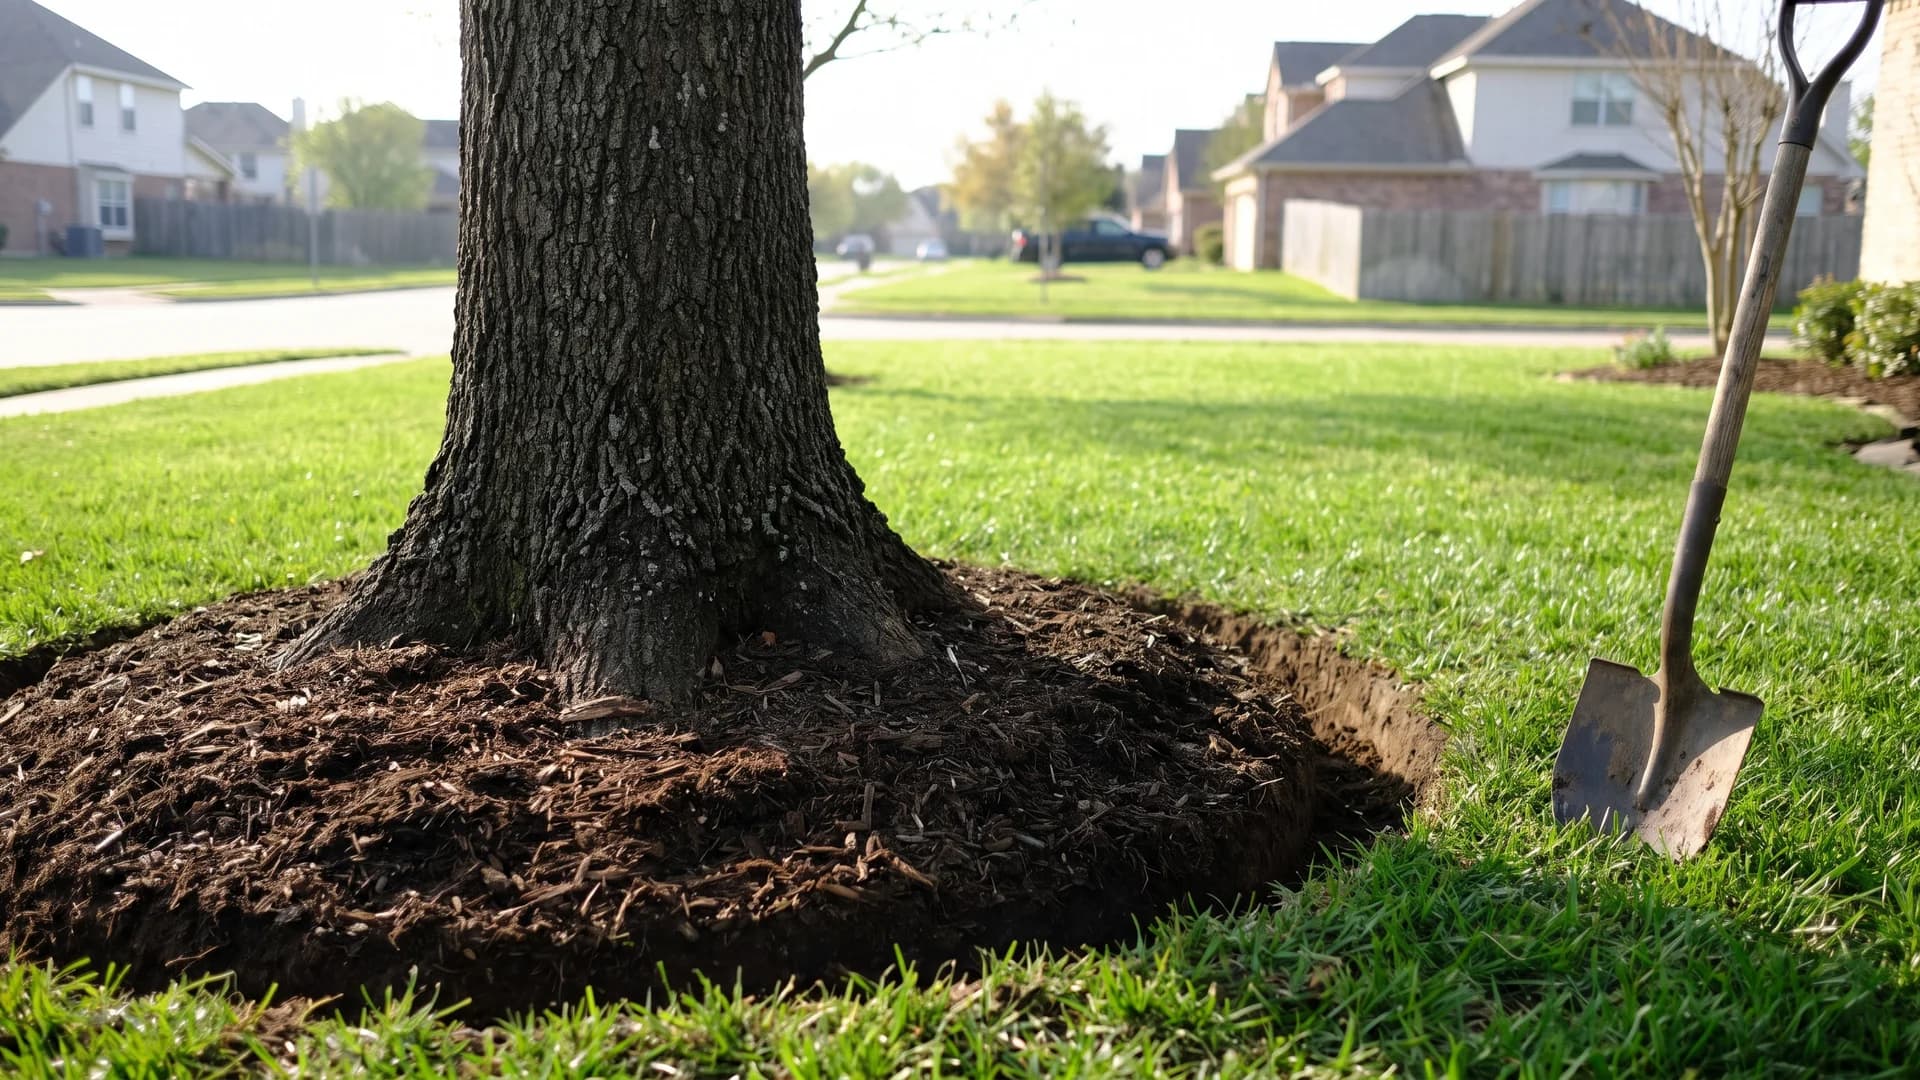
No materials, no trenching, no cost. A spade cut is a 3-inch vertical slice at the outer edge of the ring, angled back toward the bed, made once in spring and touched up in midsummer. It gives the same crisp line as steel for twenty minutes of work. Because it sits at the ring's outer edge, the only roots it meets are thinner than a pencil, which is the part that keeps it safe.
16. Drive steel edging outside the root plate
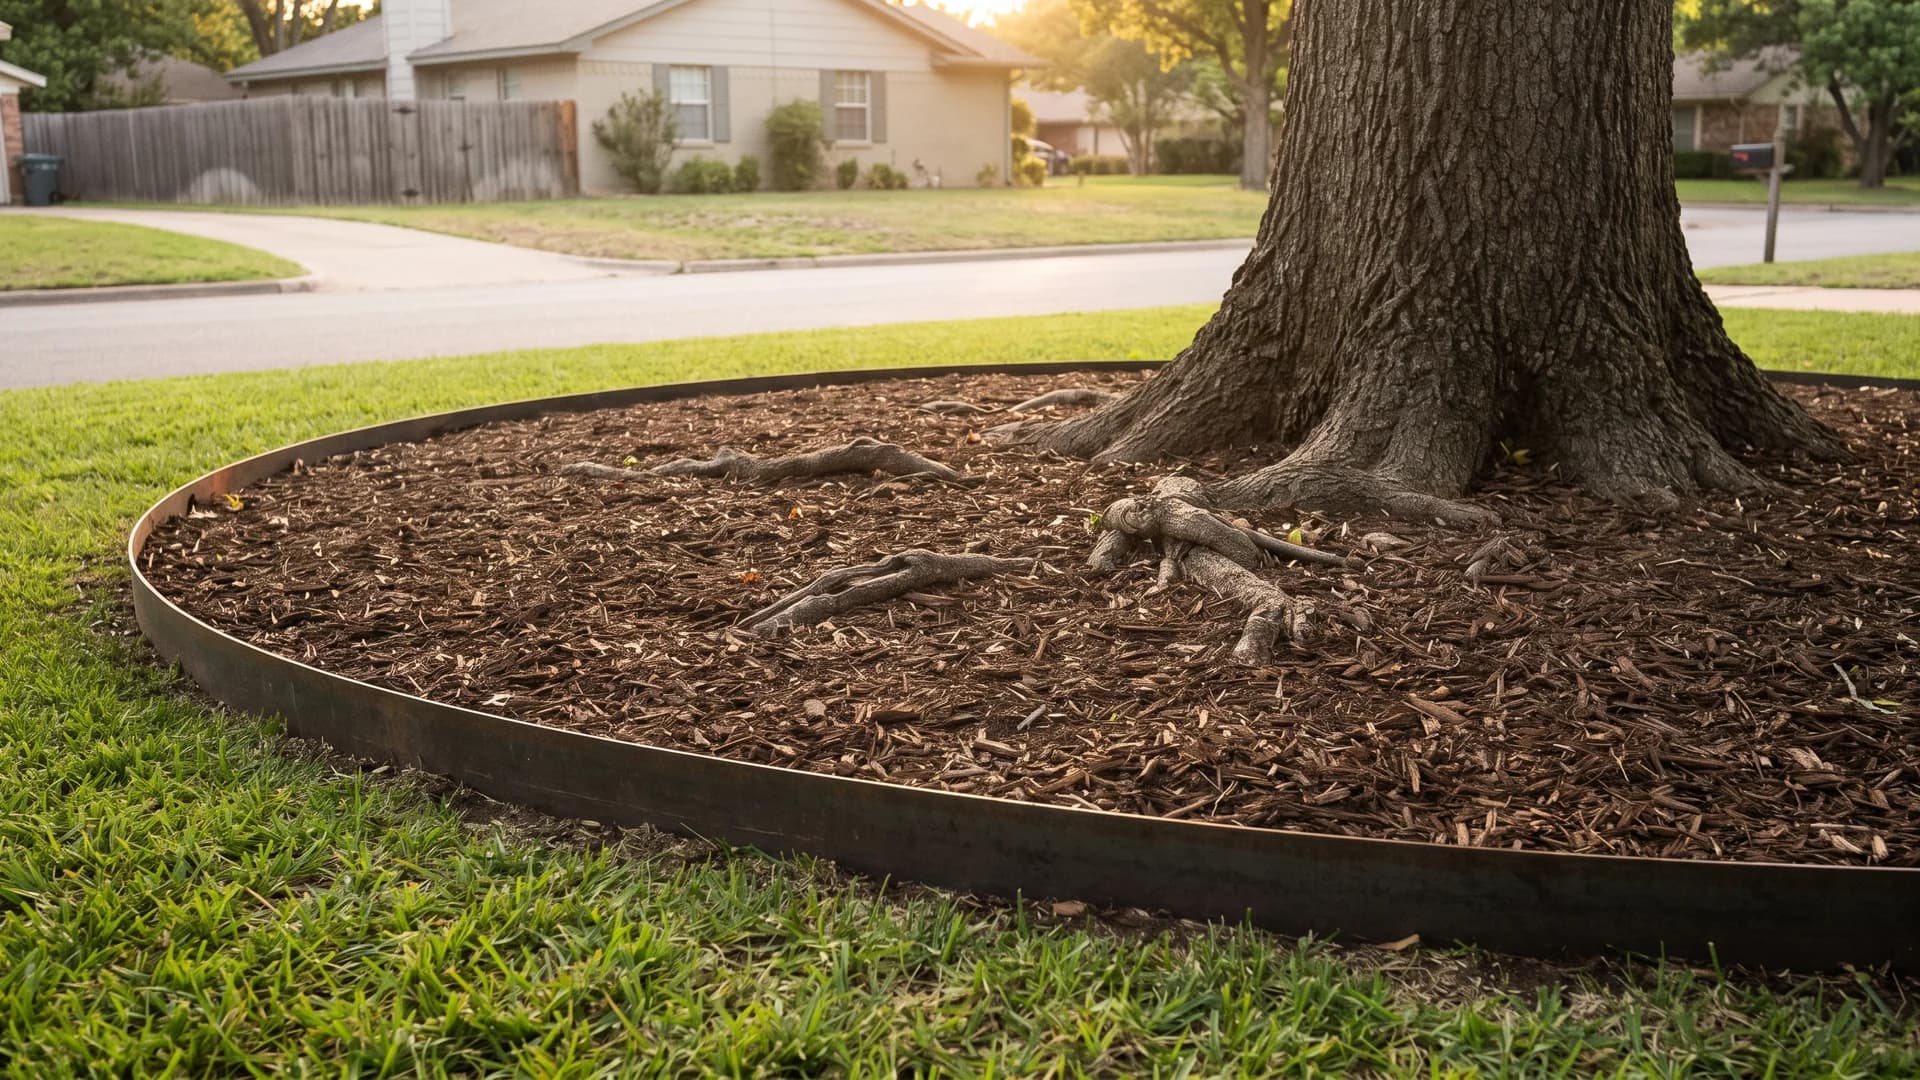
Steel and aluminum landscape edging gets driven 4 to 5 inches into the ground, which is precisely the depth feeder roots occupy. So set the line at or beyond the drip line, and probe it first with a screwdriver: if the probe hits wood, move the line out. Steel runs $2 to $4 a foot, holds a curve for decades, and disappears once the mulch settles against it.
17. Lay a stone border on grade and leave the inside alone
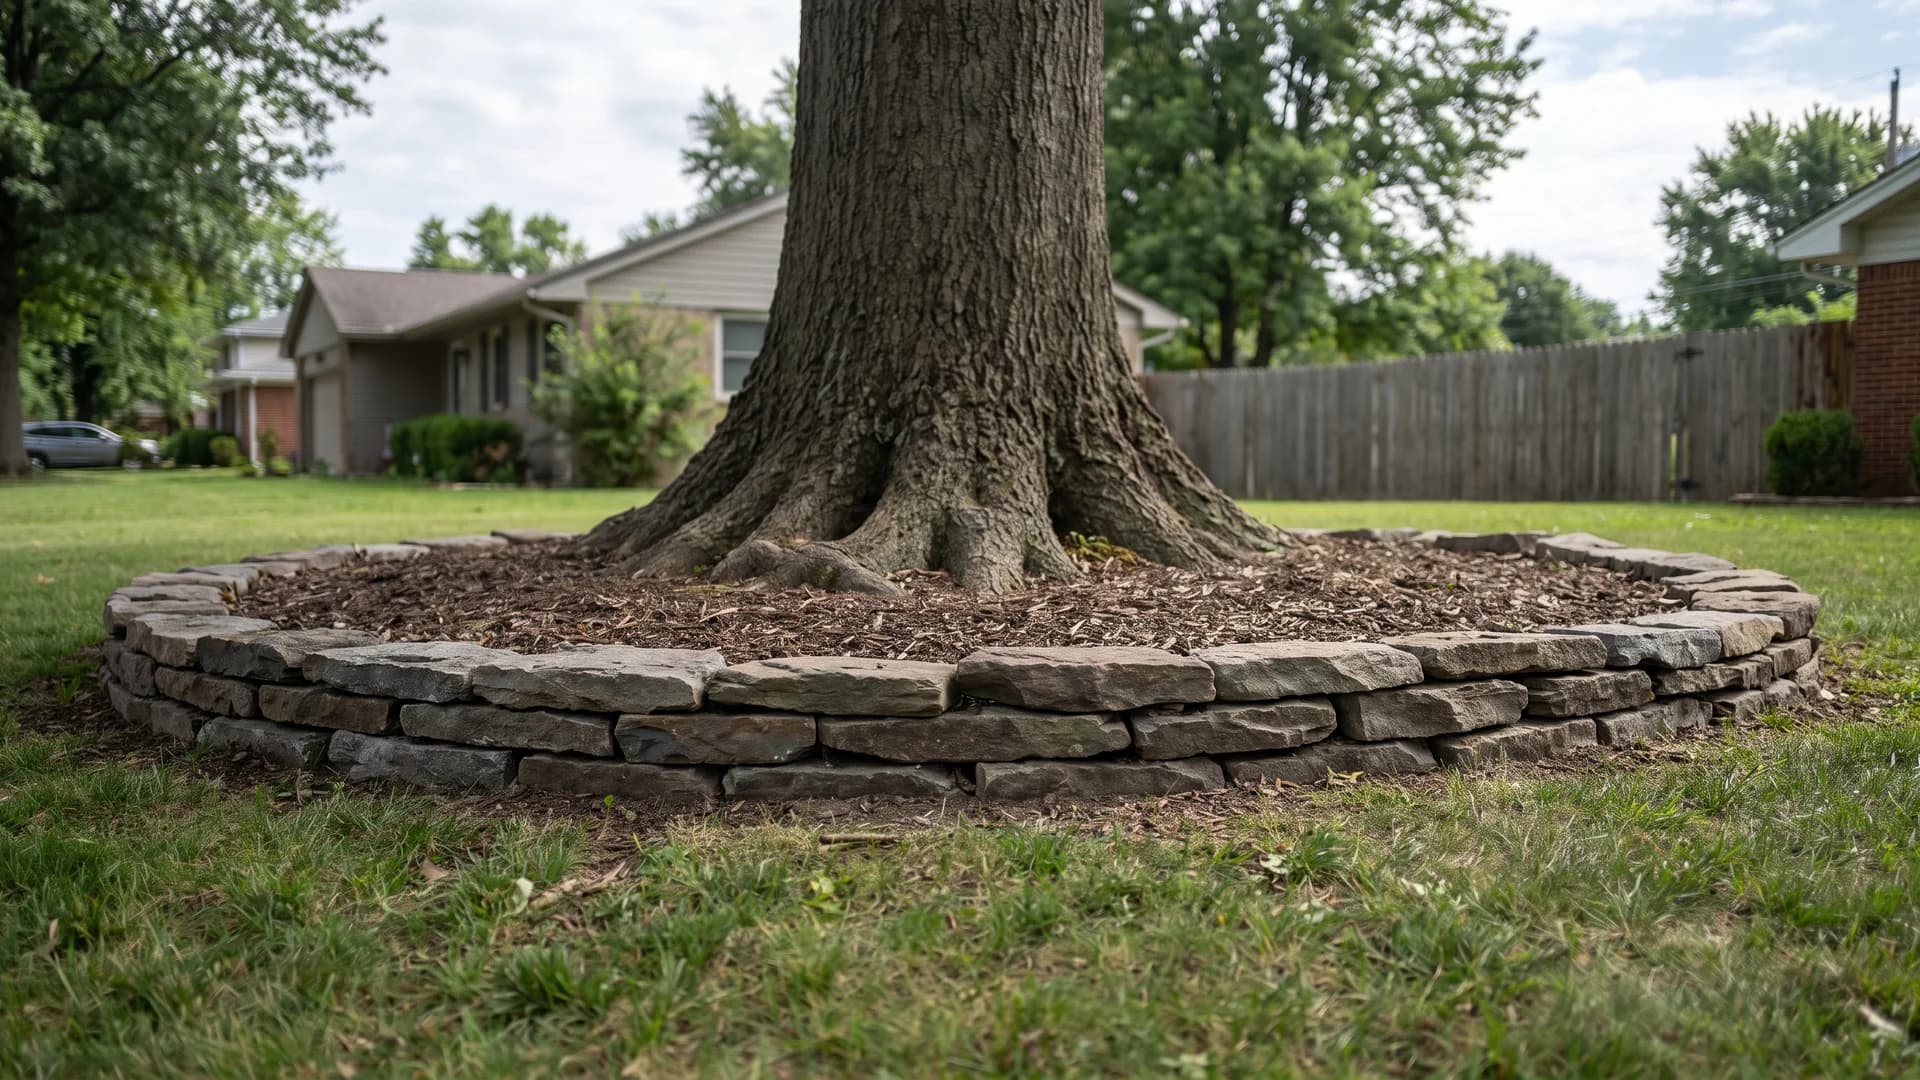
Where DIY tree rings go wrong is the backfill, not the stone. Two courses of flat fieldstone, 6 to 8 inches high, laid dry on existing grade, look exactly like the version everyone pins. The pinned version then gets filled with soil up to the trunk, which buries the flare and starts the rot. Lay the stone, leave the inside at grade, mulch thin. No mortar, no fill, no problem.
18. Build the retaining wall outside the drip line
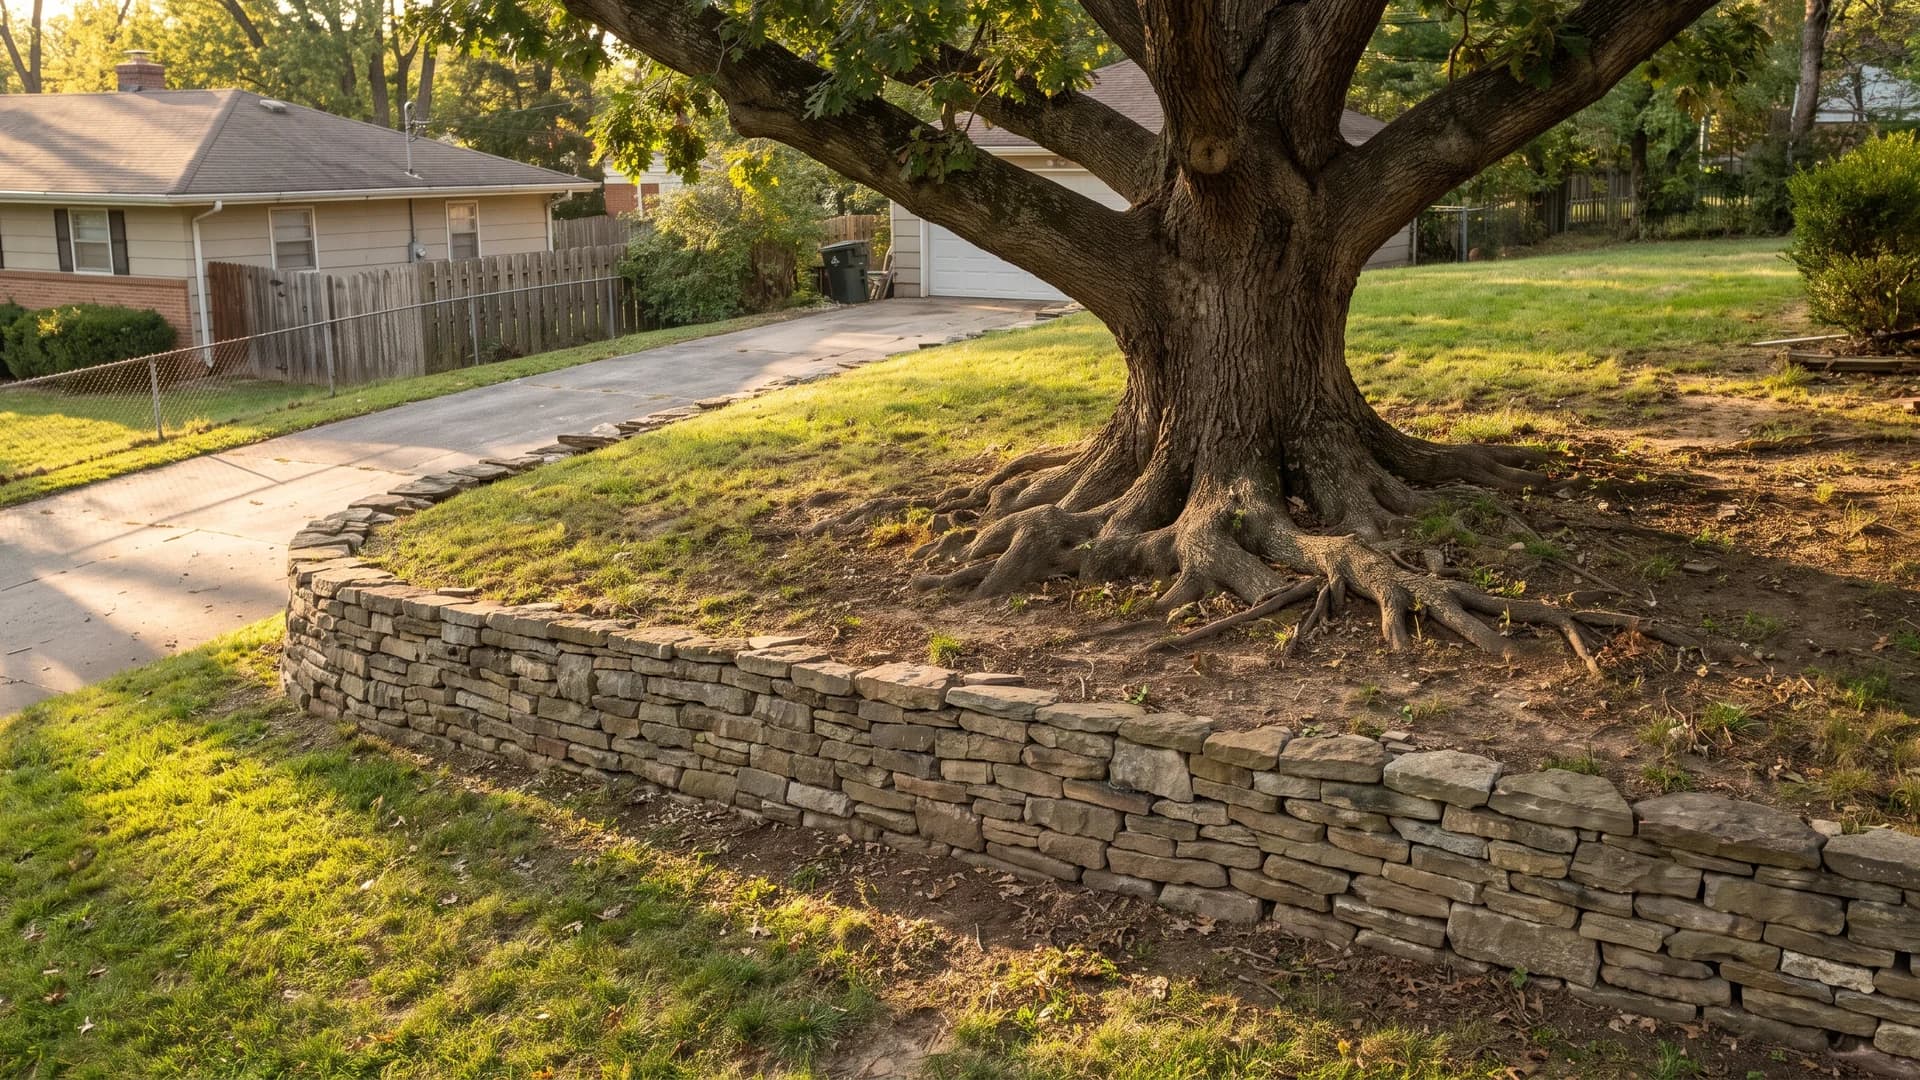
This is the honest version of the raised bed everyone wants around a tree. If a slope genuinely needs holding, put the wall beyond the canopy edge and terrace the ground below or above the tree, leaving the grade at the trunk exactly where it is. A wall inside the root zone means backfill, and backfill over feeder roots is the decision that shows up as thinning crown and dieback three or four years later.
Seating, decks and containers when planting is out
19. Straddle the roots with a bench on pier blocks
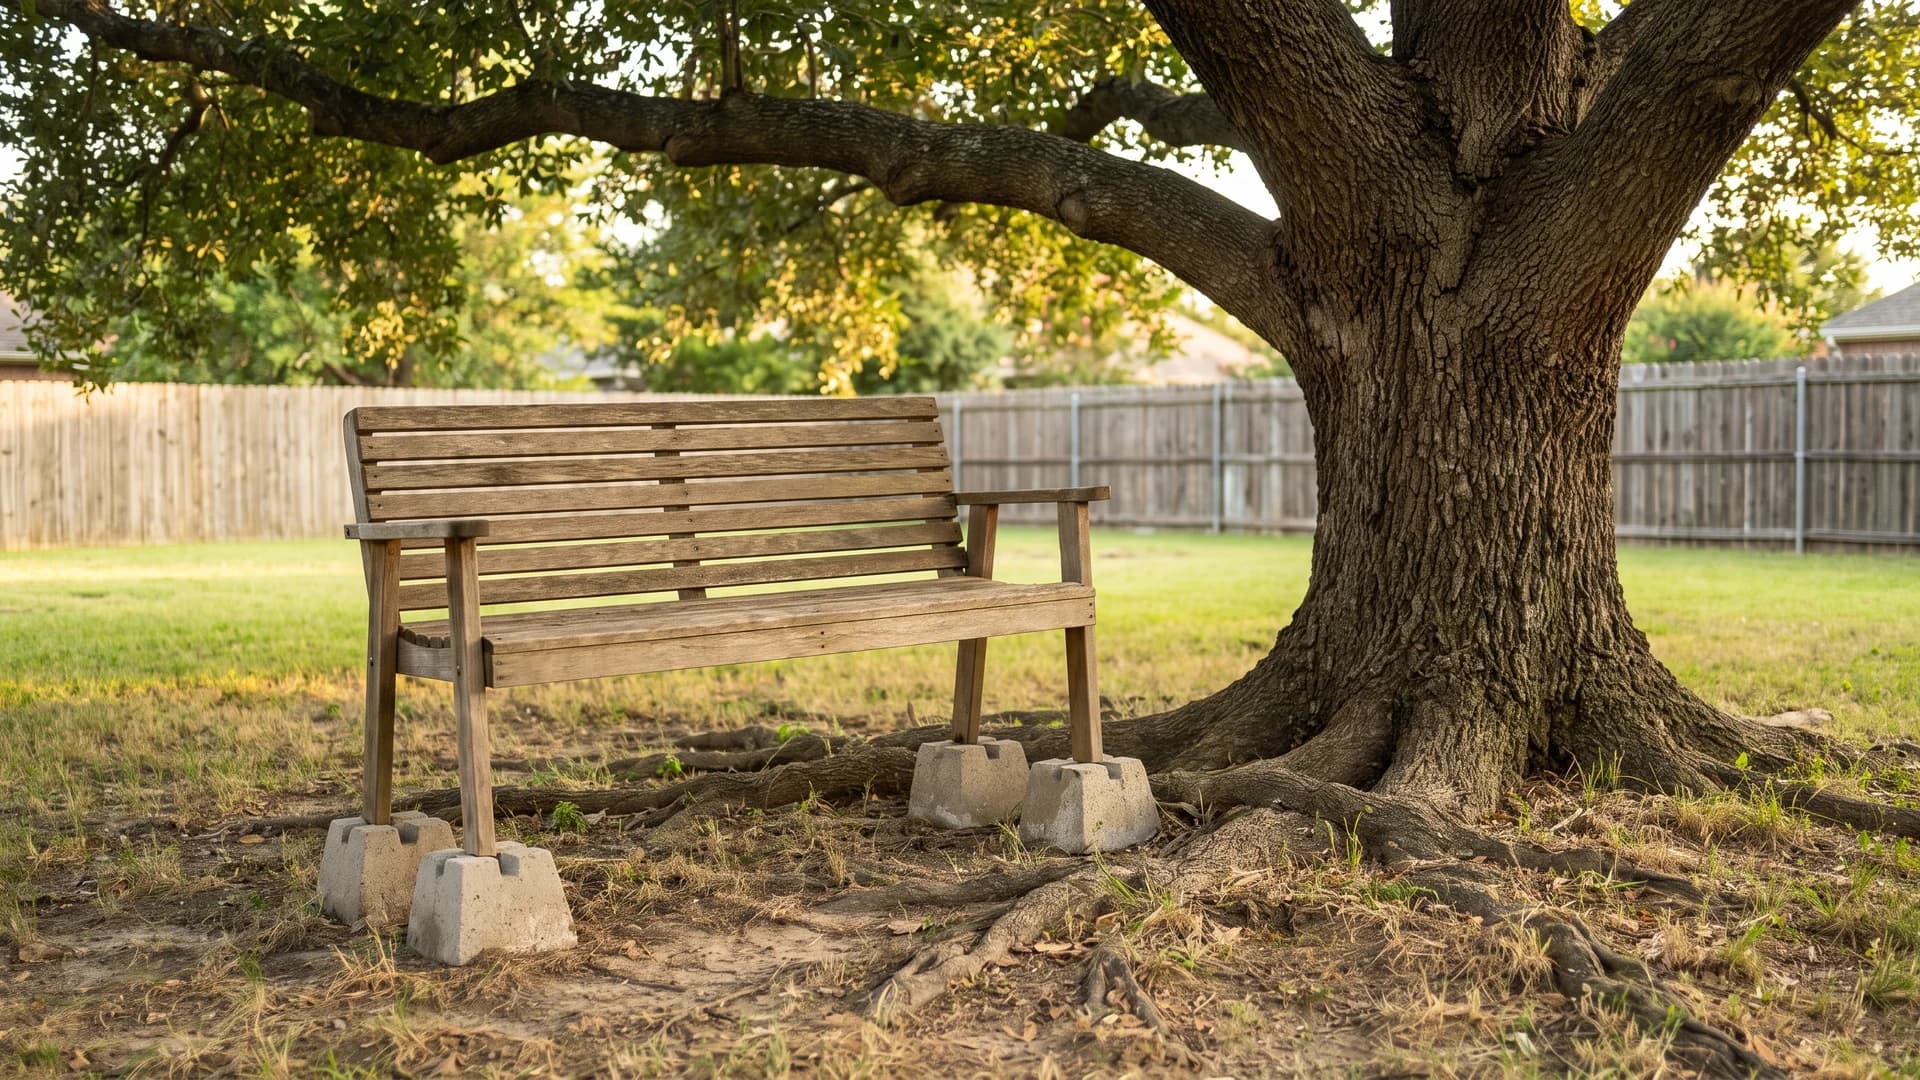
Shade is worth sitting in. A bench on four precast pier blocks, or a hexagonal bench ring, straddles the roots with no footing trench at all because the blocks rest on the surface instead of in it. Kits run $200 to $600; two planks between two blocks costs about $80. Leave 3 to 4 inches of clearance between the seat and the trunk so the tree has room to thicken.
20. Float a deck on piers with an open collar
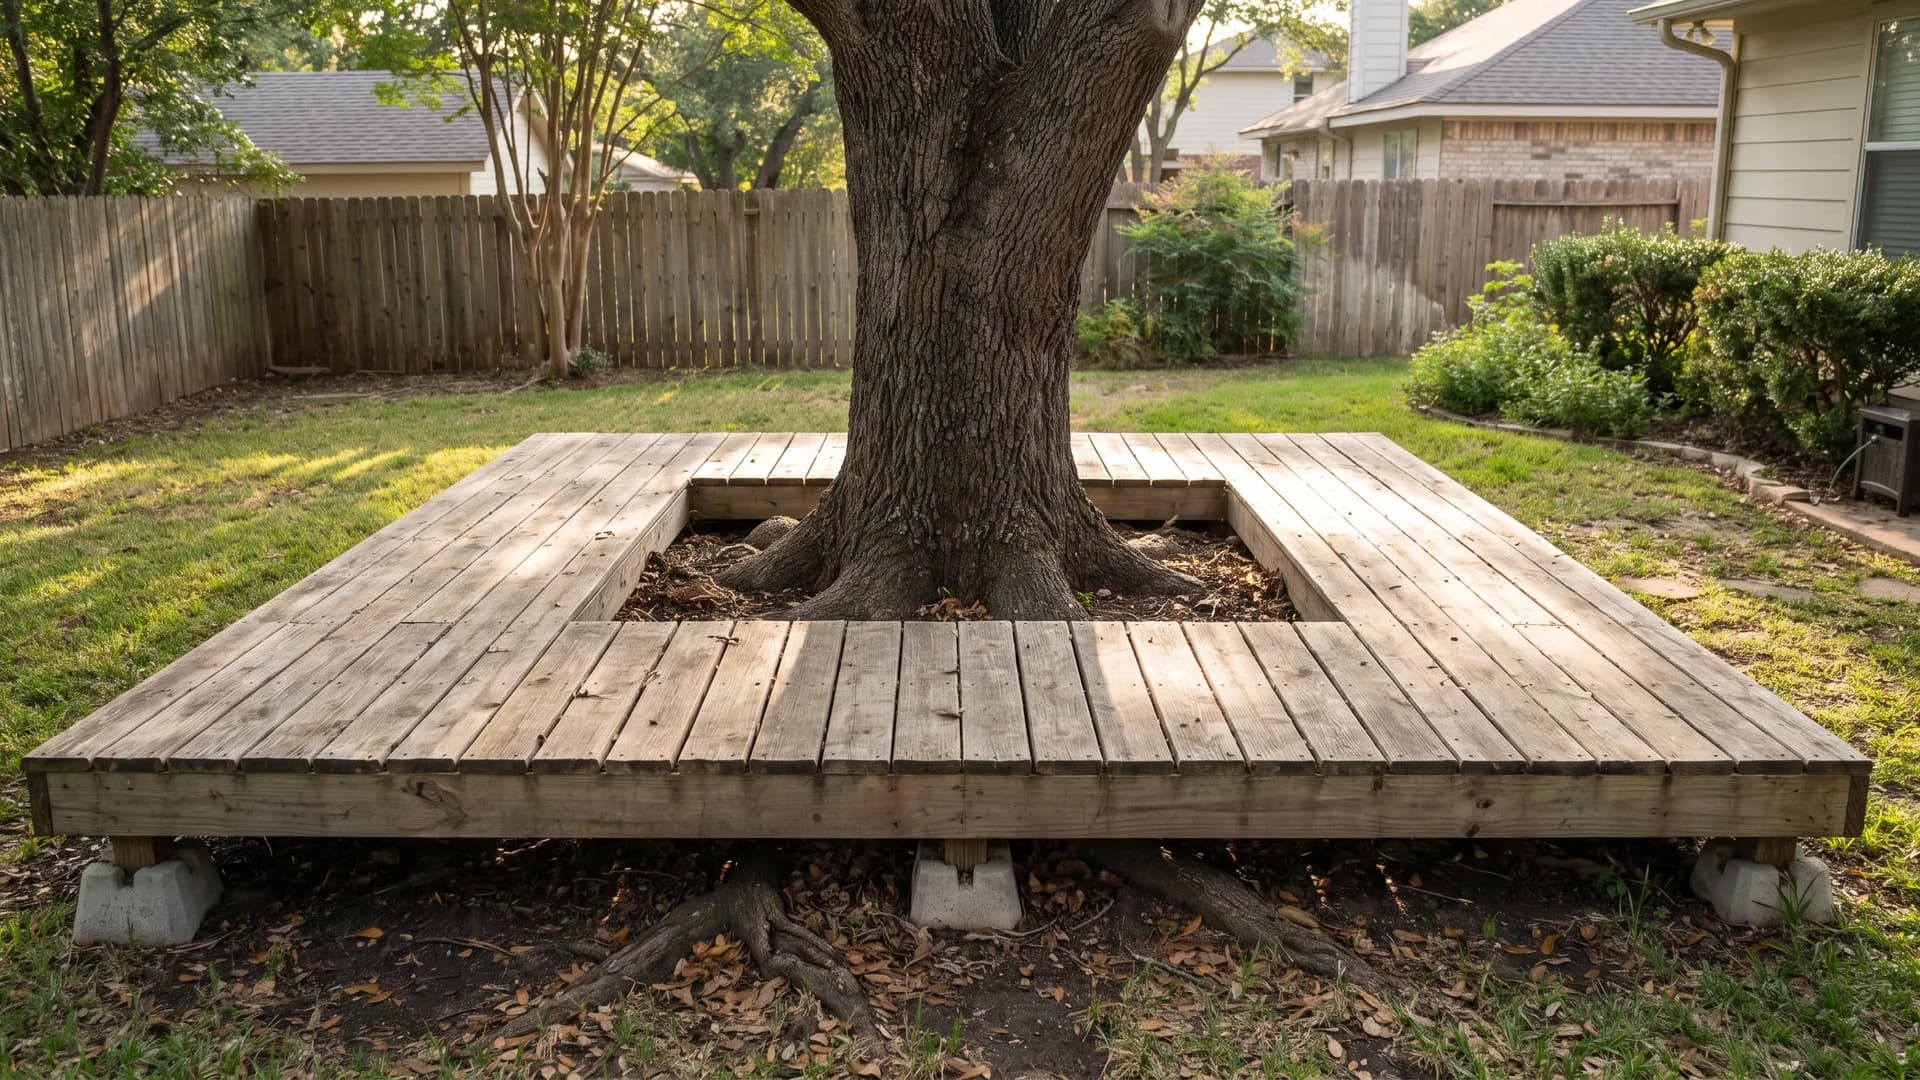
A low platform on precast piers turns a hopeless rooty patch into usable floor. The detail that decides whether the tree survives it is the collar: frame the opening at least 12 inches clear of the trunk on every side so the trunk can add girth for years, and leave the deck boards gapped so rain still reaches the ground. Set piers in the gaps between structural roots rather than through them.
21. Cluster containers where nothing can be planted
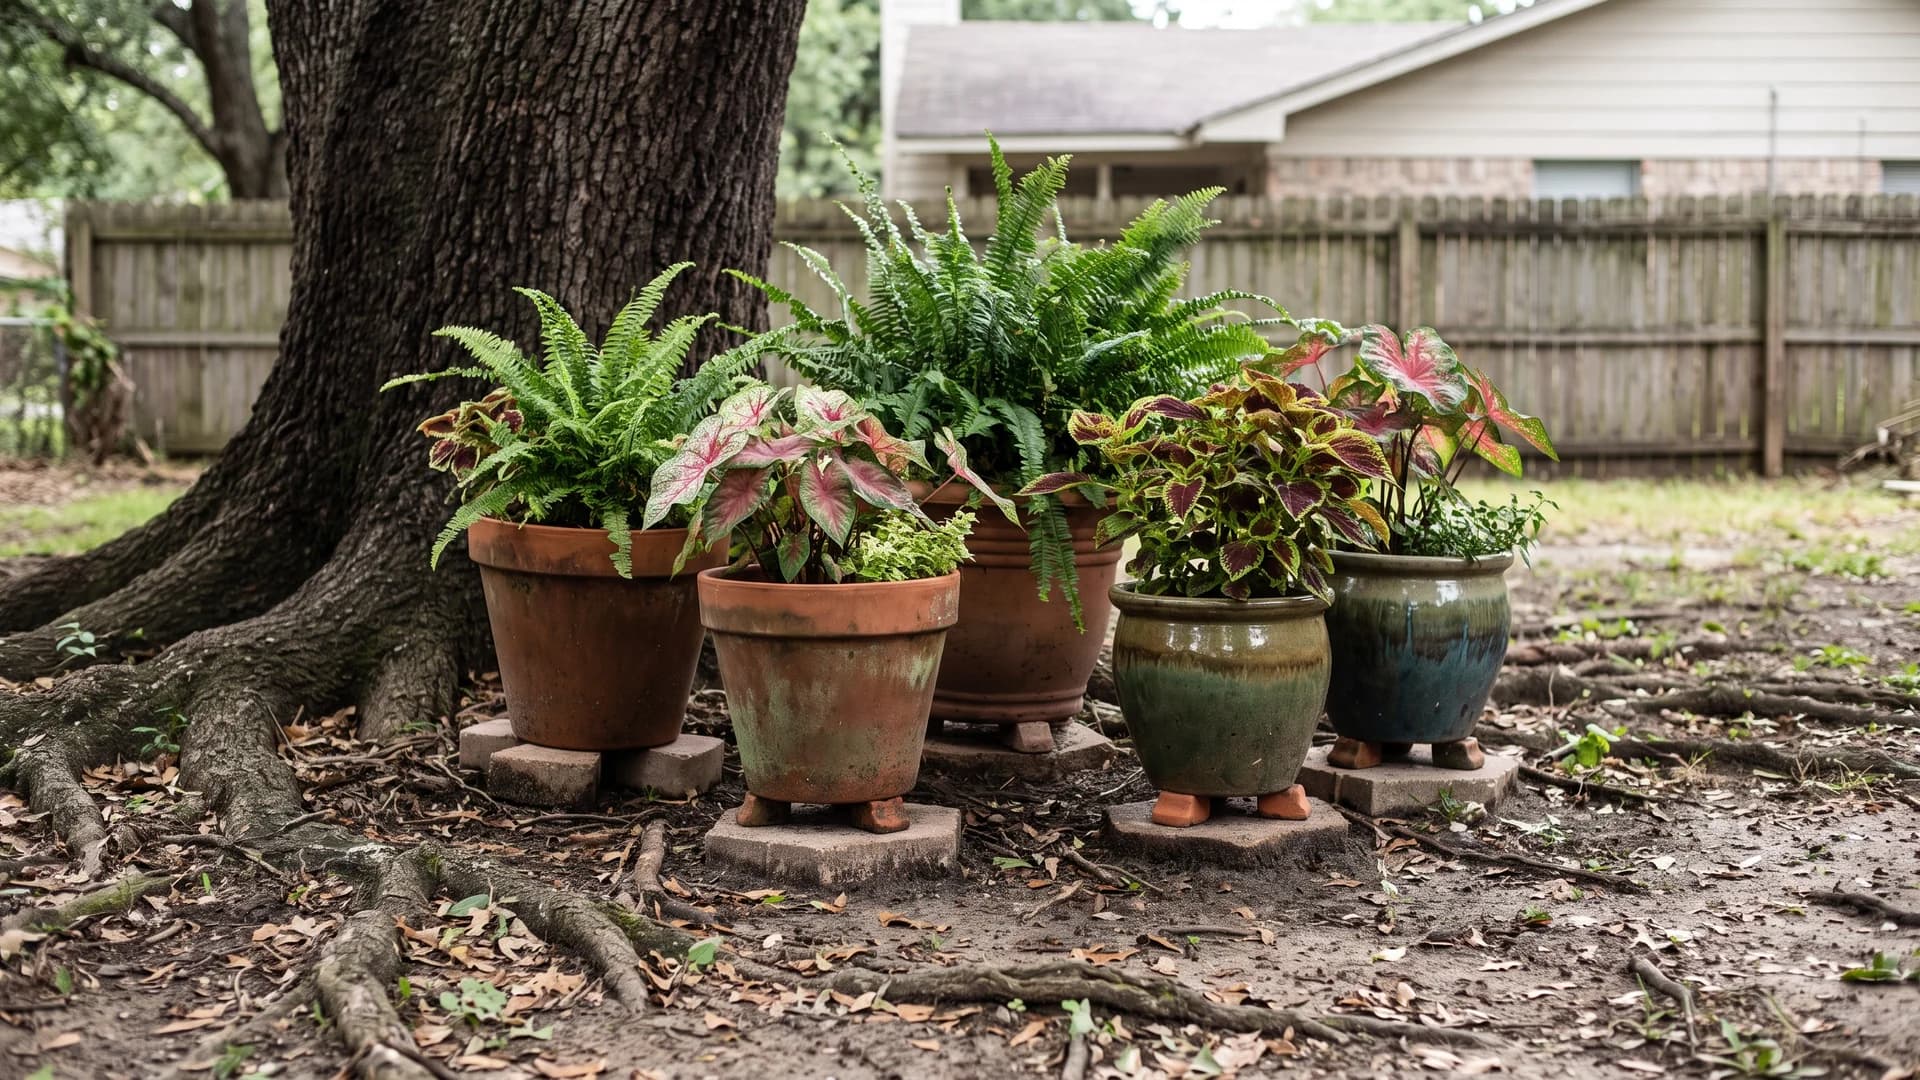
A root mat solid enough to stop a trowel is a case for pots, not plants. Group three to five containers of different heights on pot feet or a spare paver each, so they never sit flat on soil and trap moisture. Ferns, caladium and coleus carry the shade. Zero root disturbance, and the whole arrangement moves when the light or your mind changes.
What to avoid, even when it photographs well
- Mulch heaped into a cone against the bark. It keeps the trunk permanently wet, which is how cankers and root rot get started. Flat, 2 to 4 inches, pulled back from the trunk, per the ISA's mulching guidance.
- Adding soil over the root zone to level or raise a bed. Feeder roots sit in the top few inches, and even 4 inches of new soil cuts their oxygen. This is the single most common fatal mistake.
- Landscape fabric under a tree. It blocks rainfall and air exchange in the exact zone where the tree does its breathing, and it fills with silt and weeds within a couple of seasons anyway.
- Cutting a surface root to make a design fit. The widely used rule of thumb is to never cut a root thicker than a permanent marker, and to move the design instead.
- A stone ring backfilled up to the trunk. The ring is fine, the fill is not, and the two arrive together in almost every tutorial.
- Trenching for edging, lighting cable or irrigation inside the drip line, and parking or stacking materials there. Compaction does the same damage as fill, just more slowly.
Match the idea to your tree
- A few big surface roots with plantable soil between them: 1, 2 and 5.
- A solid root mat where a trowel won't go in: 11, 13 and 21.
- Deep shade under evergreens, where bulbs and most perennials fail: 7, 10 and 21.
- A rooty slope that keeps losing soil: 14, then 18 if the grade needs holding.
- A front yard tree that has to look finished from the street: 4, 9 and 16. The full-frontage version of this play is in our low maintenance front yard landscaping guide.
- A narrow side strip where the mower cannot reach: 15, plus the corridor ideas in our side yard landscaping ideas post.
- Hot, dry regions with thin soil: 6 and 12.
FAQ
How do you landscape around a tree with exposed roots?
Work at the existing grade and never above it. Spread 2 to 4 inches of mulch flat, keep it pulled back from the trunk so the root flare stays visible, and add plants as plugs or 4-inch pots set into the gaps between roots. Rock, stepping stones and benches all work as long as they sit on the surface rather than on added soil.
What can I plant around tree roots?
Shallow-rooted shade plants that go in without a big hole: hosta, Christmas fern, epimedium, ajuga, creeping phlox, coral bells, wild geranium and sedge. Under deciduous trees, small spring bulbs work because they finish before the canopy closes. Plant out toward the drip line where competition for water is lower, and buy the smallest pot size the nursery sells.
Should you put mulch around trees?
Yes, and it is one of the most useful things you can do for a mature tree. Mulch moderates soil temperature, holds moisture, and keeps mowers and string trimmers off the bark. The rules are depth and distance: 2 to 4 inches of organic mulch, spread flat out toward the drip line, pulled 8 to 10 inches back from the trunk of a mature tree.
Will cutting tree roots kill the tree?
It can, depending on size and how many. A common rule of thumb is to never cut a root thicker than a permanent marker, and to stay out of the inner root zone entirely. Larger roots carry both anchorage and a large share of the tree's water, so severing several near the trunk raises the risk of decline and of the tree failing in a storm years later.
Why do tree roots come to the surface?
Roots are not climbing up so much as the soil is going down. Feeder roots live in the top 6 to 12 inches where oxygen is, and erosion, mower compaction, or a thin layer of topsoil over clay all thin that layer until roots show. Maples, beeches, poplars and willows surface more than most species regardless of soil.
Can you put rocks around trees instead of mulch?
Yes, if the rock goes on at existing grade in a thin layer, 2 inches or so, with no soil added underneath and no fabric. Loose river rock or gravel still lets rain and air through. Rock does hold more heat than bark mulch and adds nothing to the soil, so it suits a decorative ring better than a bed you plan to plant heavily.
What can I do with tree roots above ground in a lawn?
Stop mowing over them, which is the fastest fix and free. Convert the rooty area to a mulch ring wide enough that the mower stays outside it, or plant a ground cover through the gaps. Never top-dress the roots with soil to level the lawn back out; that is the shortcut that suffocates them, and grass will not thrive there anyway.
How can I see these ideas on my own tree?
Upload a photo of the tree and the ground around it and generate concepts in a few styles before you buy anything. That is exactly what AI garden design does, and comparing a mulch ring, a rock treatment and a planted understory on your actual yard takes less time than a trip to the nursery.