37 Horizontal Fence Ideas in Wood, Composite and Metal
Wood, composite, aluminium and steel, from a bare pressure-treated budget build to slats set between stucco pillars. Each idea includes the detail that decides whether it lasts: post spacing, board thickness, and how the material behaves after five summers.
A fence built the usual way, boards standing upright, reads as a boundary and nothing else. Turn the same boards on their side and the run starts behaving like a wall: it stretches the yard sideways, it hides the neighbour's shed without feeling like a stockade, and it makes a 1970s ranch look like it got a renovation. That is the whole appeal of horizontal fence ideas, and it is why the style keeps showing up on new builds and remodels alike.
The 37 designs below cover wood, composite, aluminium, and steel, at heights from a 3-foot front-yard fence to an 8-foot privacy run. Some are weekend budget builds. Some need a contractor and a permit. Each one lists the detail that actually decides whether it works: post spacing, board thickness, how the material behaves after five summers.
One thing to know before you scroll. Horizontal boards carry their own weight across the span instead of hanging off rails, so they sag if the posts are too far apart. Most of these runs need posts every 6 feet rather than the 8 feet a vertical fence gets away with. Every photo here is an AI-generated design concept rather than a client project, the same kind of render AI fence design makes from a photo of your own boundary.
Wood, from budget build to built to last
1. Leave pressure-treated boards bare
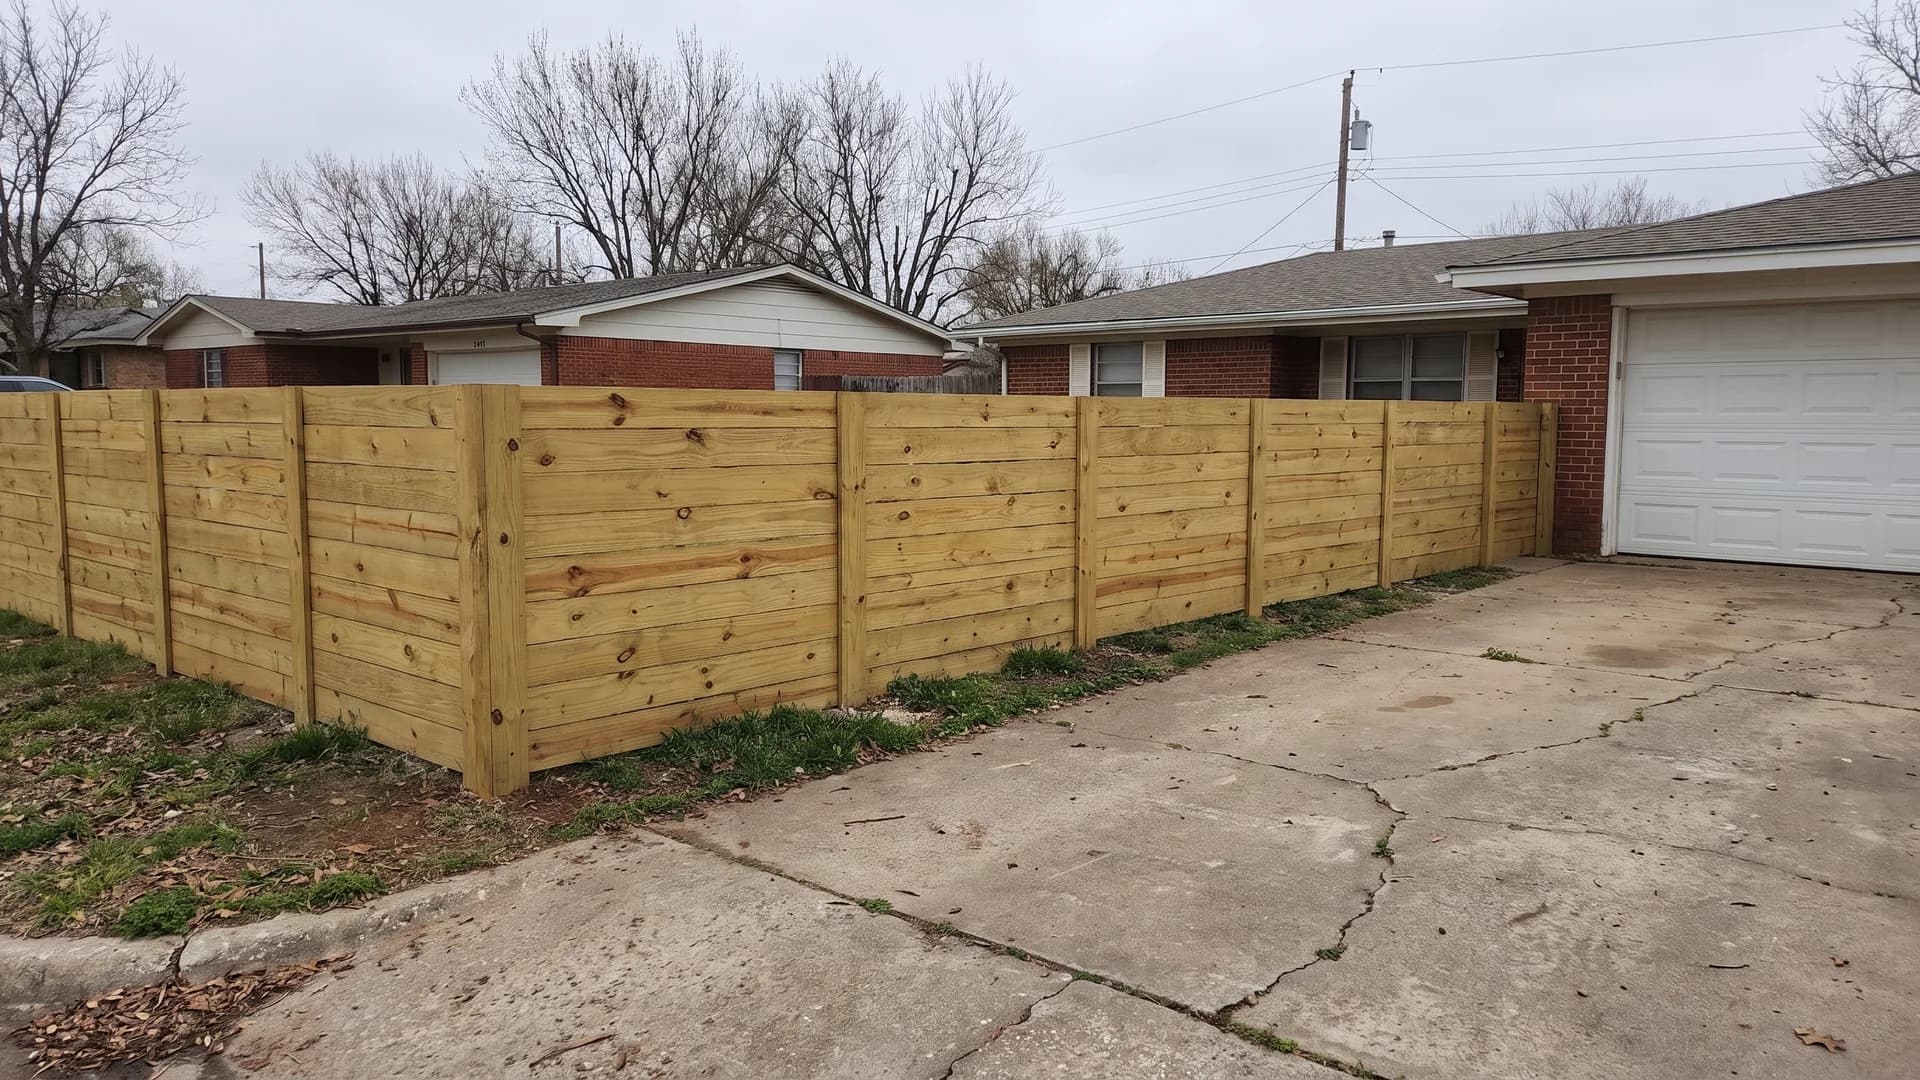
The cheapest way into this look. Pressure-treated 1x6 pine runs about $8 to $12 a board in most markets, and a flat cap board along the top hides the end grain where water would otherwise sit. The green tint fades to silver-grey in roughly a year outdoors. If you plan to stain later, wait until the lumber has dried out, usually a full season, or the finish will not soak in.
2. Go eight feet with board on board
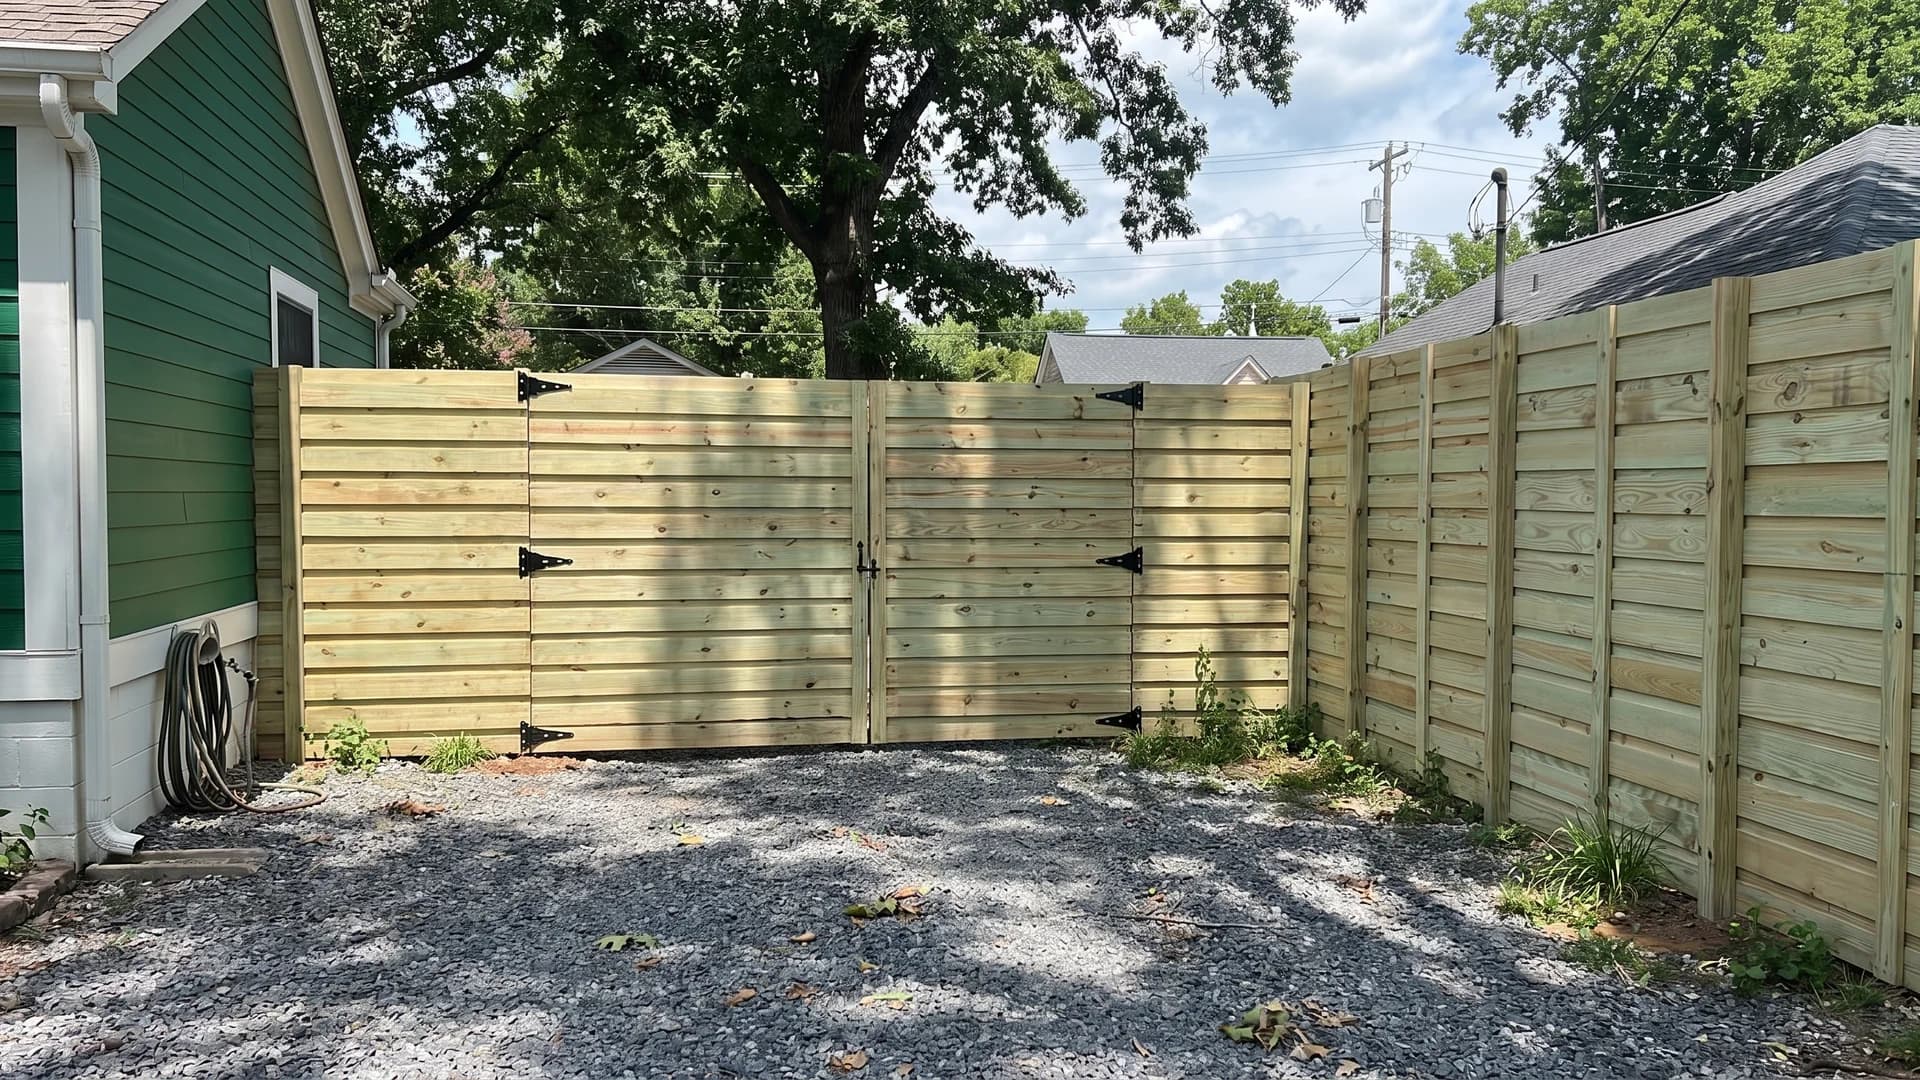
Overlapping each board about an inch over the one below kills every sightline, which is the point when you are screening a two-storey window next door. It also eats 30 to 40 percent more lumber than a butted fence, so price it properly. Eight feet is over the limit in plenty of municipalities, so check your zoning before you order anything.
3. Cap the top rail on cedar
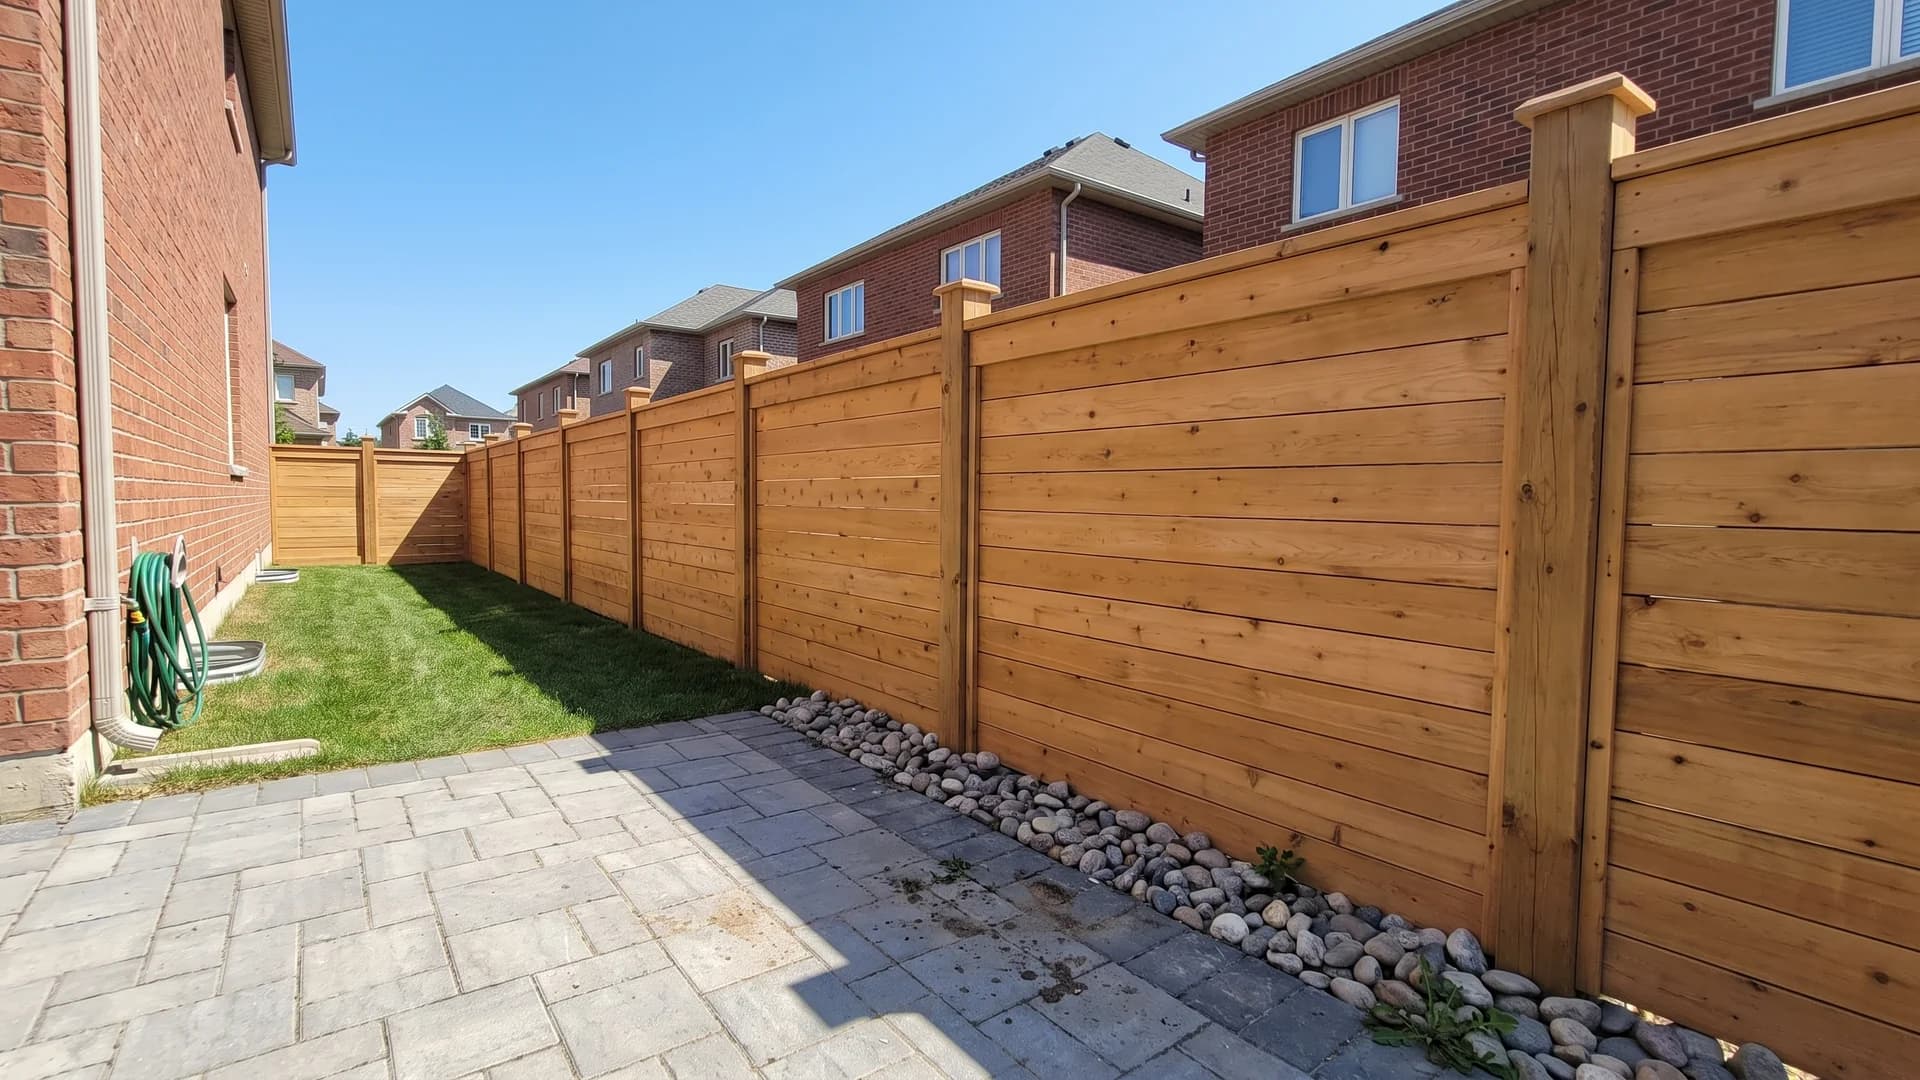
A flat 2x6 laid across the posts is the single best thing you can do for a wood fence's lifespan. Horizontal boards hold rainwater on their upward face, and the top board takes the worst of it. Cap it and you shed water off the whole assembly. Western red cedar resists rot naturally, so it earns the extra $6 to $8 per board over pine.
4. Alternate boards for two good sides
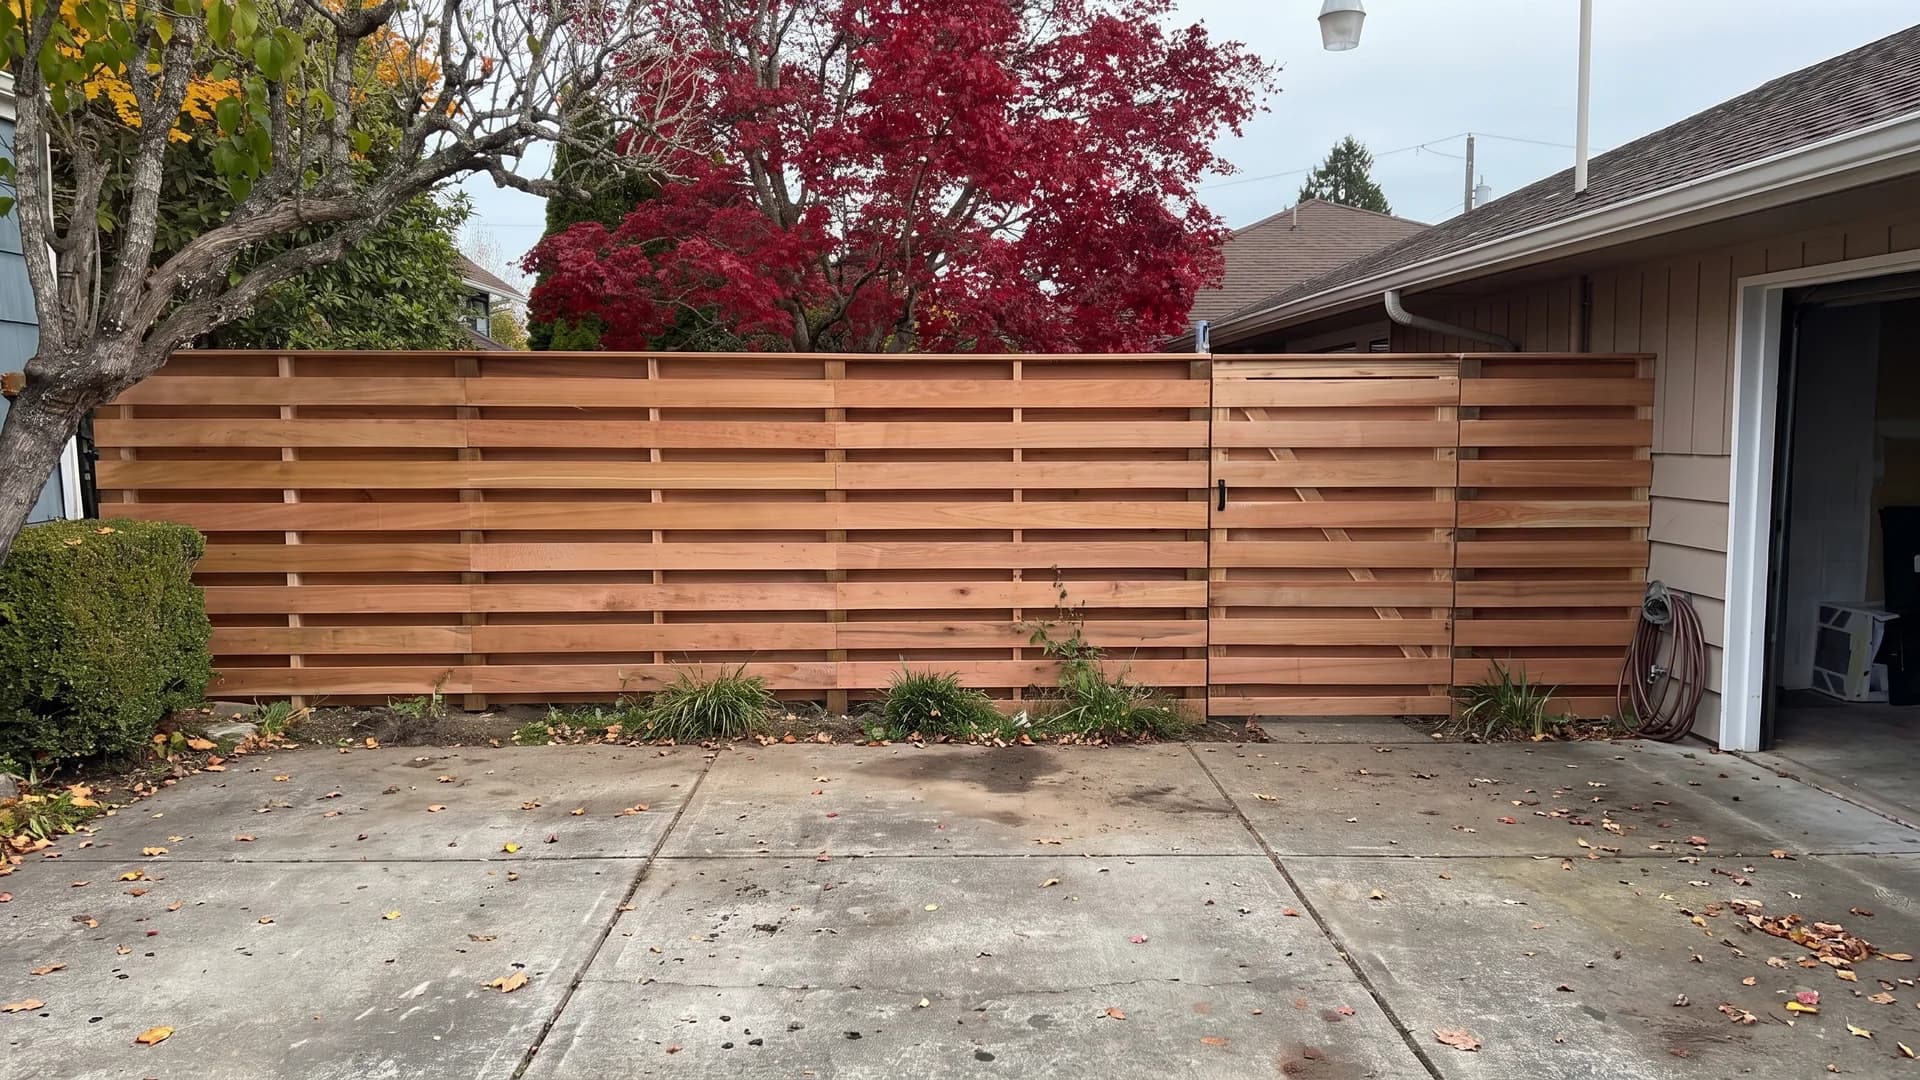
Shadowbox puts one board on the front of the rails, the next on the back. Nobody gets the ugly side, which matters when the fence is shared and your neighbour is paying half. Wind passes through the offset gaps instead of pushing on a solid panel, so the posts take less load in a storm. Budget roughly the same lumber as board on board.
5. Use rough-sawn cedar and copper caps
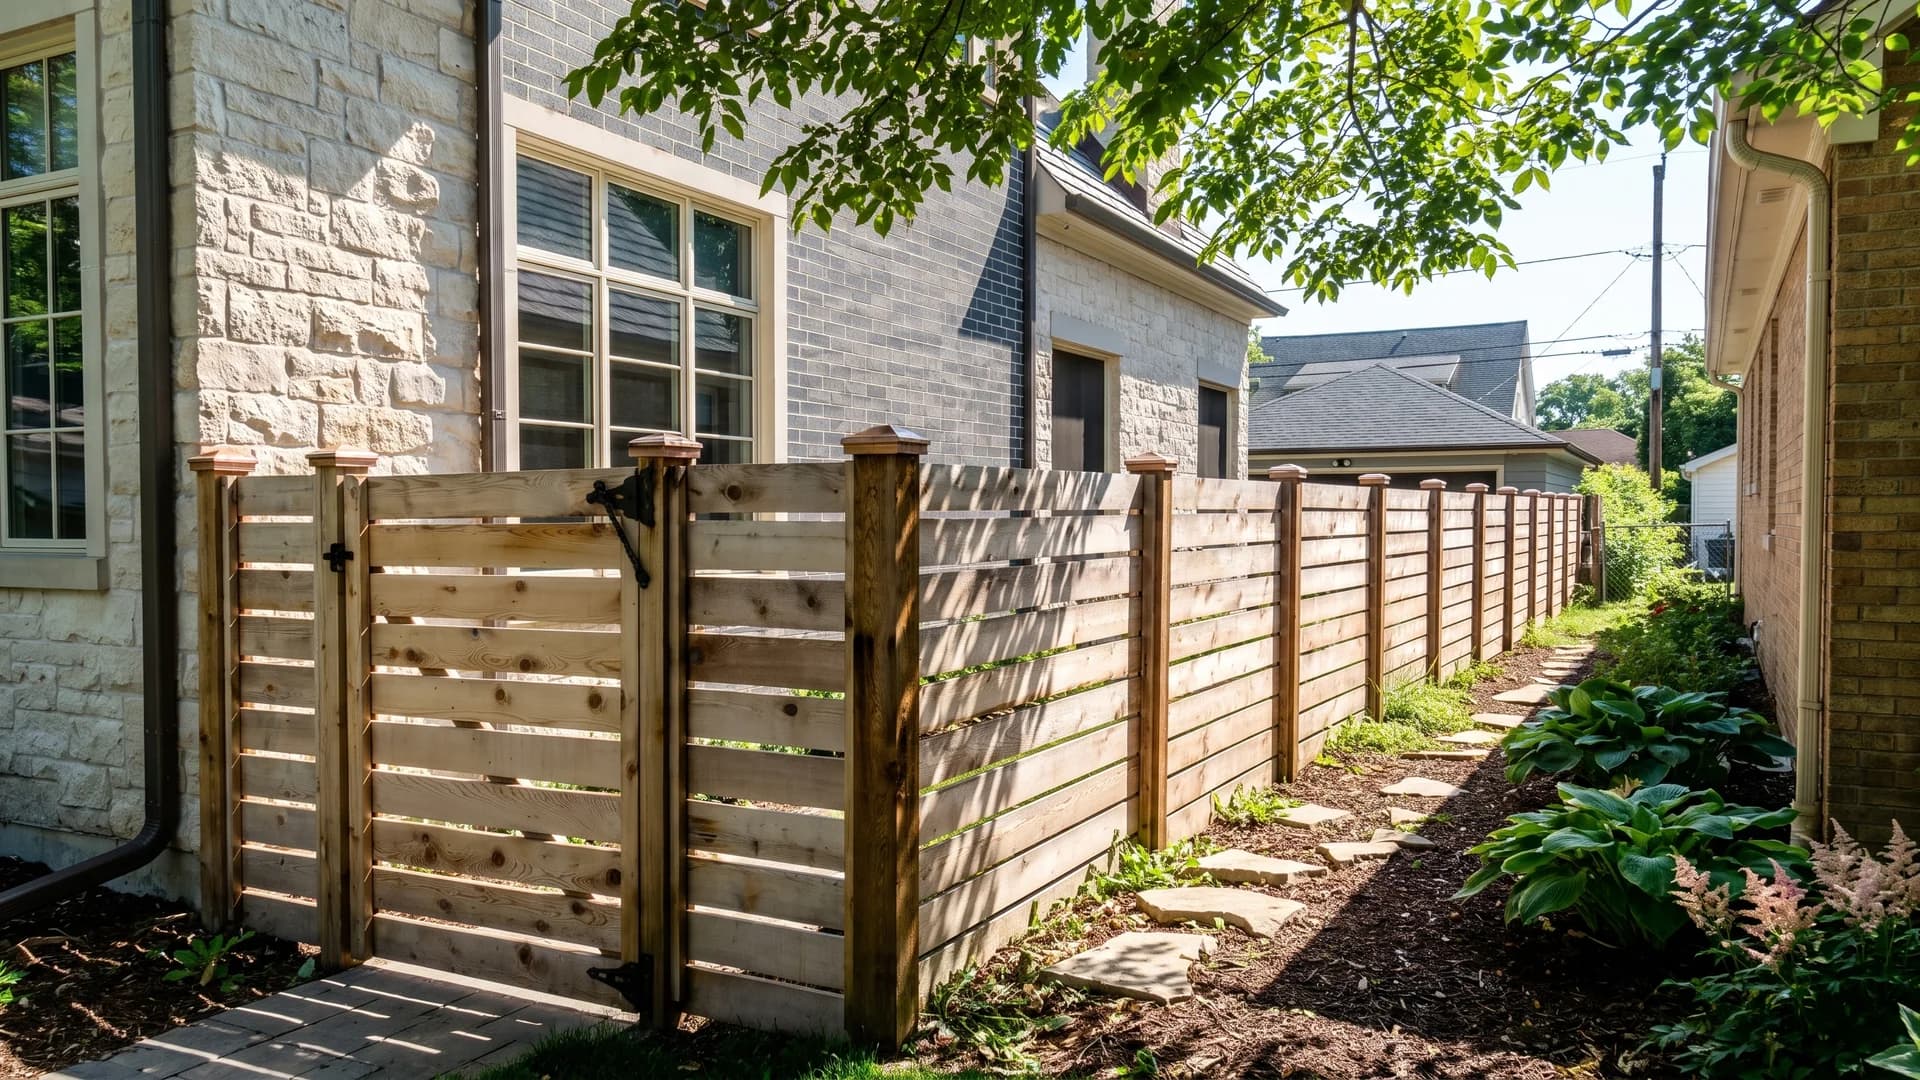
Rough-sawn boards hold stain far better than planed ones because the open grain drinks it in. Heavy 6x6 posts left tall and topped with copper caps give the run a rhythm you lose with flush posts. The copper turns brown within months and green after a decade or so, which is either the appeal or the problem depending on your taste.
6. Stain cedar a warm redwood
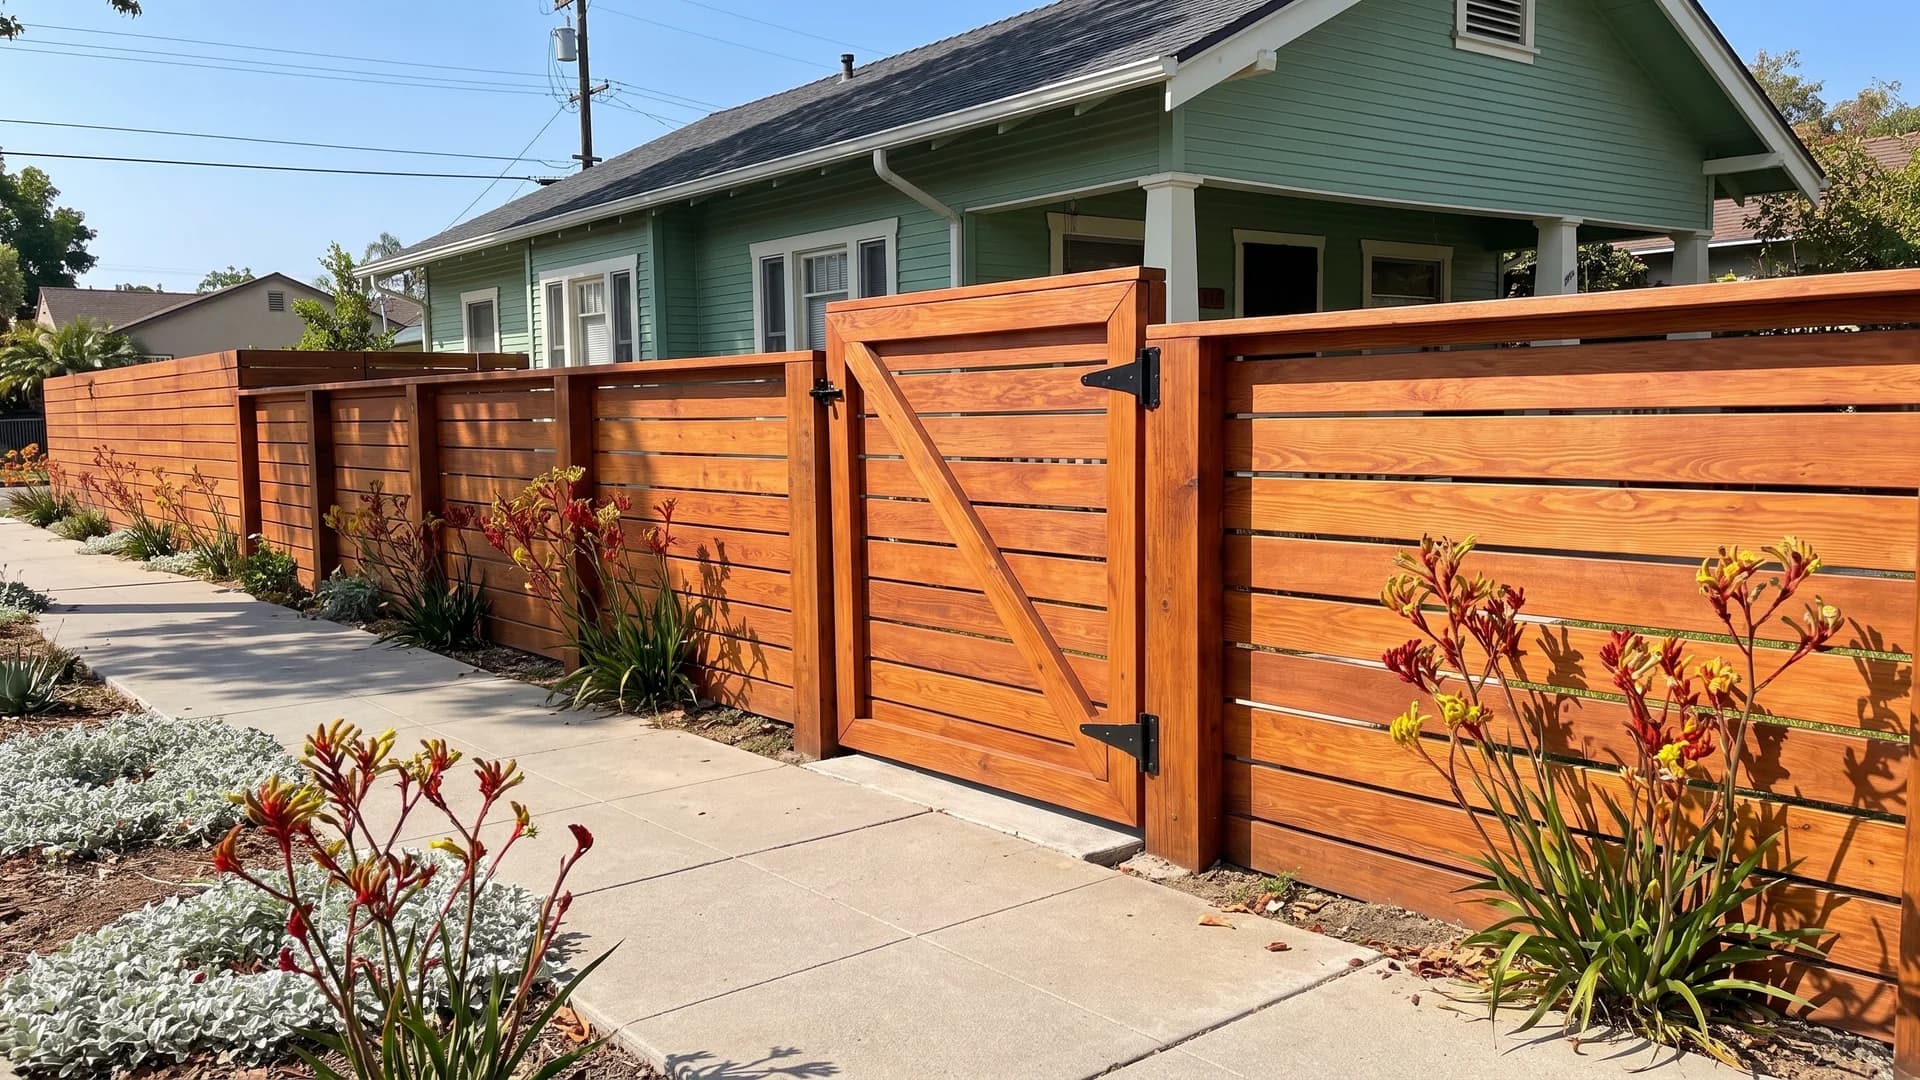
A semi-transparent redwood stain keeps the grain visible and pushes the whole fence warm, which flatters green and cream houses. Plan on recoating every two to three years on a sun-facing run, longer in shade. Build the gate from the same boards with a diagonal brace running from the bottom hinge upward, or it will drop out of square by the second winter.
7. Pick a grey-brown stain that ages evenly
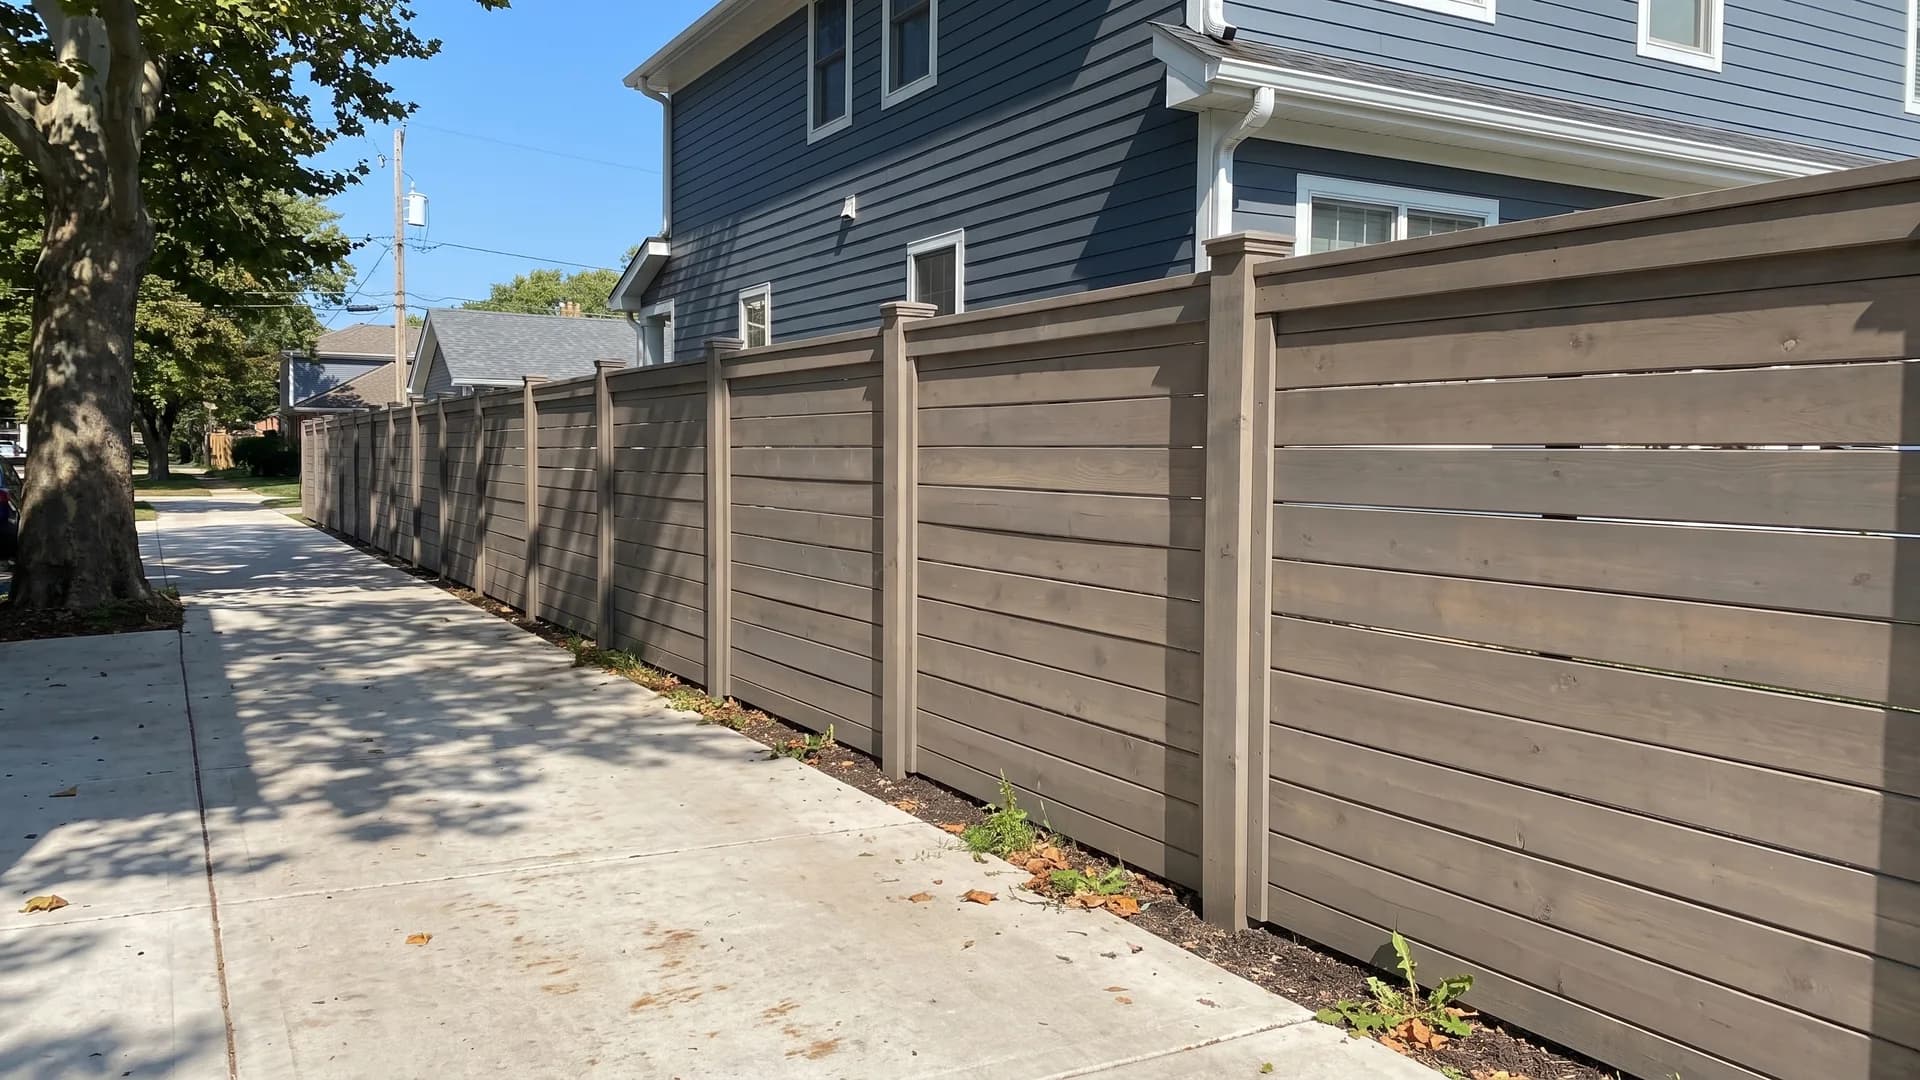
Untreated wood goes grey anyway. A semi-solid grey-brown stain gets you there on day one and, more usefully, gets you there evenly, so the shaded run beside the house does not stay orange while the sunny end silvers. Semi-solid hides mismatched boards better than semi-transparent, which is handy if your lumber pile varied.
8. Whitewash the boards and widen the gaps
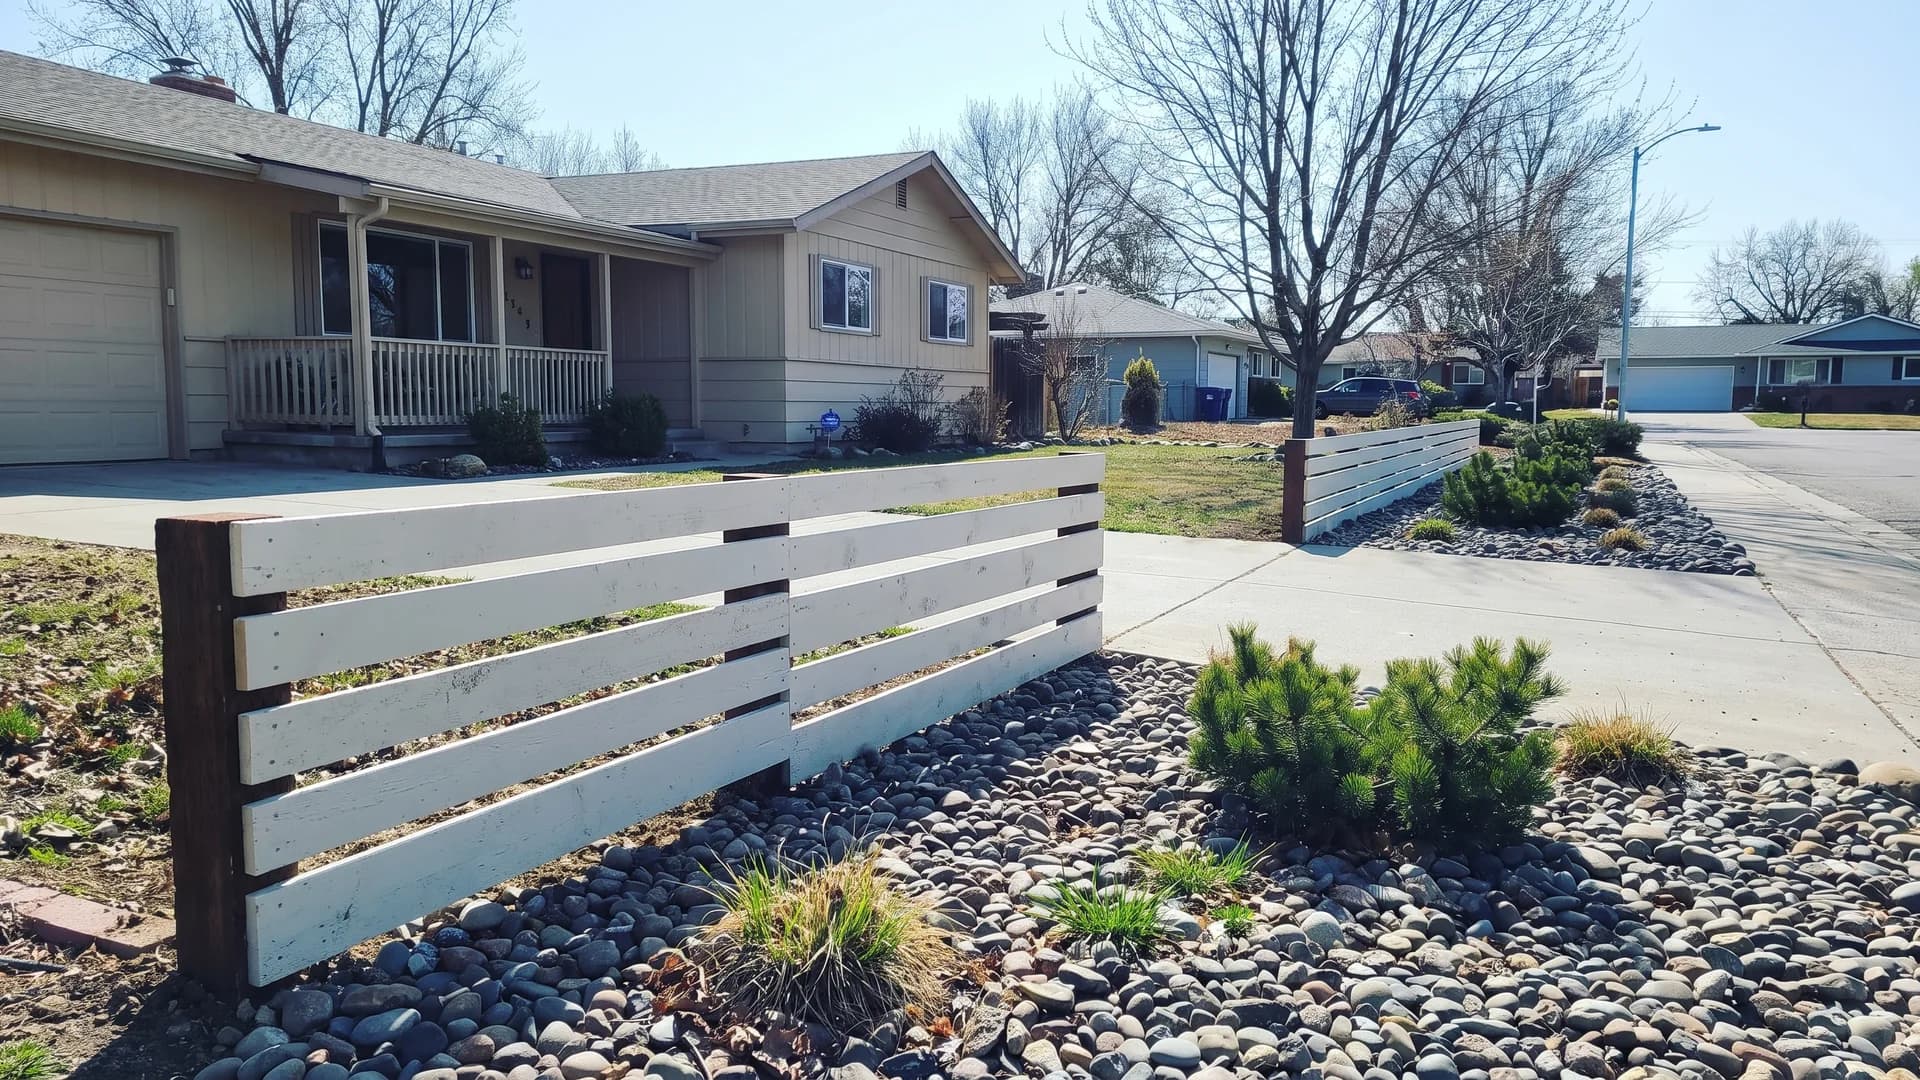
At 3 feet with 3-inch gaps this is a boundary marker, not a screen, and that is usually what front-yard codes allow anyway. The contrast does the work: chalky white boards against dark stained 6x6 posts. Wide gaps also mean fewer boards, so a long street frontage stays affordable. Snow and leaves blow straight through instead of drifting against it.
9. Run even gaps along a deck
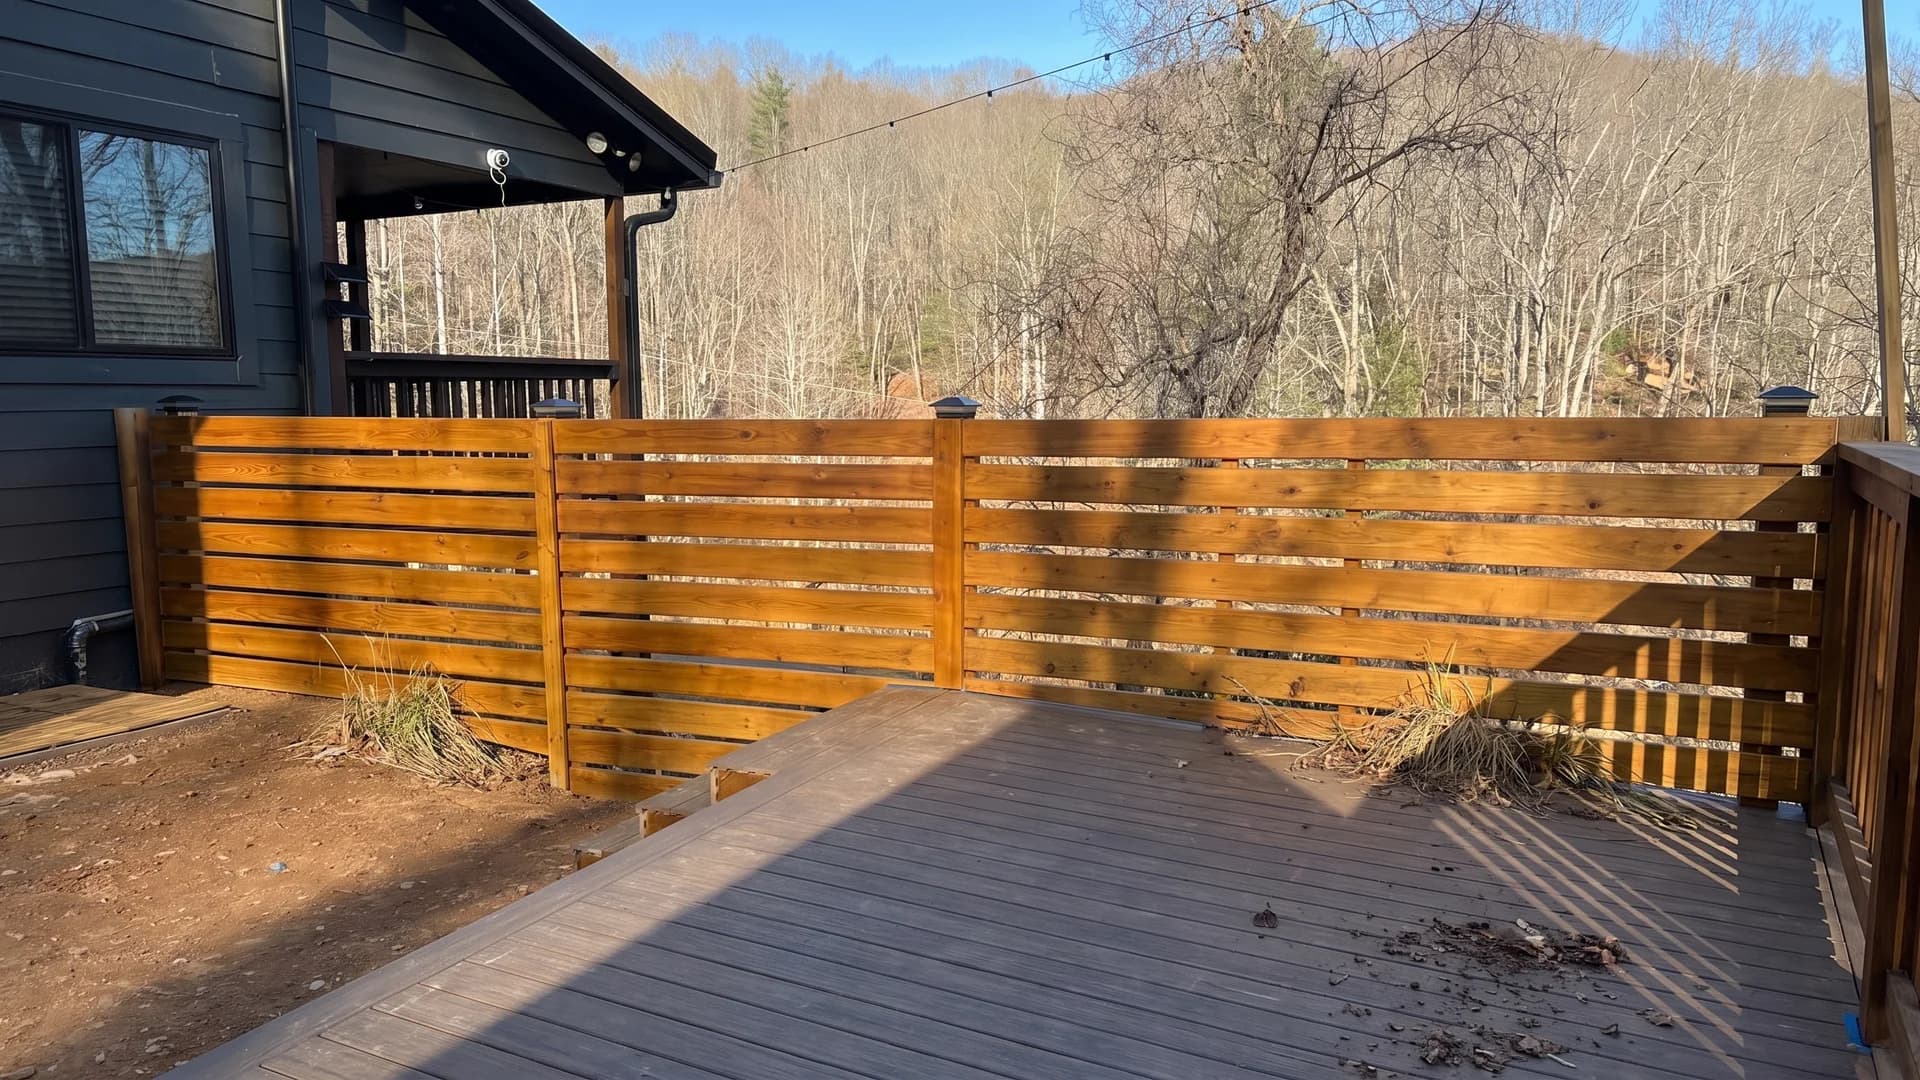
A consistent 1-inch gap screens sightlines from a seated position while letting breeze and light through, which is the trade you want on a deck rather than full privacy. Solar caps on the posts save running low-voltage cable to an exposed edge. Check the gap against your local pool and deck guard rules if the drop below is more than 30 inches.
Composite, if you never want to stain again
10. Frame tan composite in dark metal
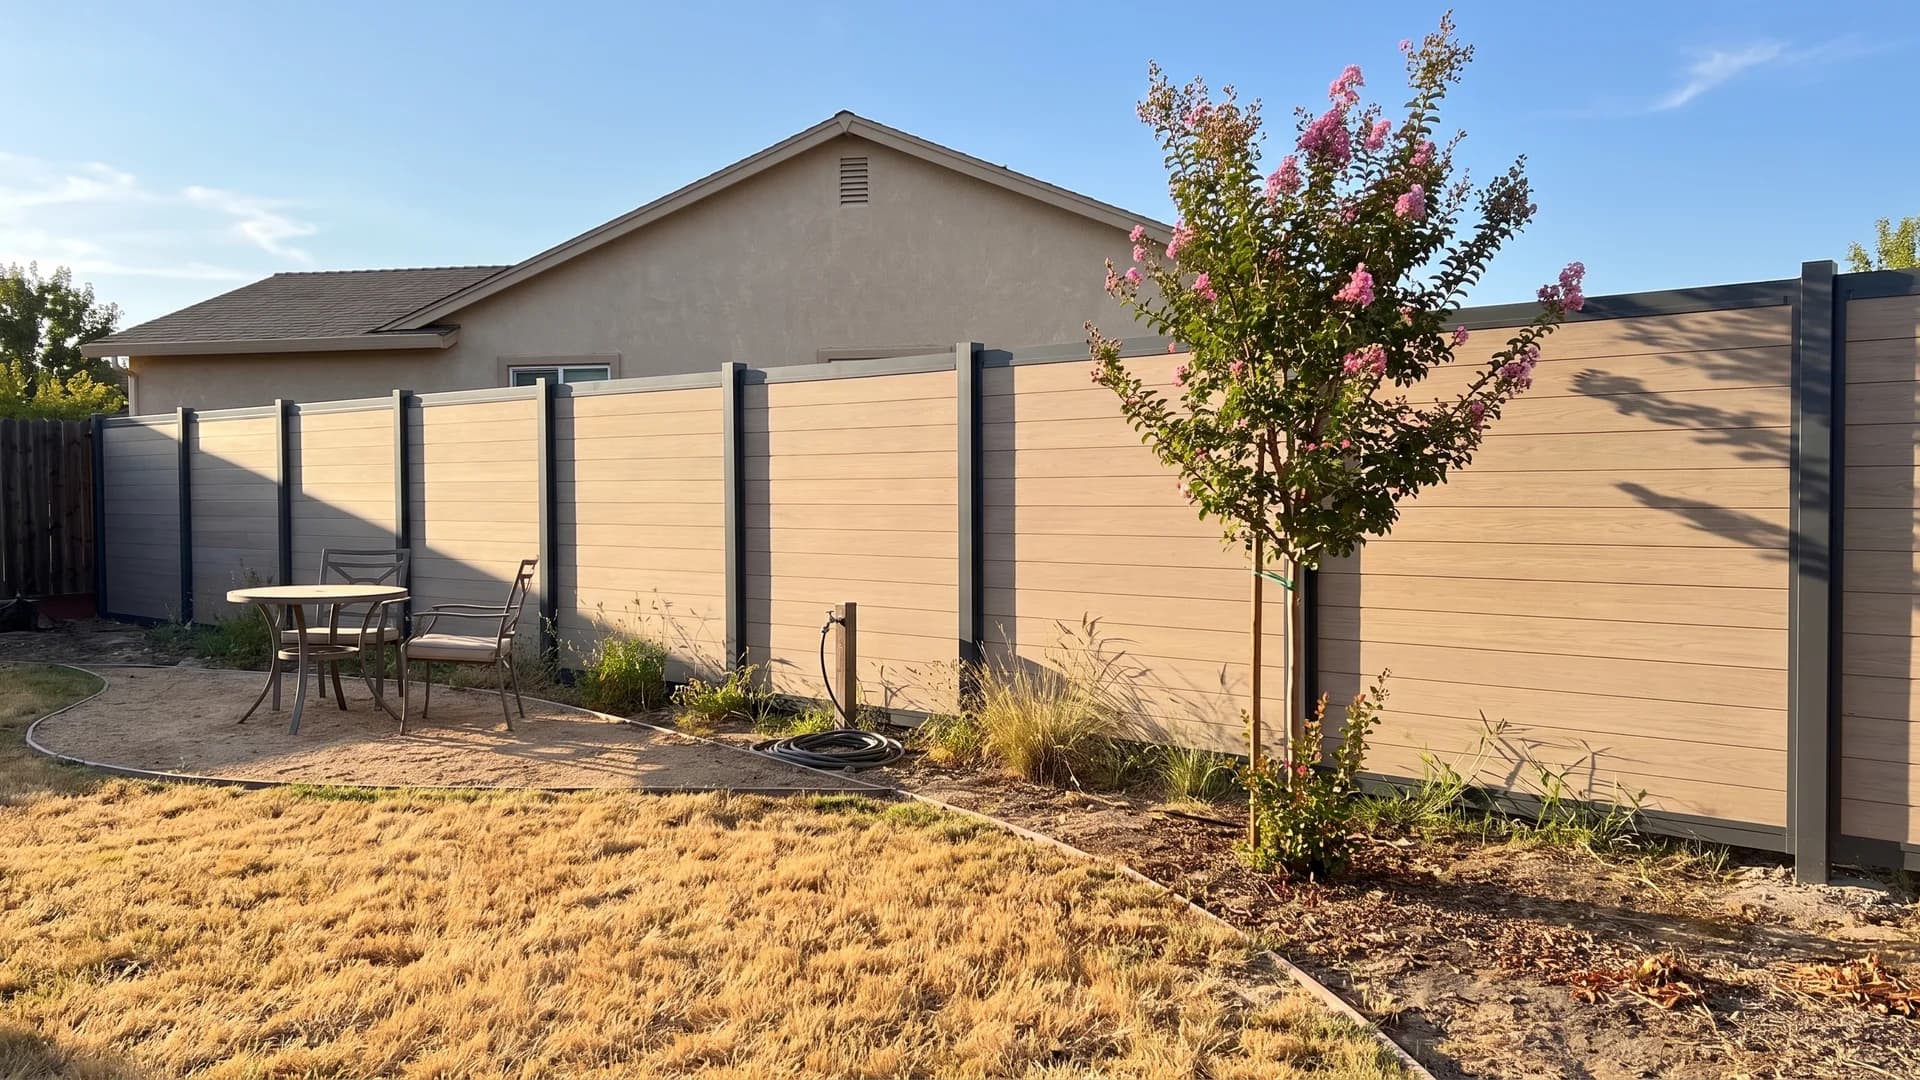
Composite infill inside an aluminium frame is the most common kit on the market, and the contrast is why it photographs well: warm panel, cold frame. Composite boards expand and contract with temperature more than wood does, which is exactly why the boards float in a post channel rather than being screwed down. Never fasten the board ends tight.
11. Go espresso on a long run
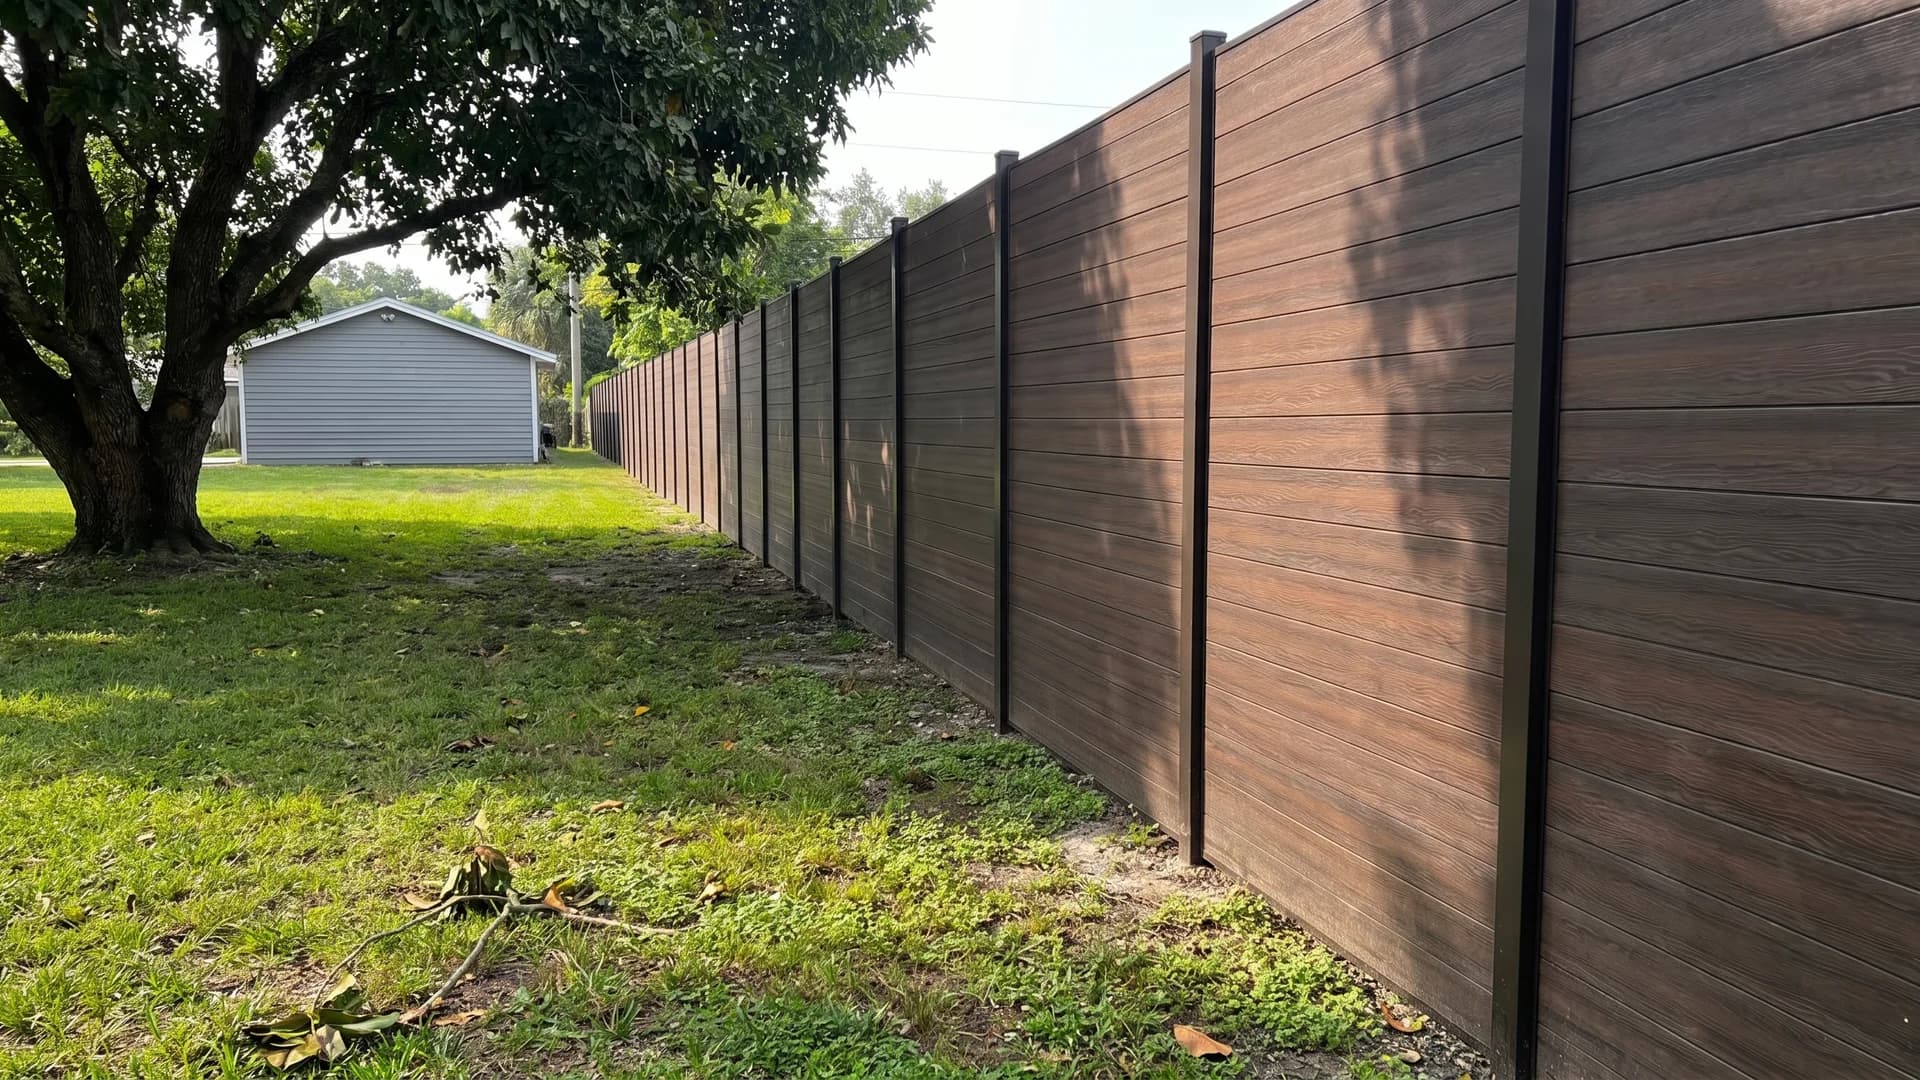
Dark colours make a long boundary recede, so the yard reads bigger than the same run in a pale tone. The trade is heat. A near-black composite panel in full afternoon sun gets too hot to lean on, and darker pigments fade faster than mid-tones. Worth it on a shaded north or east boundary, less so facing west in Phoenix.
12. Try a mahogany tone against concrete
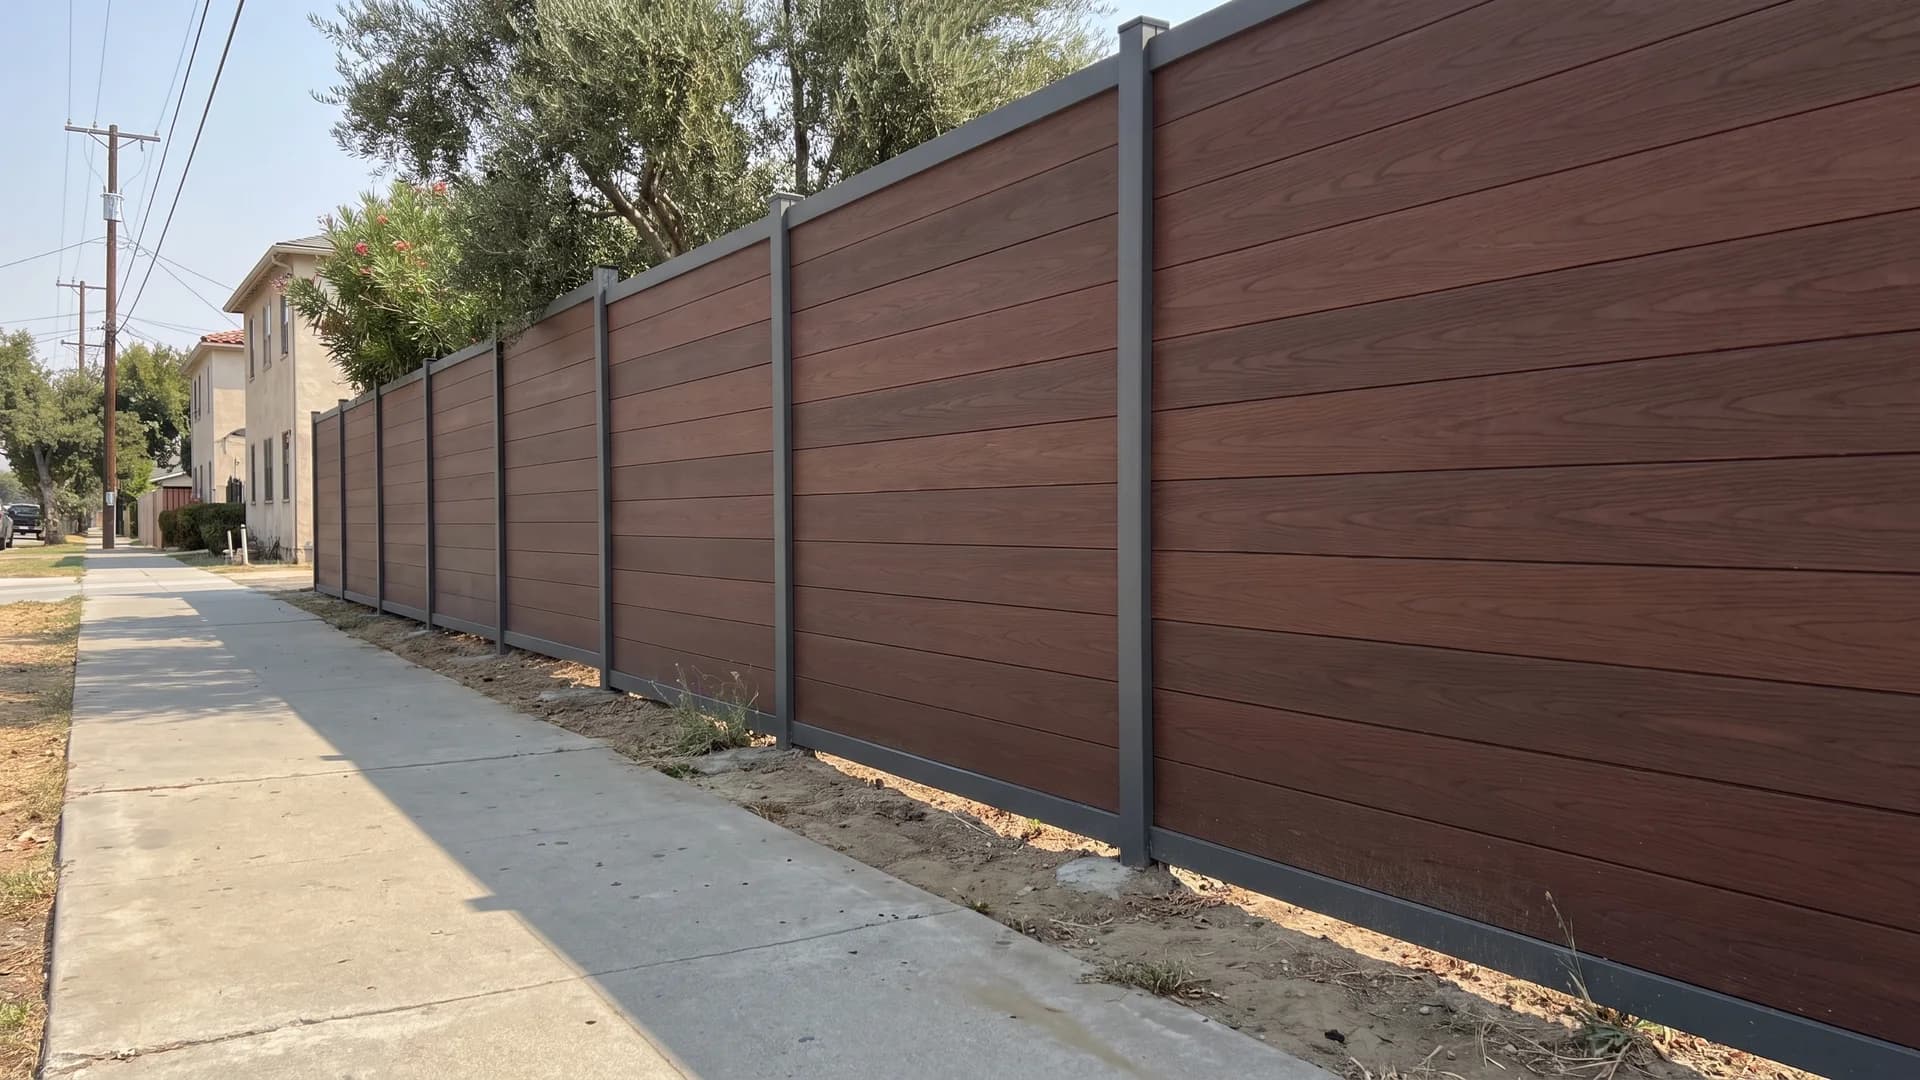
Red-brown composite is the one tone that does not read as plastic from the sidewalk, because real timber that colour exists. Grey posts keep it from tipping into fake-wood territory. Most capped composite carries a 25-year fade and stain warranty, though read what it actually covers, since colour warranties are usually pro-rated after year 10.
13. Use walnut in a tight side yard
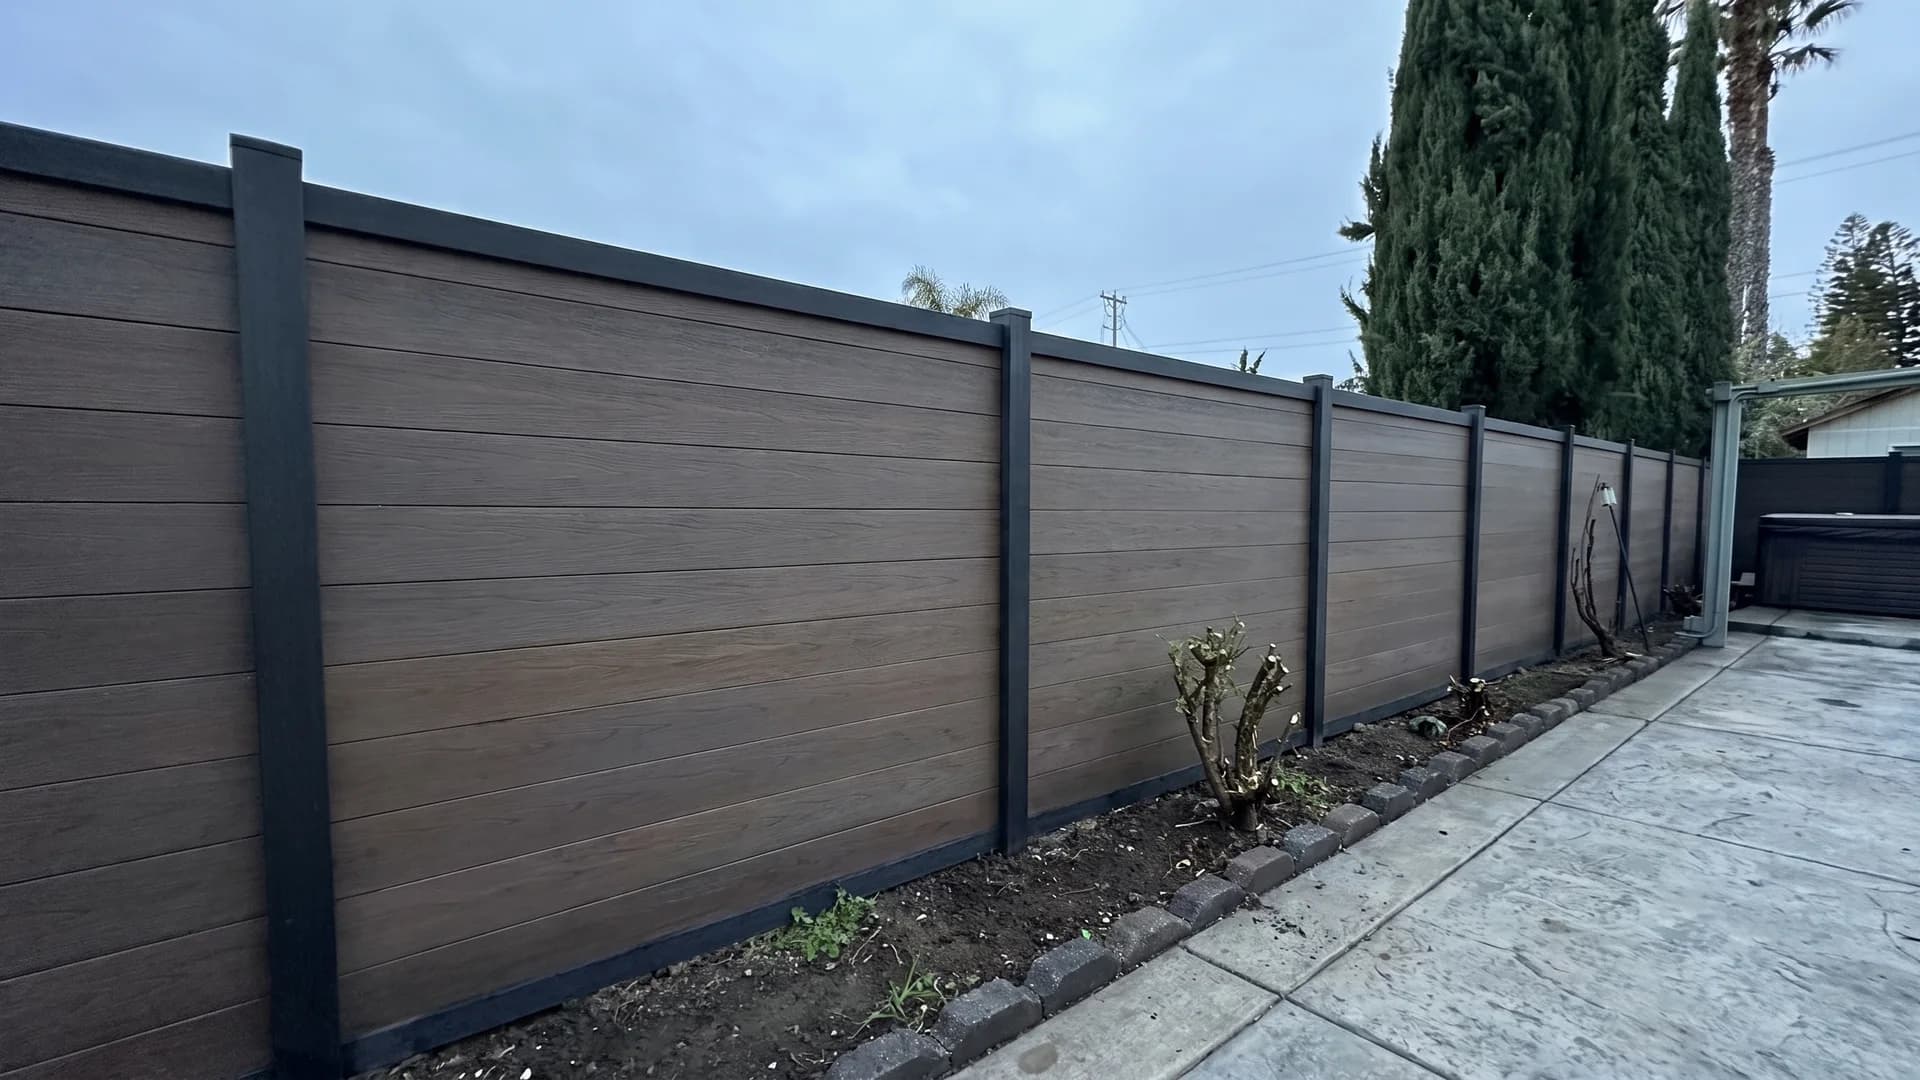
Side yards are the strongest case for composite. They stay damp, they get no airflow, and they are miserable to work in, so a material you never have to sand and restain earns its price there faster than anywhere else on the property. Mid-brown keeps a narrow corridor from feeling like a tunnel the way charcoal would.
14. Choose driftwood grey for shade
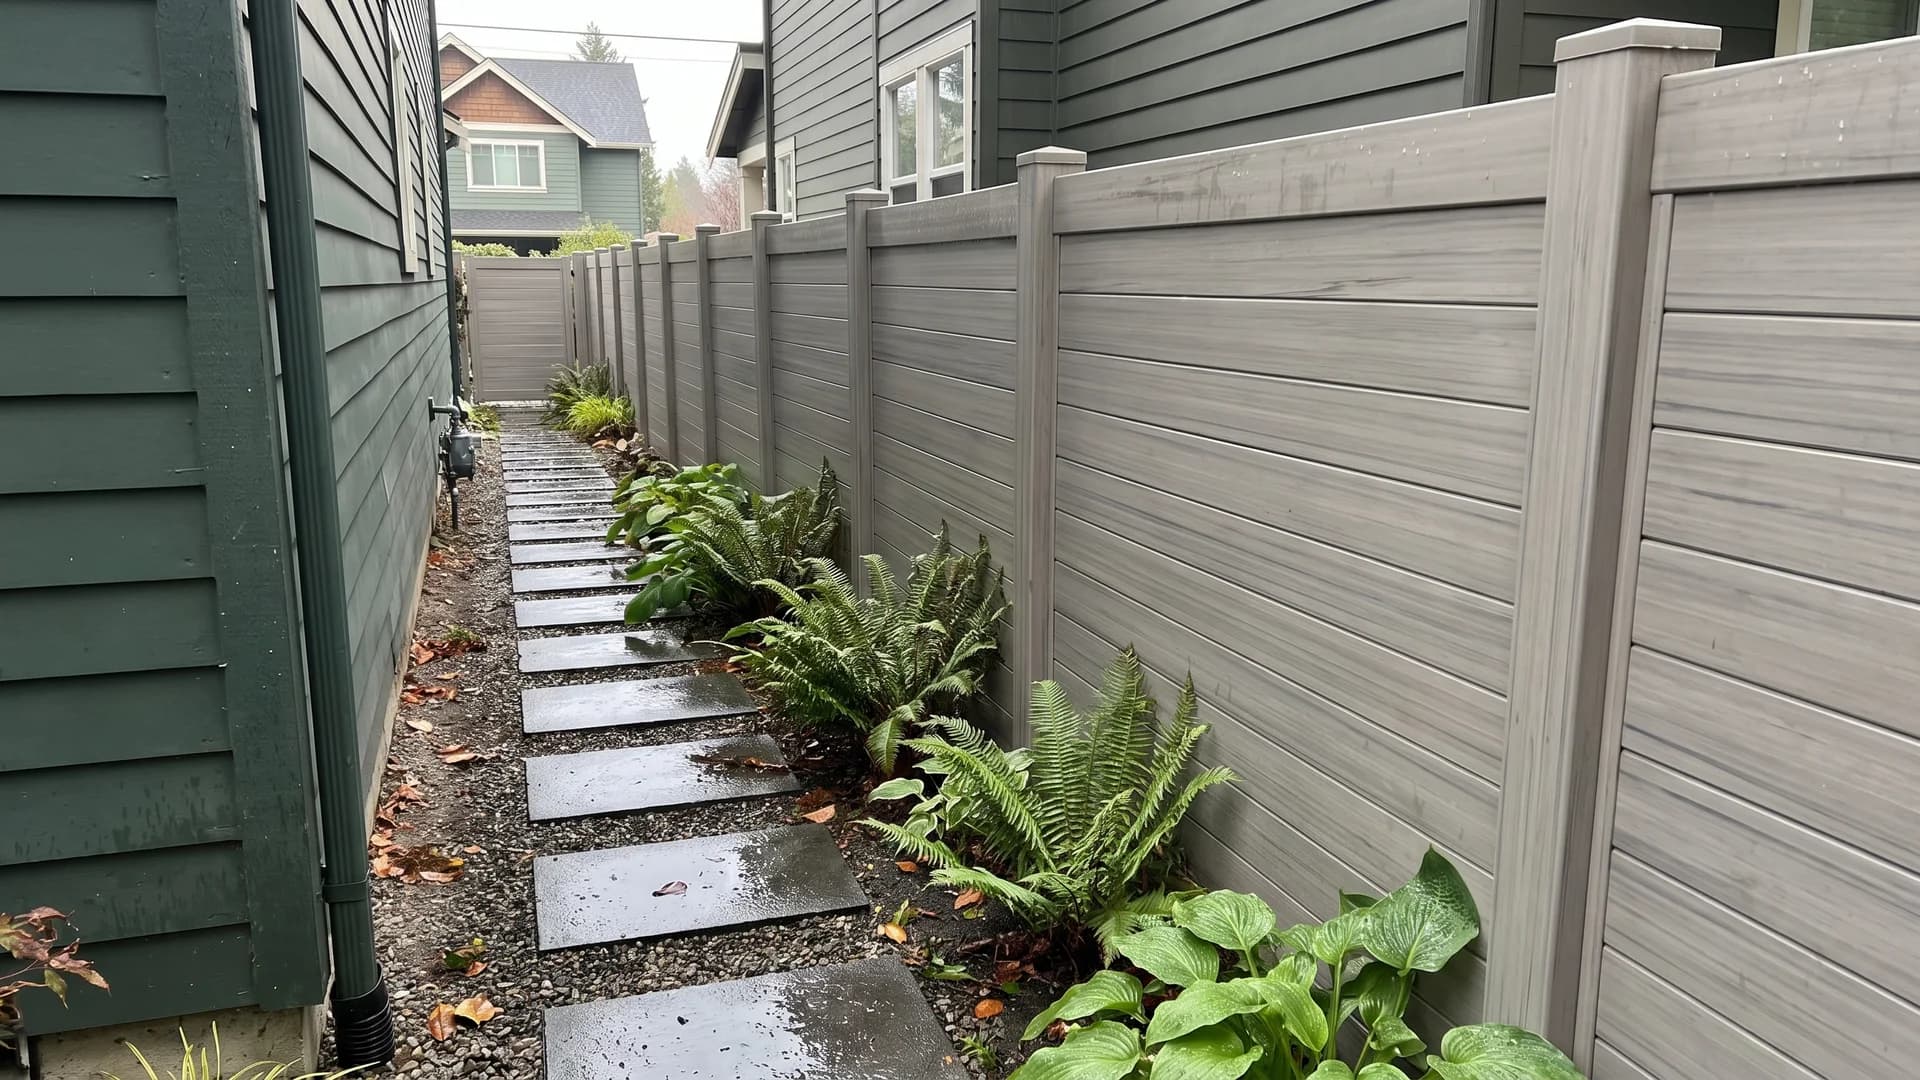
Grey composite in a wet shady corridor sidesteps the problem that kills wood there, which is not rot so much as the green algae film that returns two months after every wash. On grey it barely shows. Ferns and hostas read beautifully against it. Hose it down once a year and that is the entire maintenance schedule.
15. Pair grey boards with black posts
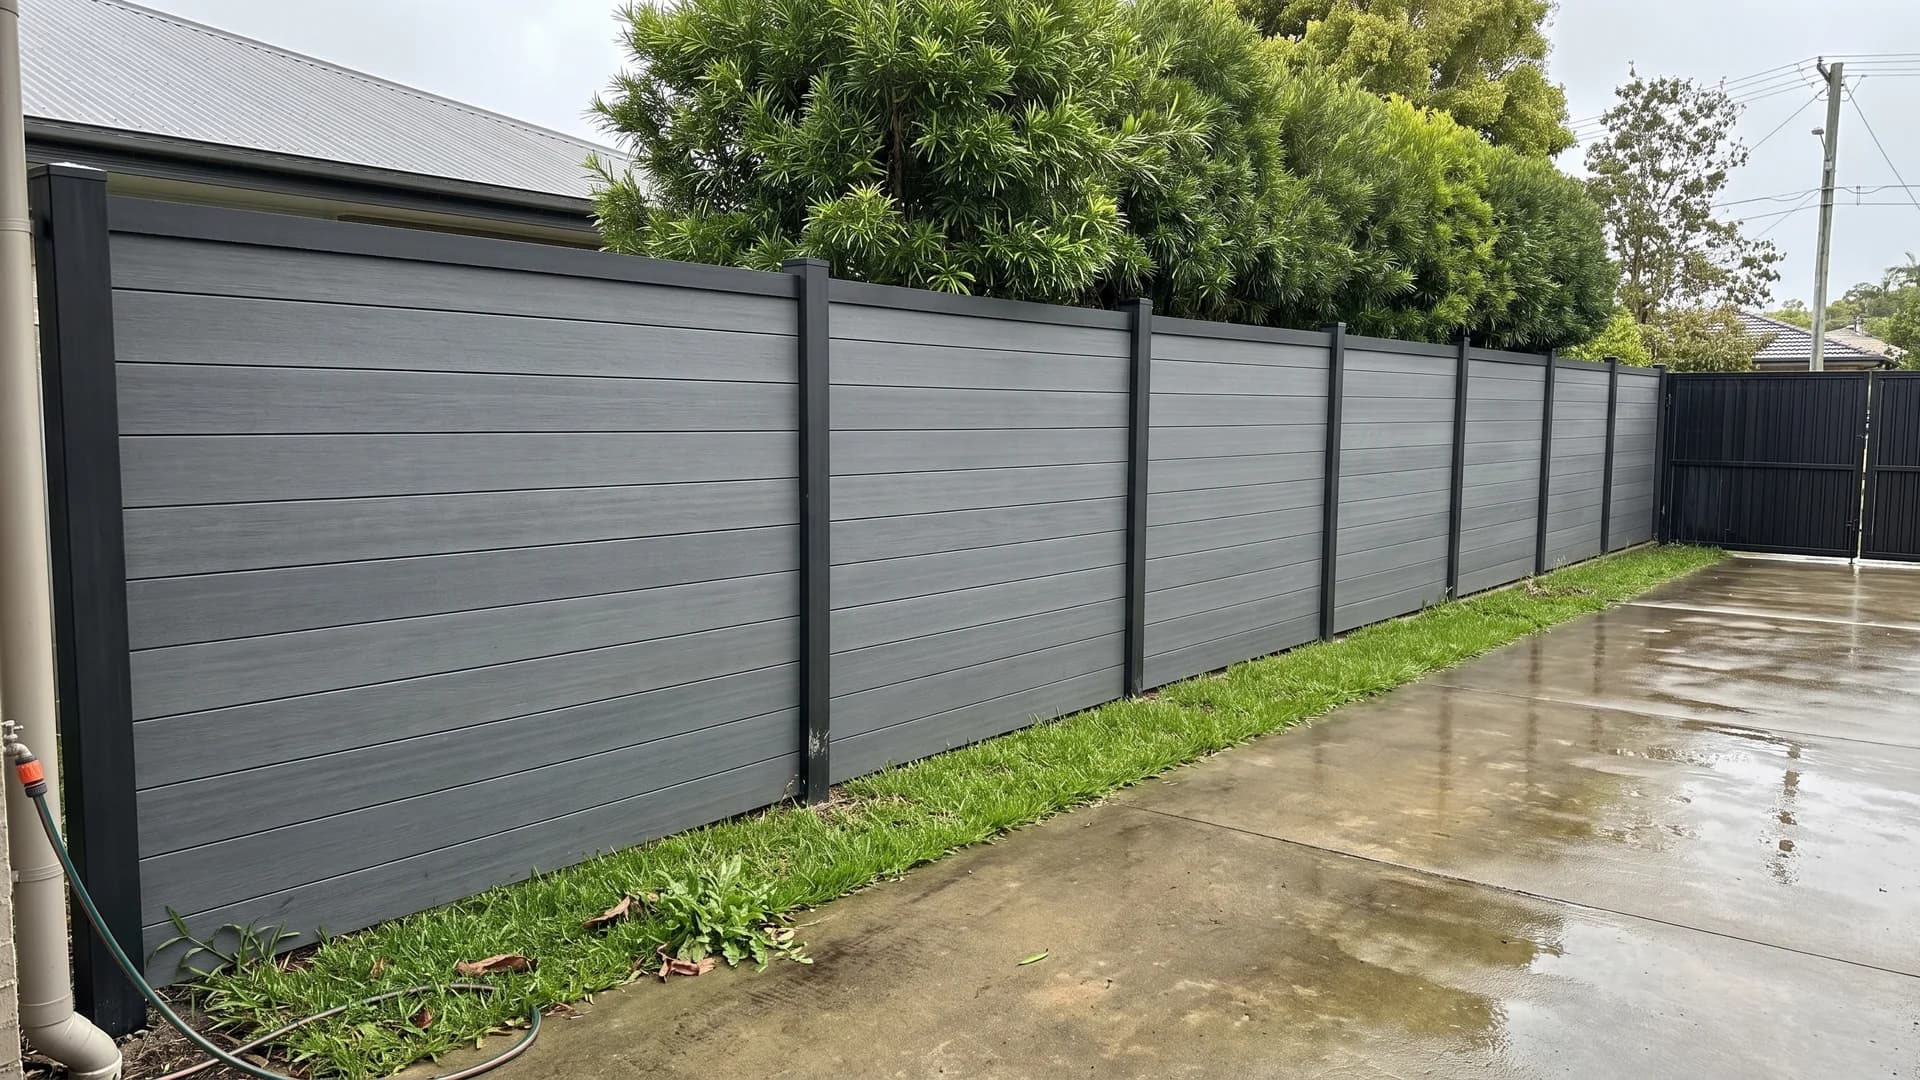
Two-tone is the cheapest way to make a budget panel system look specified rather than picked off a shelf. Mid-grey boards, black posts, black cap rail running the full length. The continuous cap matters more than the colour: it ties separate panels into one line and stops your eye counting the joints.
16. Let the posts stand proud
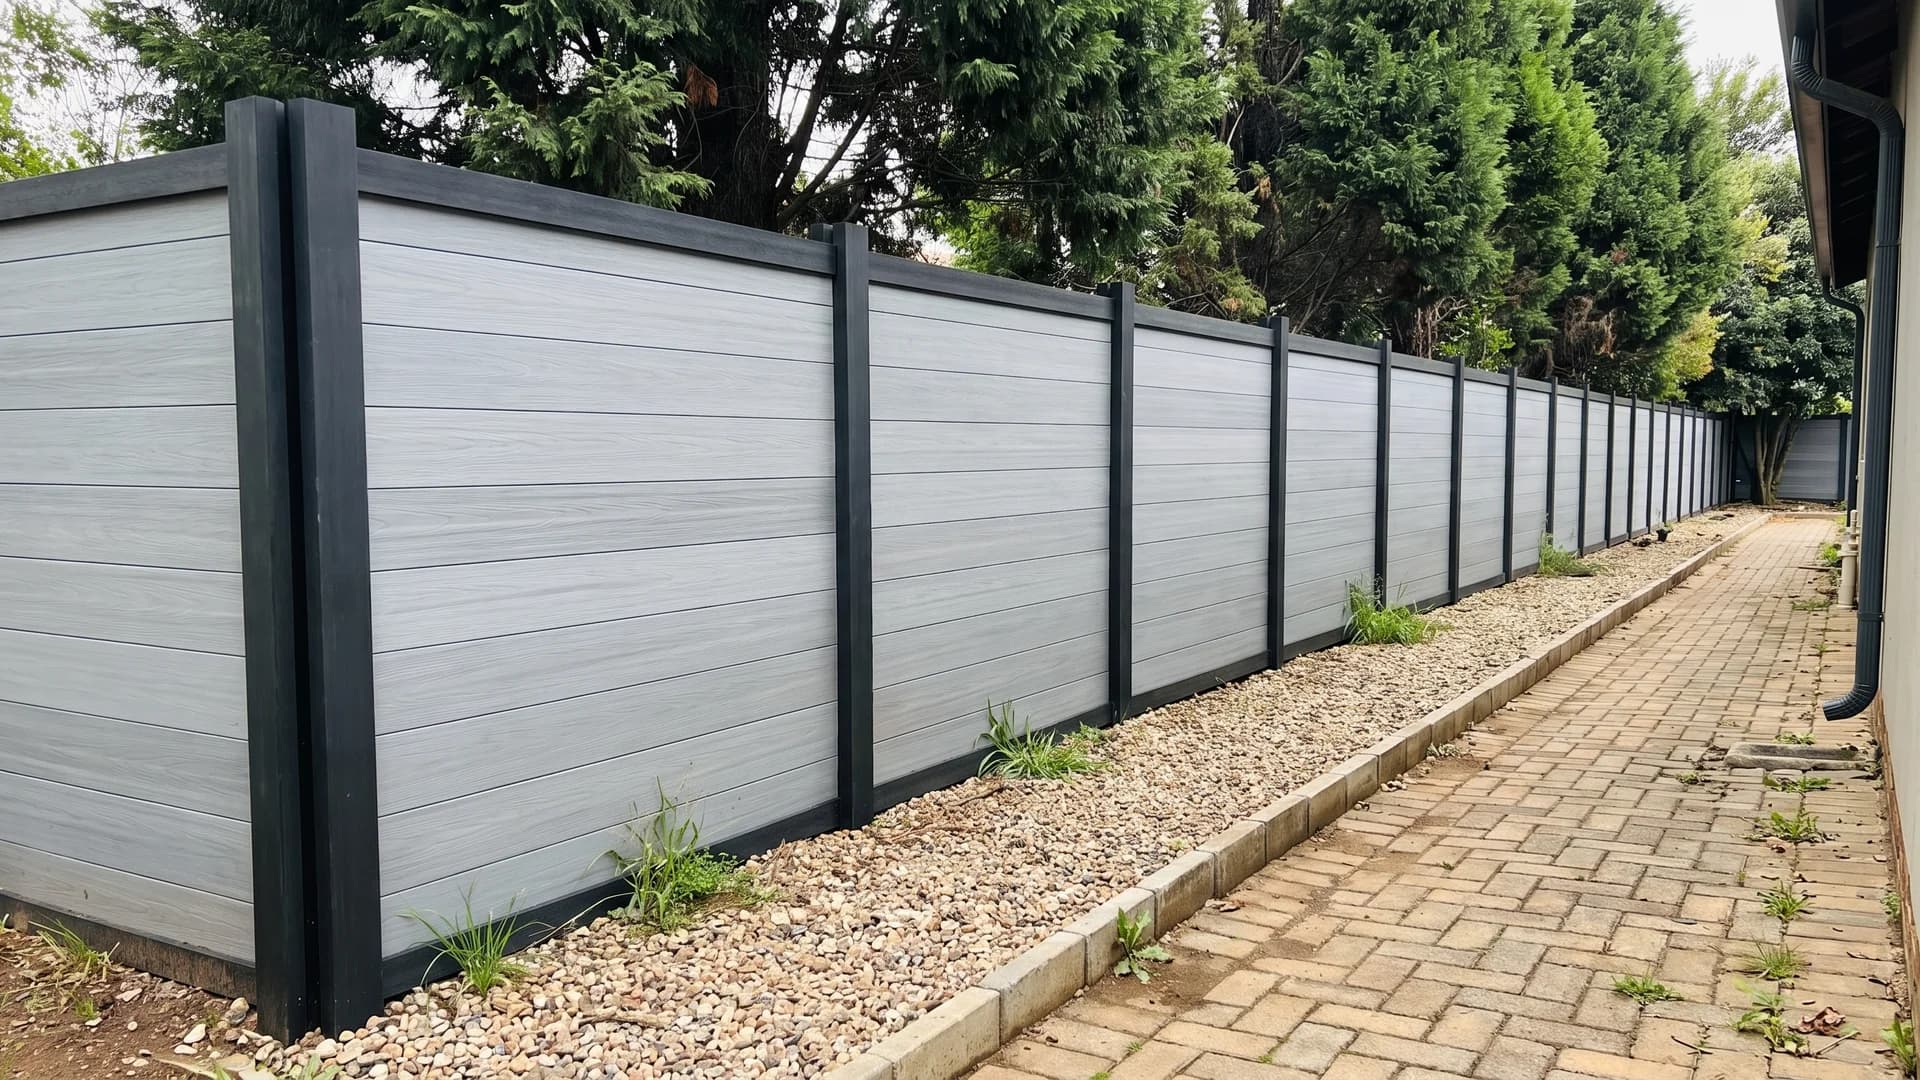
Running the posts 4 inches above the top board and leaving them square-cut turns structure into rhythm. It is also forgiving to build, because the posts no longer have to finish at exactly the same height as each other. Cap the open post tops, though. An uncapped hollow post fills with rainwater and freezes.
17. Pick a deep charcoal for an exposed boundary
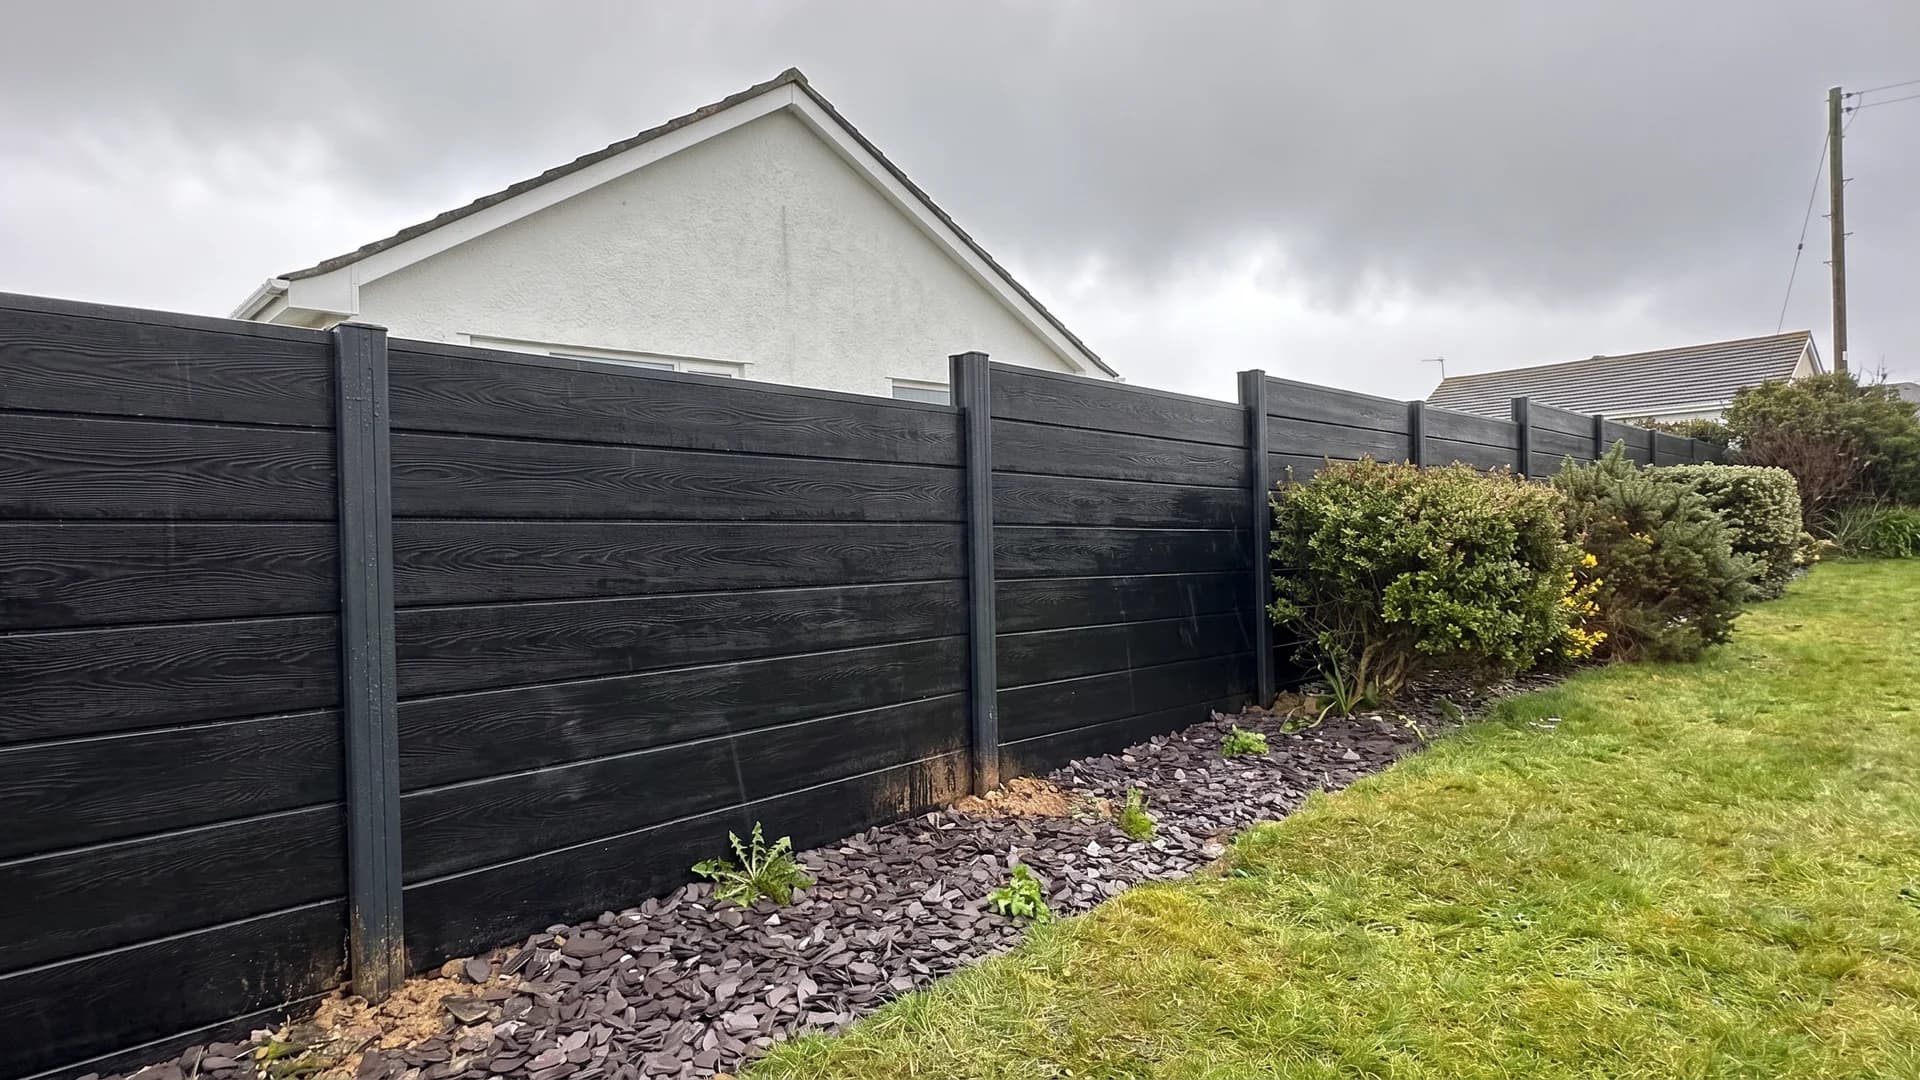
Coastal and open sites destroy stained timber. Salt strips the finish, and constant wind drives rain into every joint. Composite in aluminium H-posts does not care. Solid panels catch the full wind load, so on exposed ground the posts want deeper footings than the manufacturer's minimum, set below the local frost line.
Metal slats, battens and louvers
18. Space black aluminium slats evenly
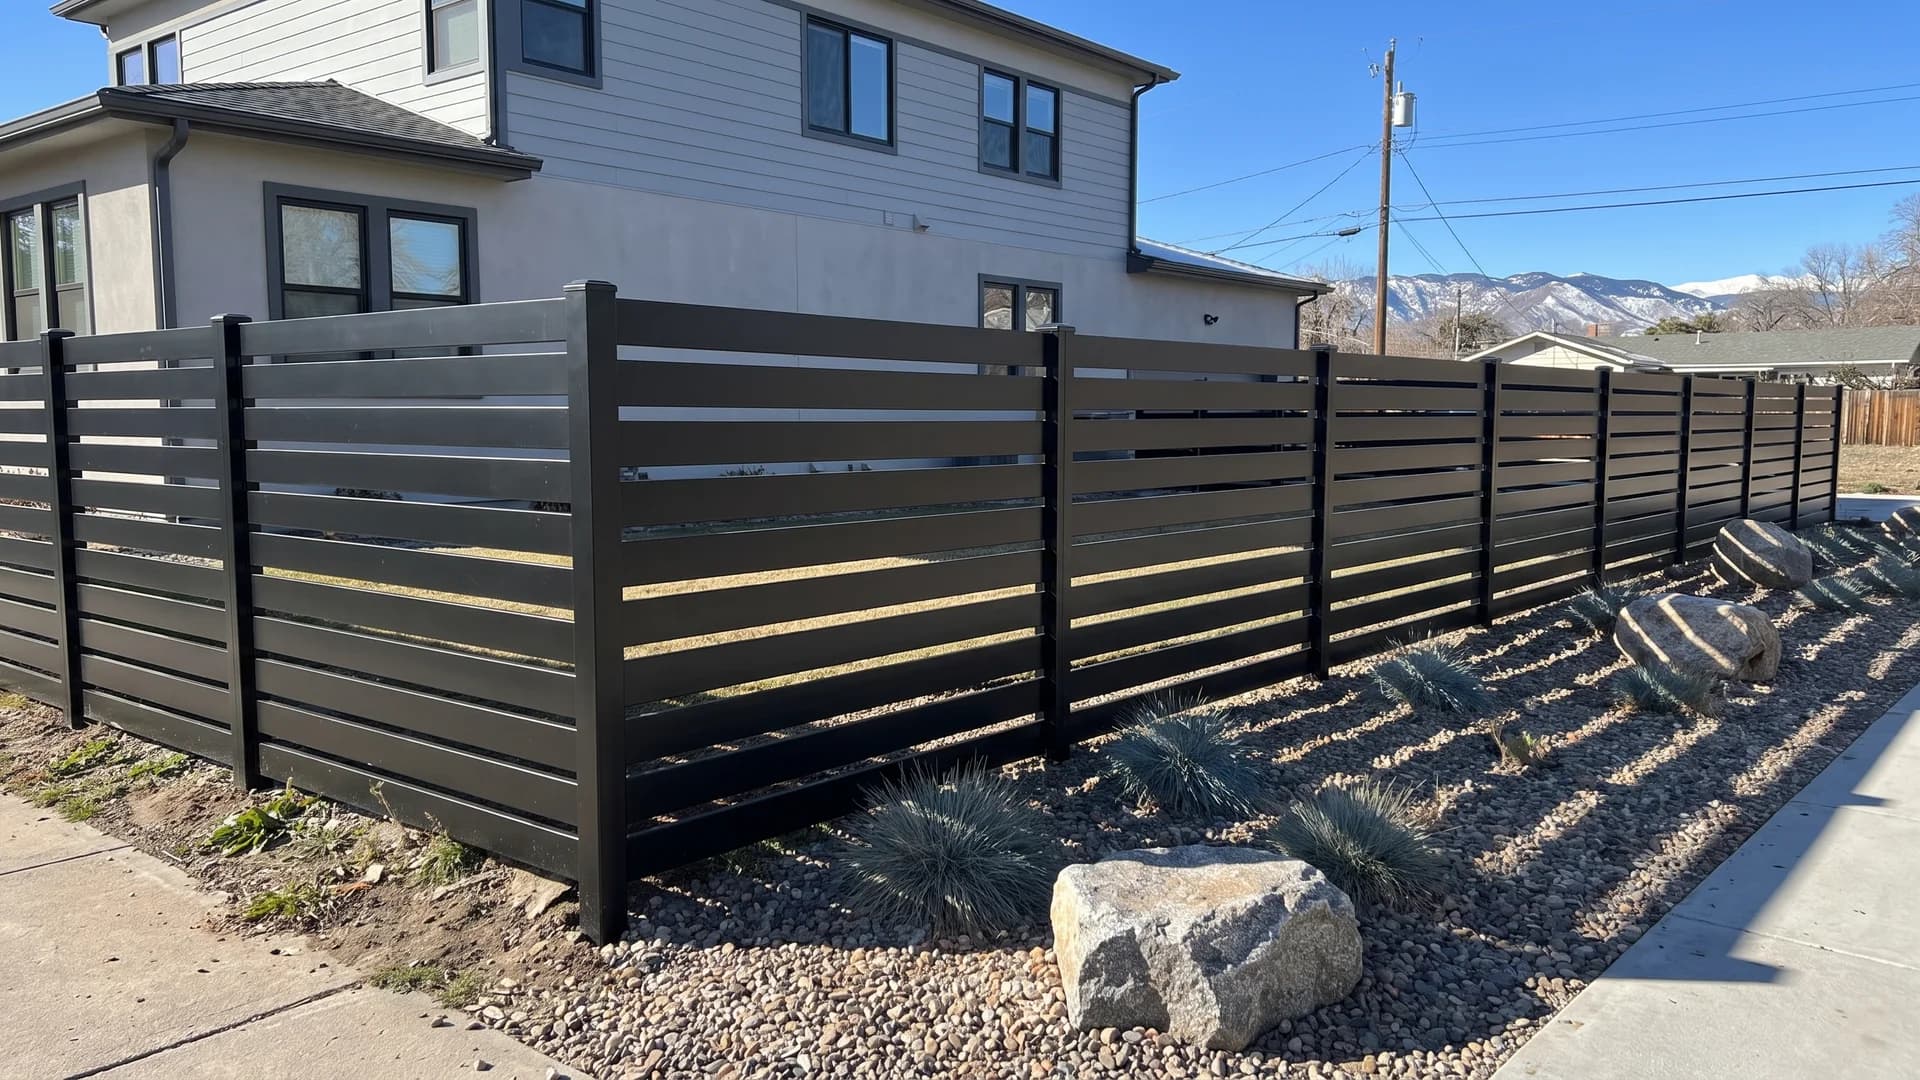
The gap is the design. At 1.5 inches you get privacy walking past and openness from inside, which is the balance most front gardens want. Powder-coated aluminium will not rust, so it suits places where steel would bleed onto the paving. It pairs naturally with xeriscaping, since neither asks anything of you again.
19. Mix black battens with raw timber posts
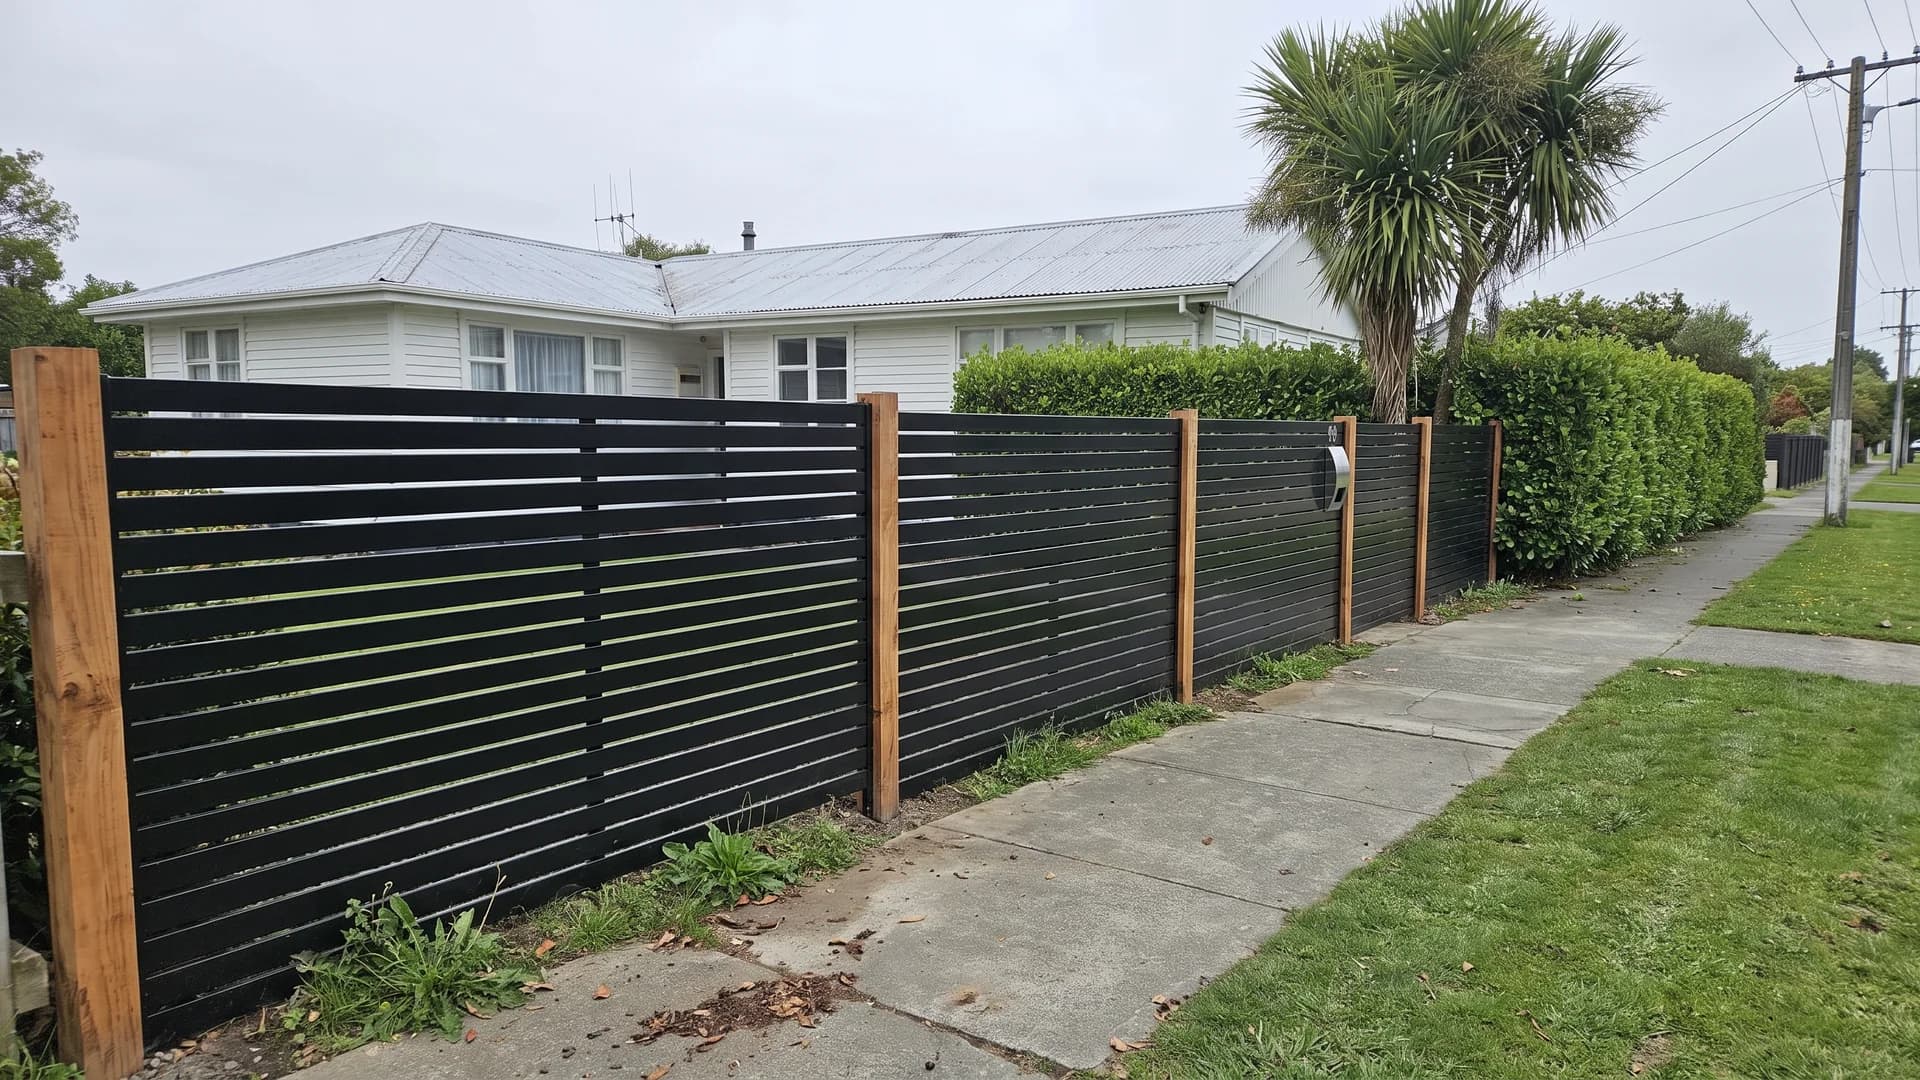
Metal battens spanning between chunky hardwood posts is the detail that saves an all-metal fence from looking commercial. The timber warms it and gives the eye something soft to land on. Use a genuinely durable species for the posts, ironbark or black locust rather than pine, because these posts are visible and cannot be hidden once they check and split.
20. Match a sliding gate to white slats
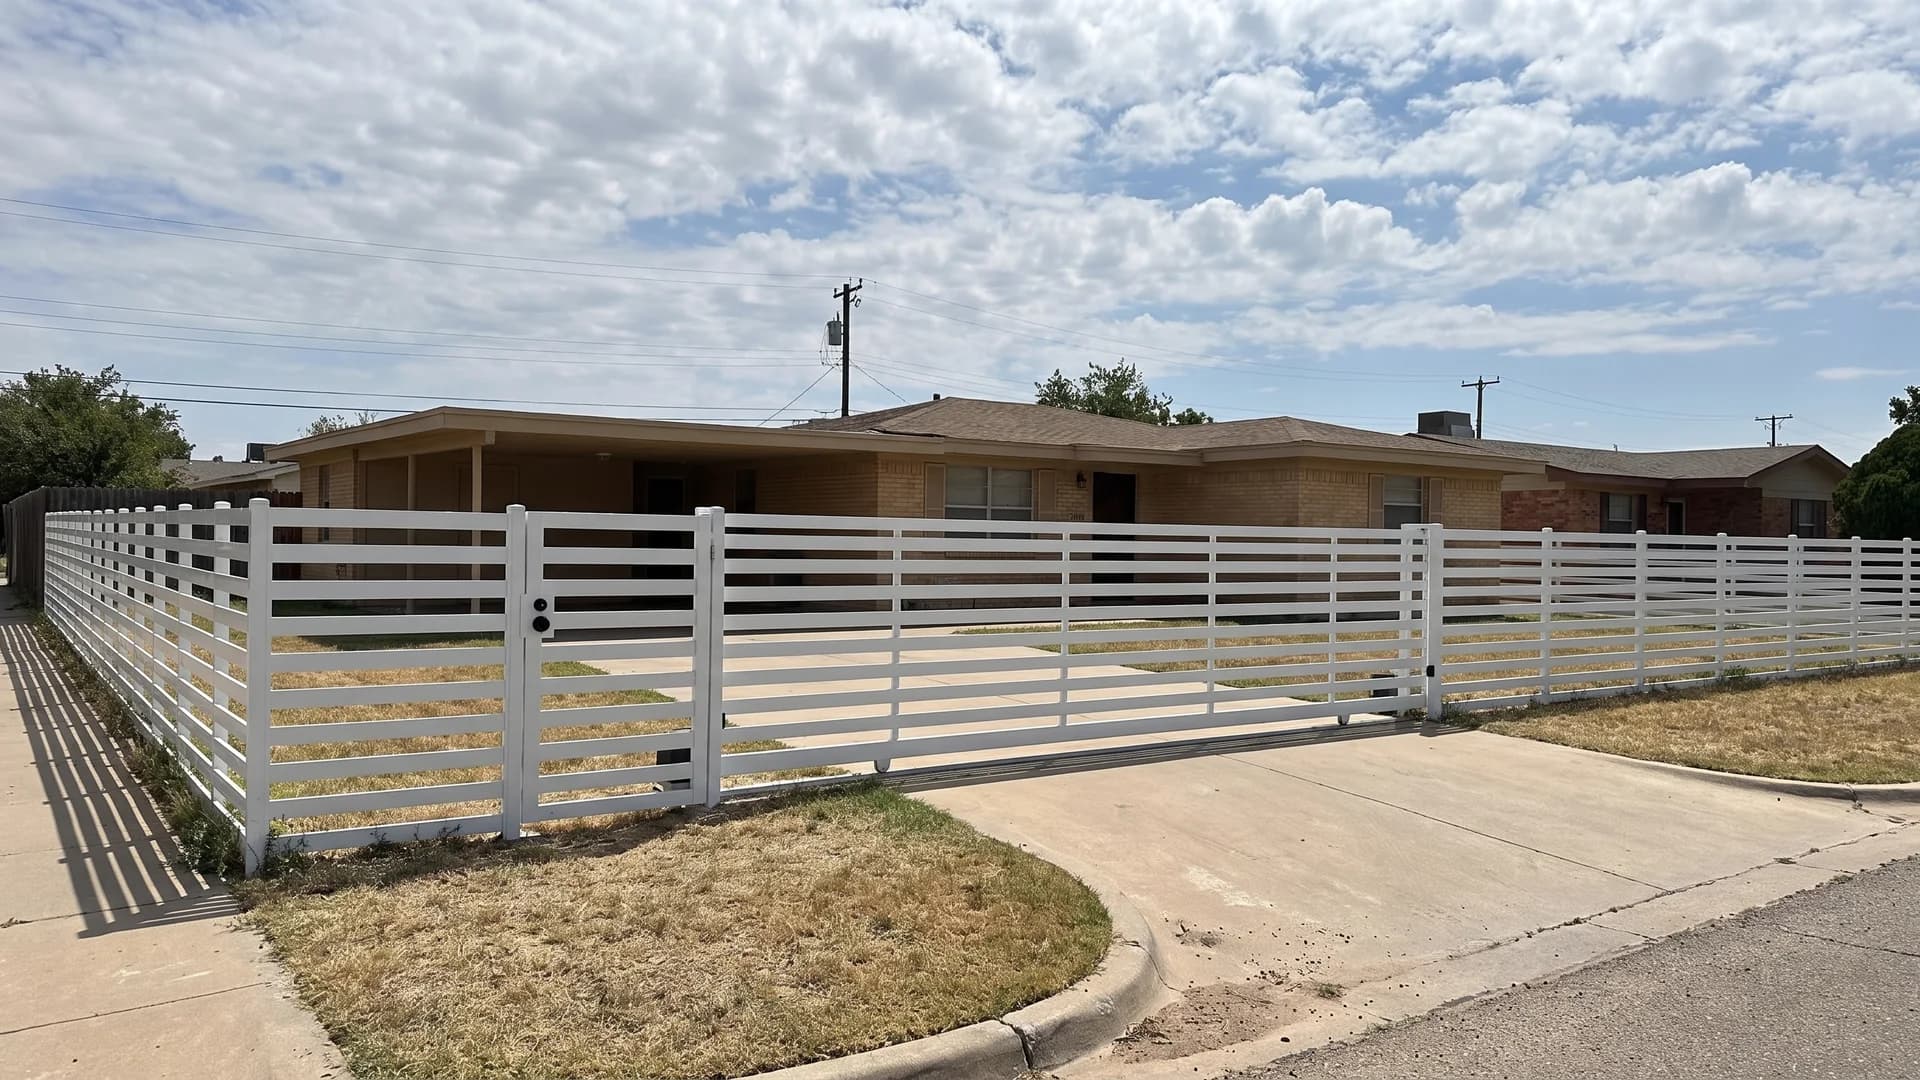
A sliding gate needs level ground and clear run-back space along the fence, roughly the width of the opening again. Where you have that, it beats a swing gate on a short driveway because nothing arcs into the parking space. Building the gate from the identical slat spacing is what makes the run continuous rather than a fence with a gate stuck in it.
21. Stack louver blades tight for privacy
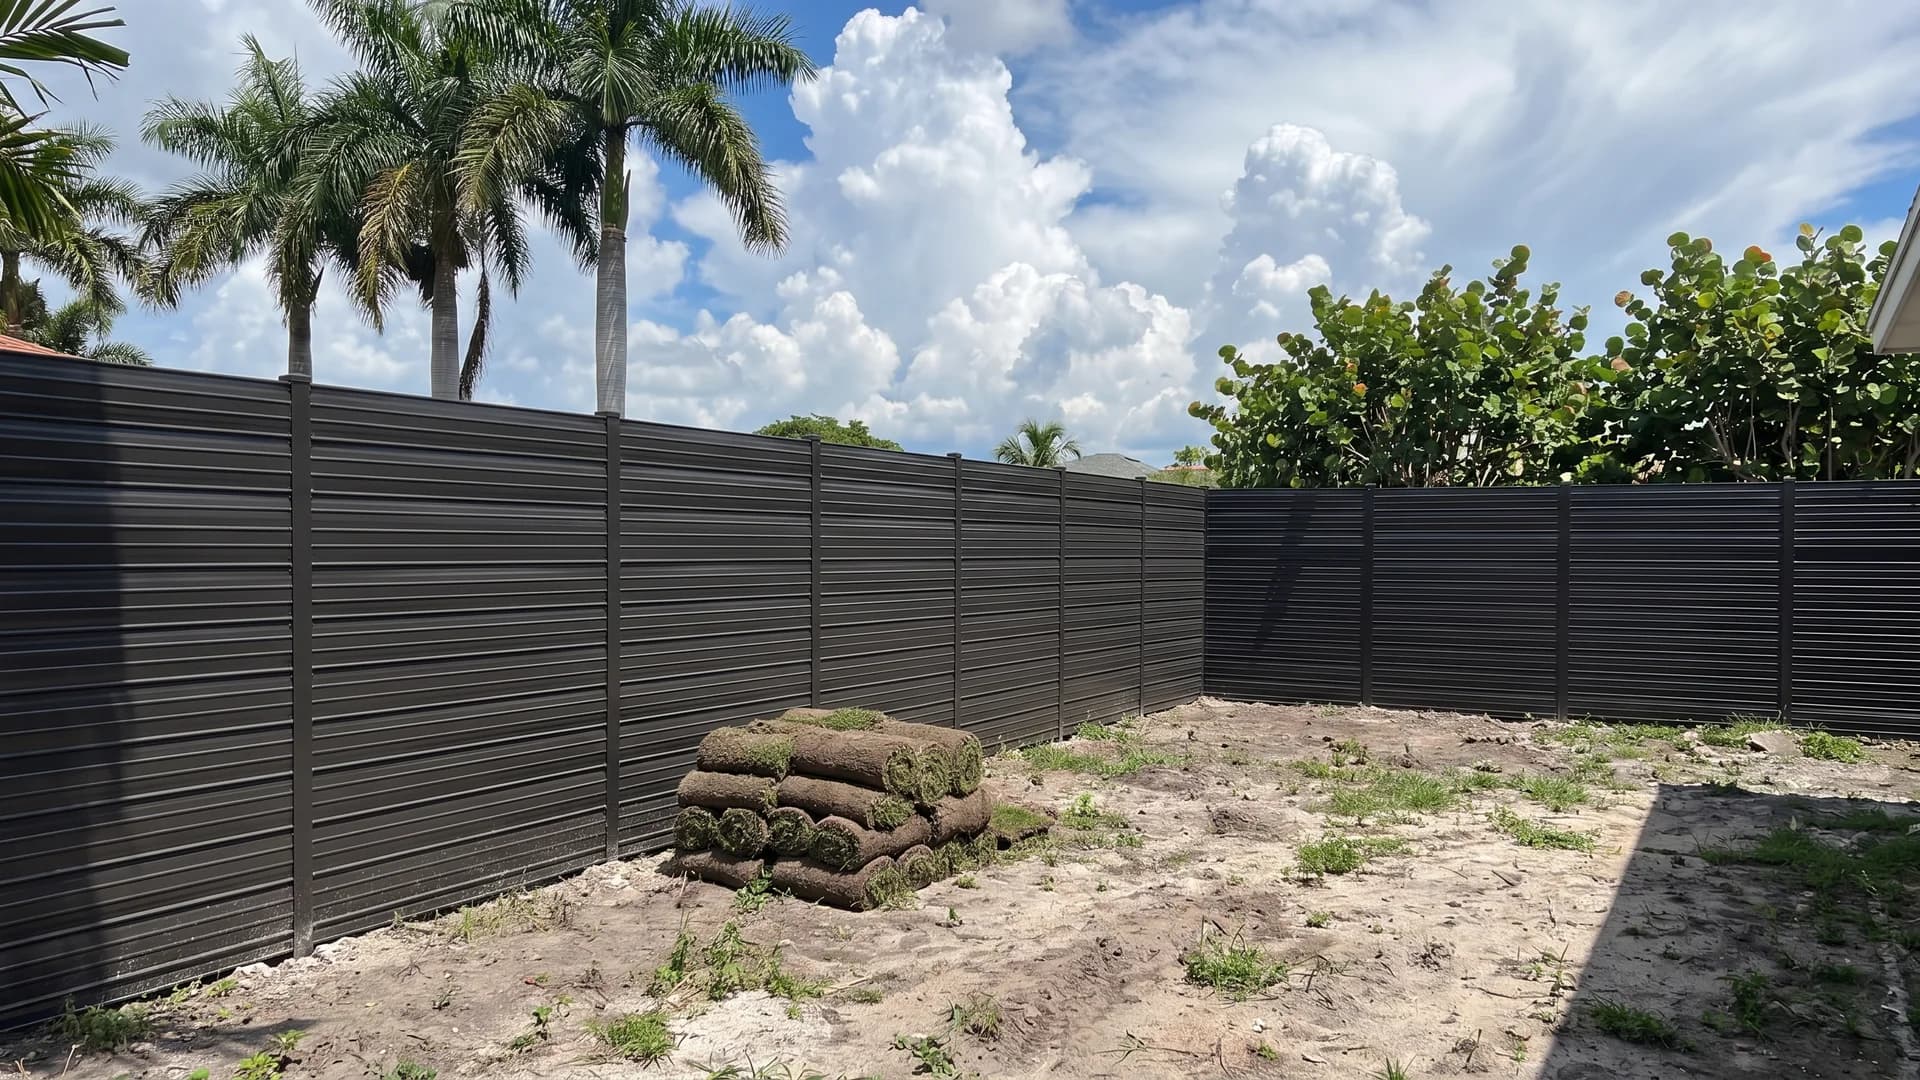
Narrow blades packed close give a fine ribbed texture and full privacy from any angle, with a fraction of the visual weight of a solid panel. Bronze and charcoal hide dust better than black in dry climates. Expect this to sit at the top of the metal fencing price range, often two to three times a wood fence per linear foot installed.
22. Angle the louvers to let wind through
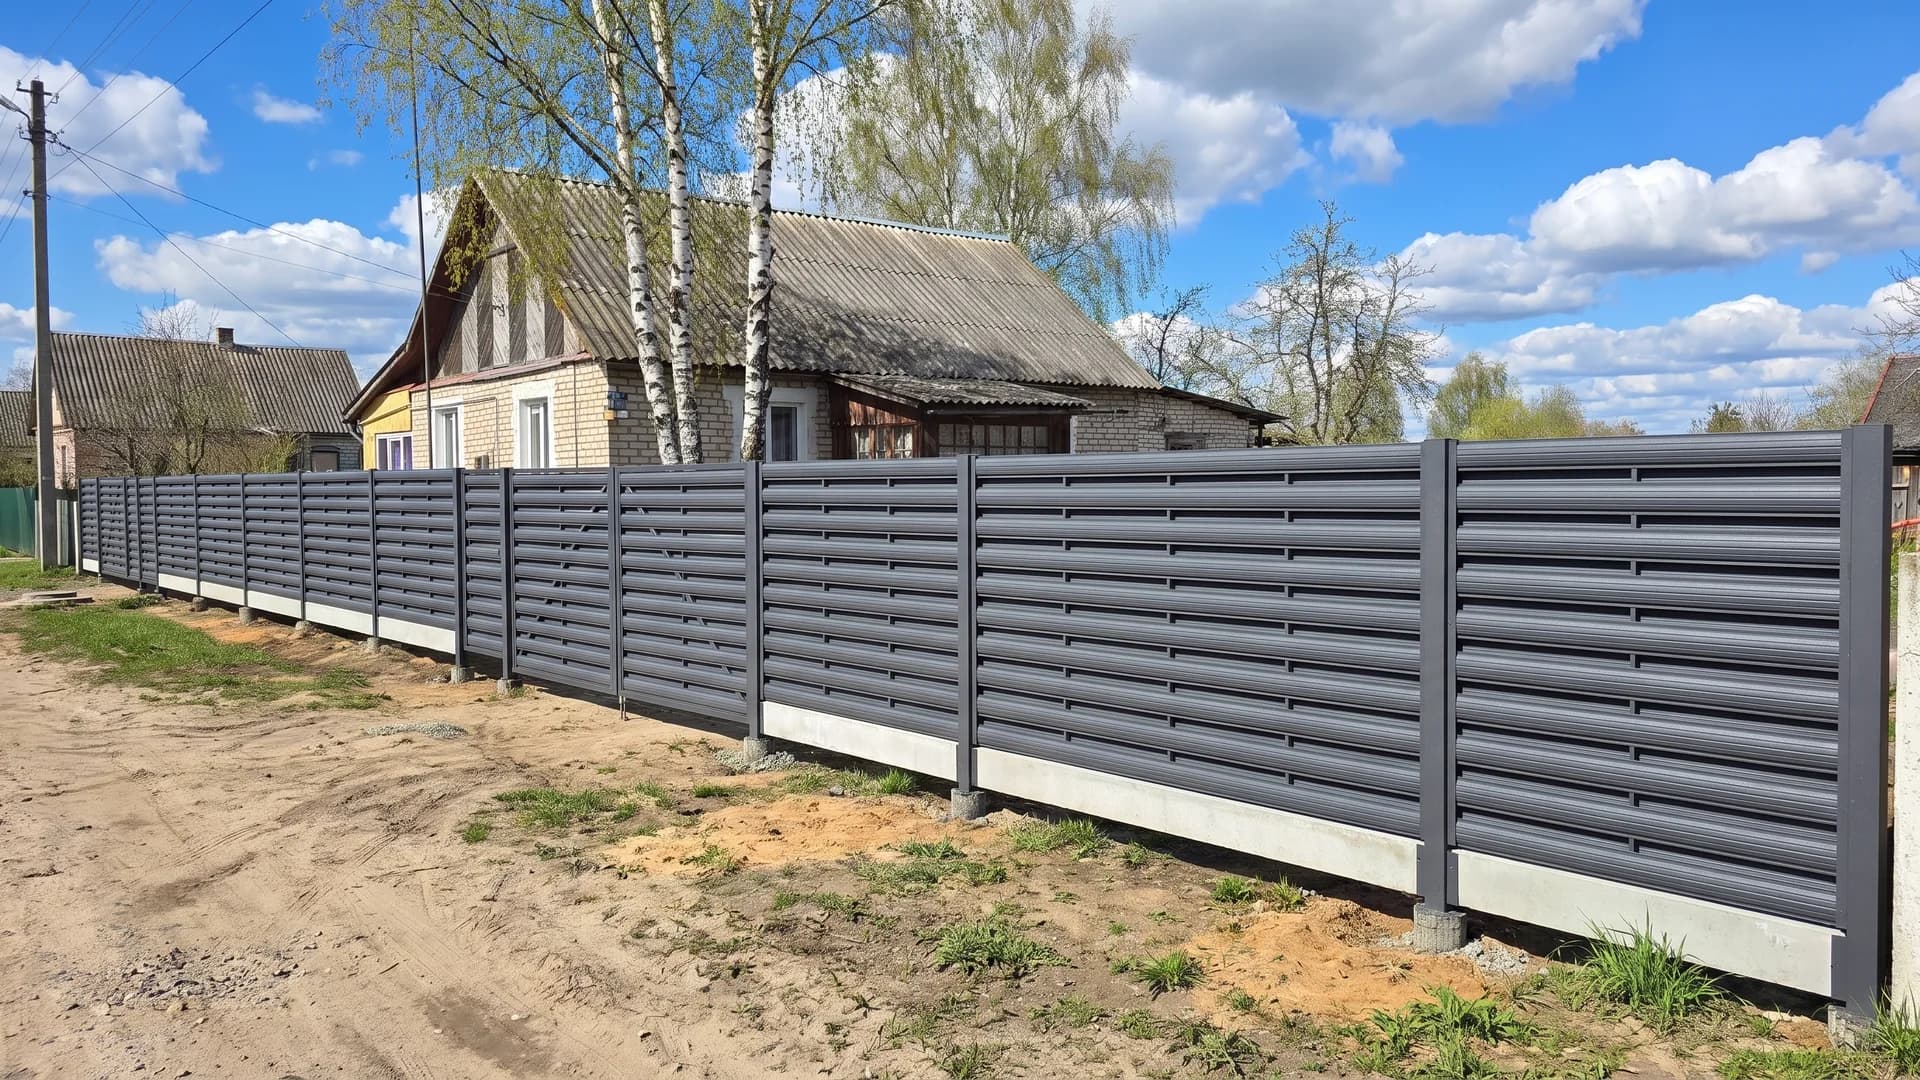
Angled blades block the view from straight on while leaving a clear air path between them. On a windy site that is a structural argument, not just a comfort one: a fence that breathes puts far less leverage on its footings. The concrete plinth along the bottom keeps steel out of wet soil, which is where these fences usually fail first.
23. Hide the side gate in the fence line
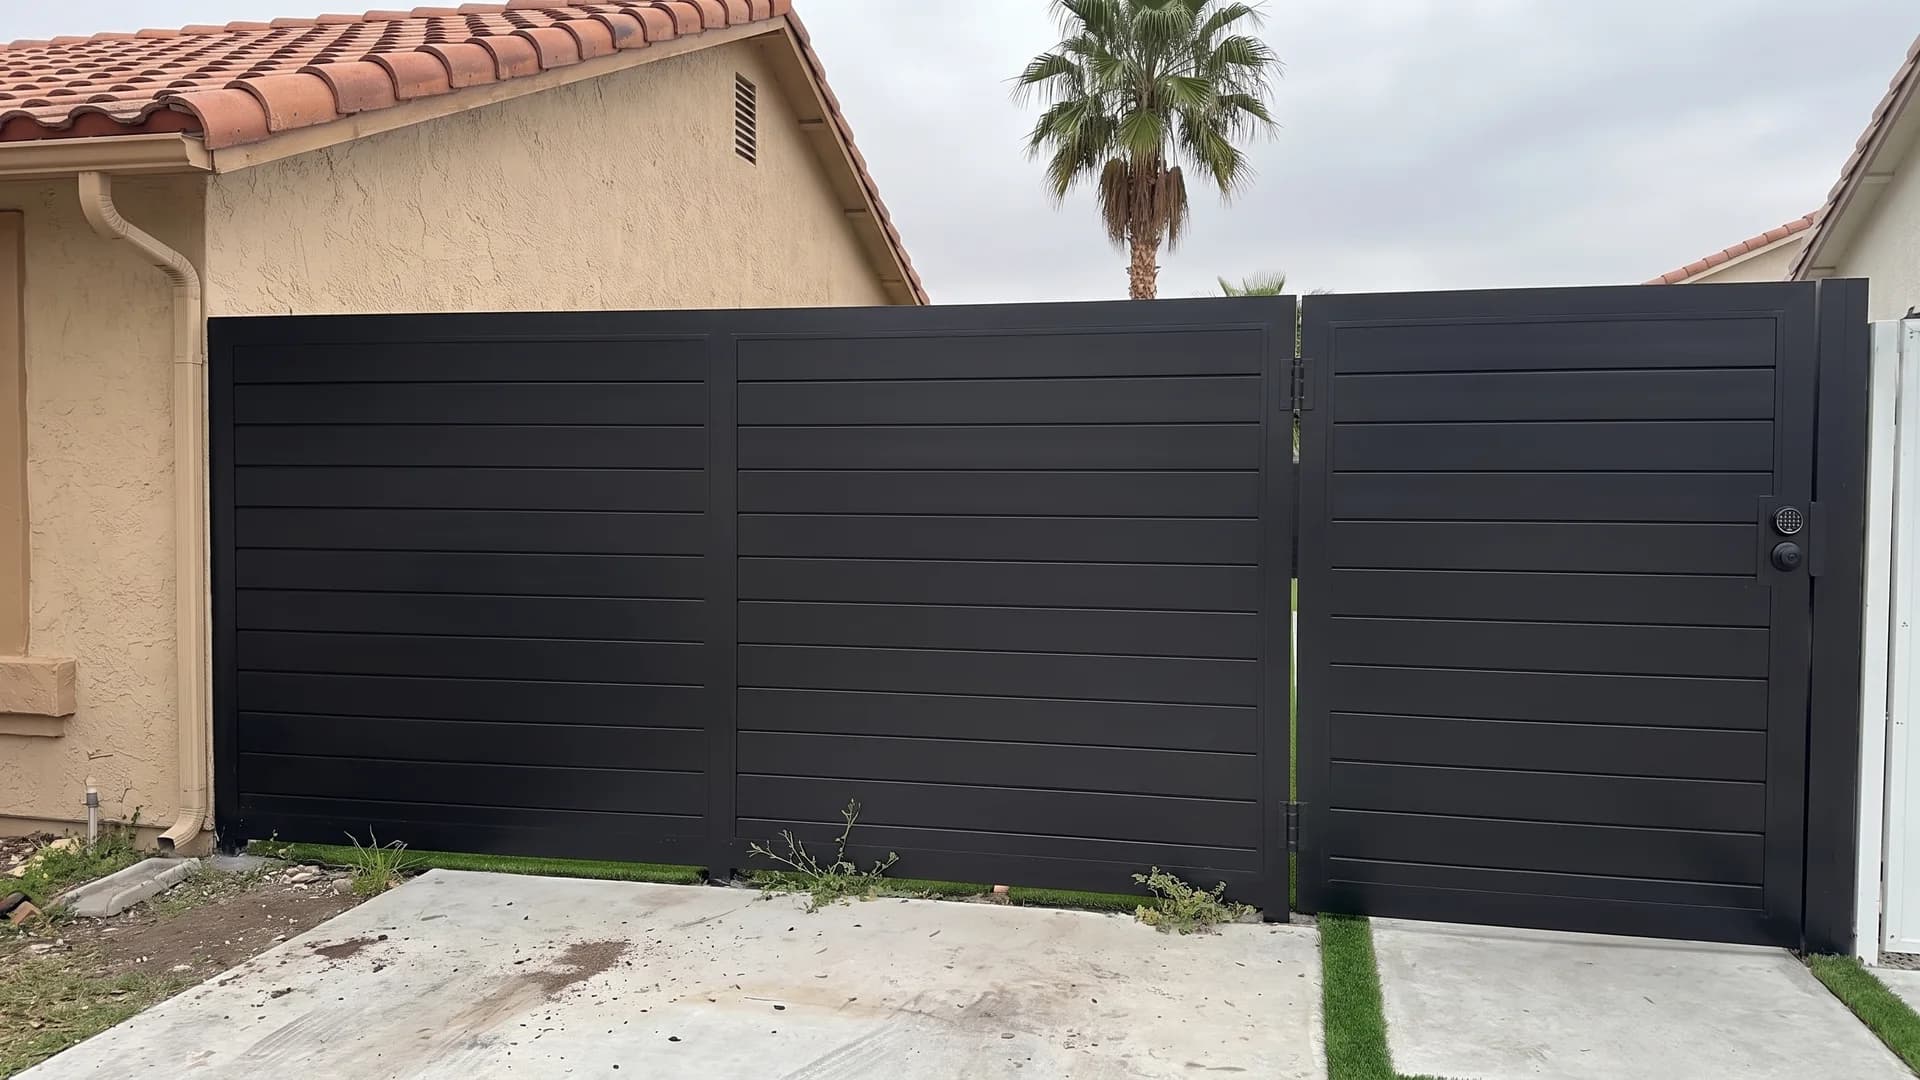
Solid panels with fine seams, a flush keypad lock, and hinges that are the only tell. When the gate is the same panel as the fence, the eye reads one clean wall. Worth knowing: a full-height solid metal gate is heavy, so it wants a properly set gate post, ideally steel, and three hinges rather than two.
24. Go dark green for a solid metal boundary
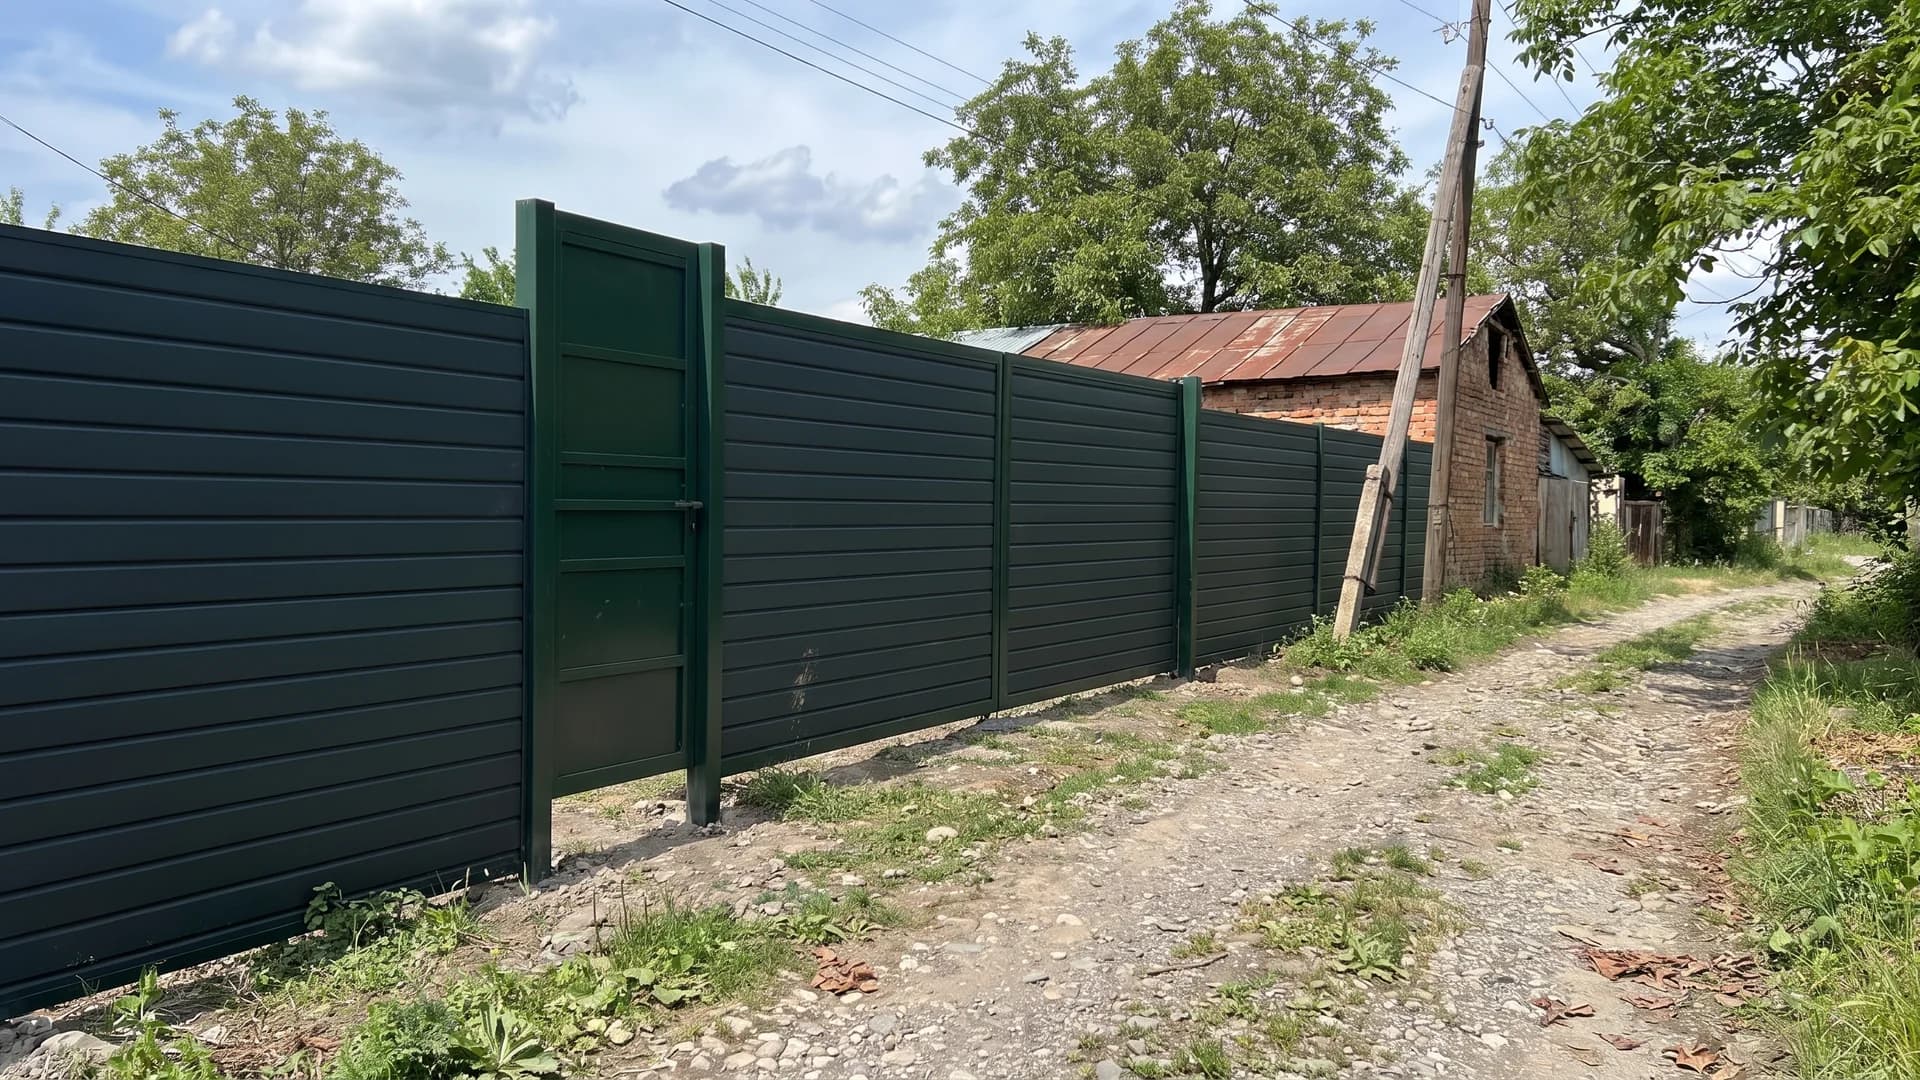
Ribbed steel siding is the budget end of metal fencing and it is everywhere in eastern Europe for good reason: it is fast, it is fully solid, and it costs a fraction of aluminium slats. Dark green disappears against planting in a way that grey and brown do not. Check the panel edges are hemmed, because cut steel edges are genuinely sharp.
Fences that sit on a wall or between pillars
25. Put slats on a concrete knee wall
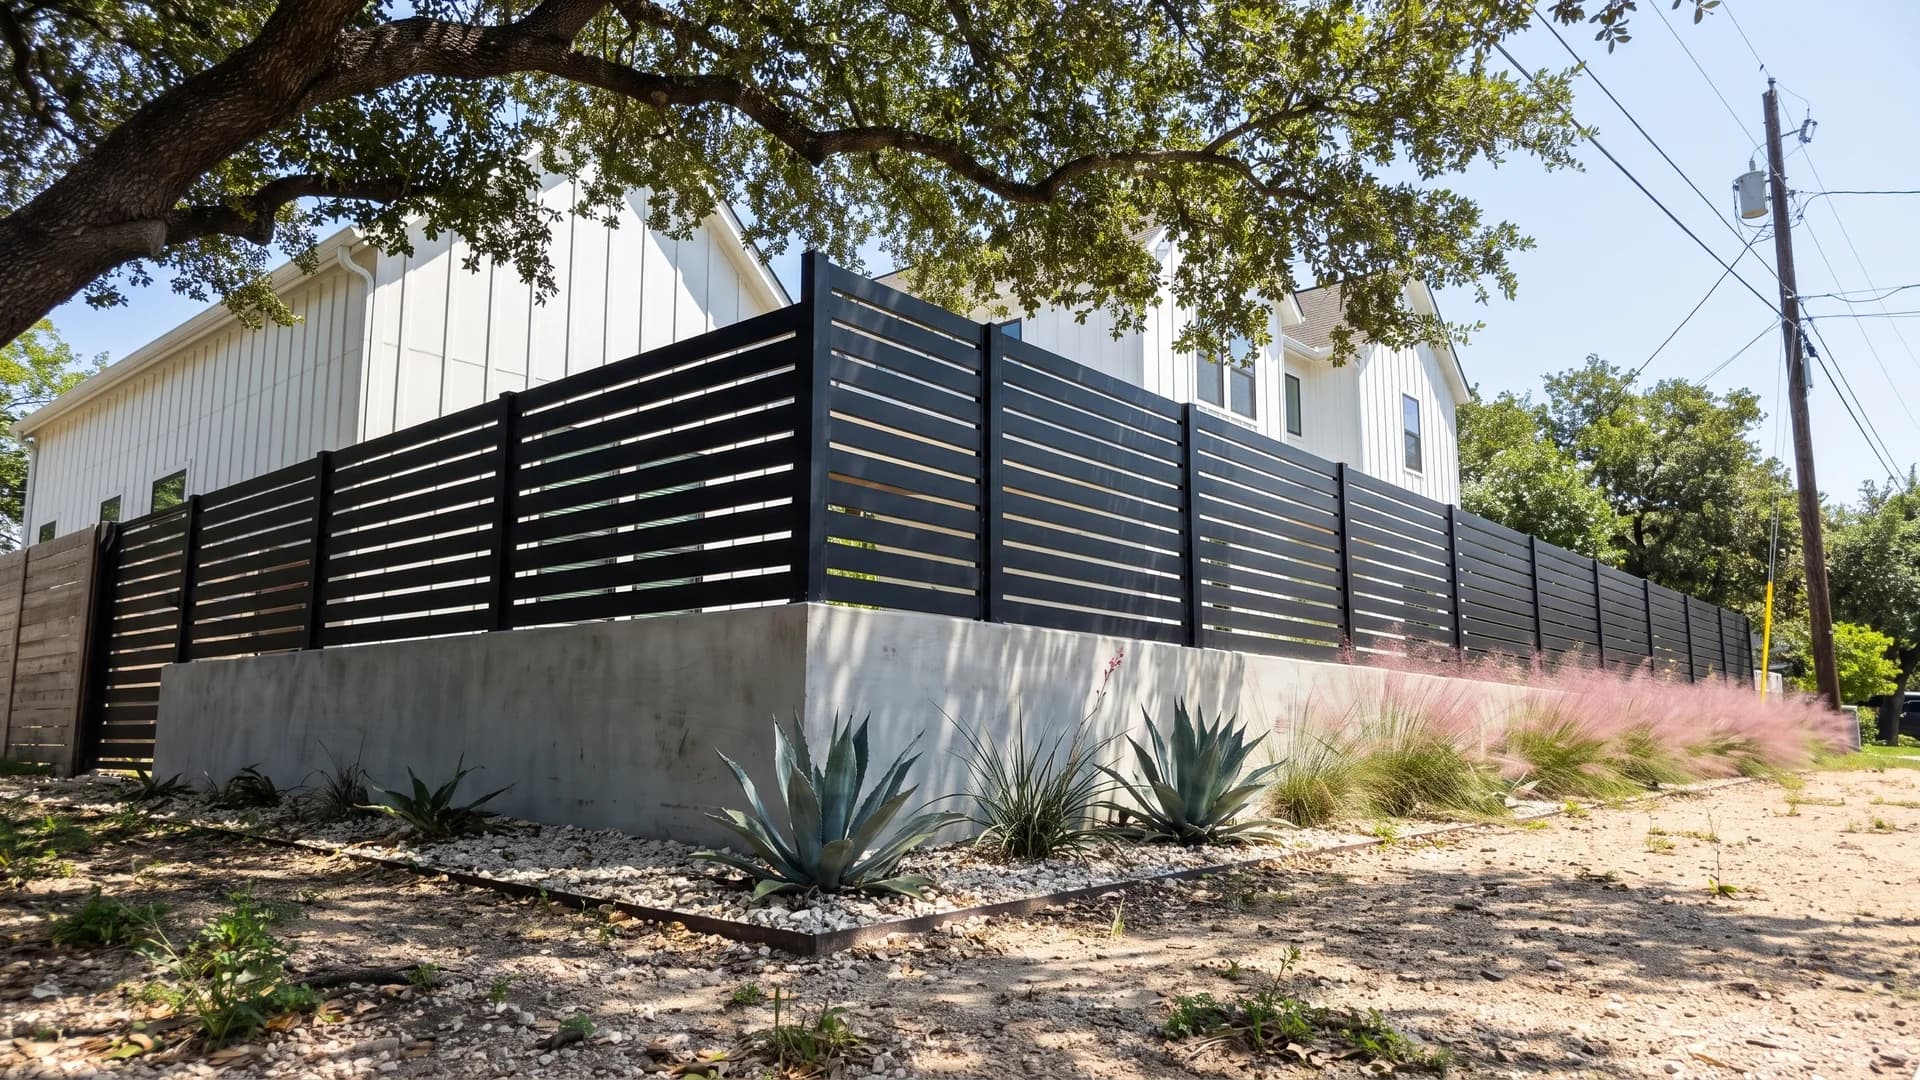
Two and a half feet of concrete, three feet of slats. The wall holds back the grade and takes the mower knocks, the slats do the screening, and you end up under the height a solid 6-foot fence would need a permit for in a lot of front yards. Board-formed concrete keeps a raw wall from reading like a foundation.
26. Bolt metal panels to a stone wall
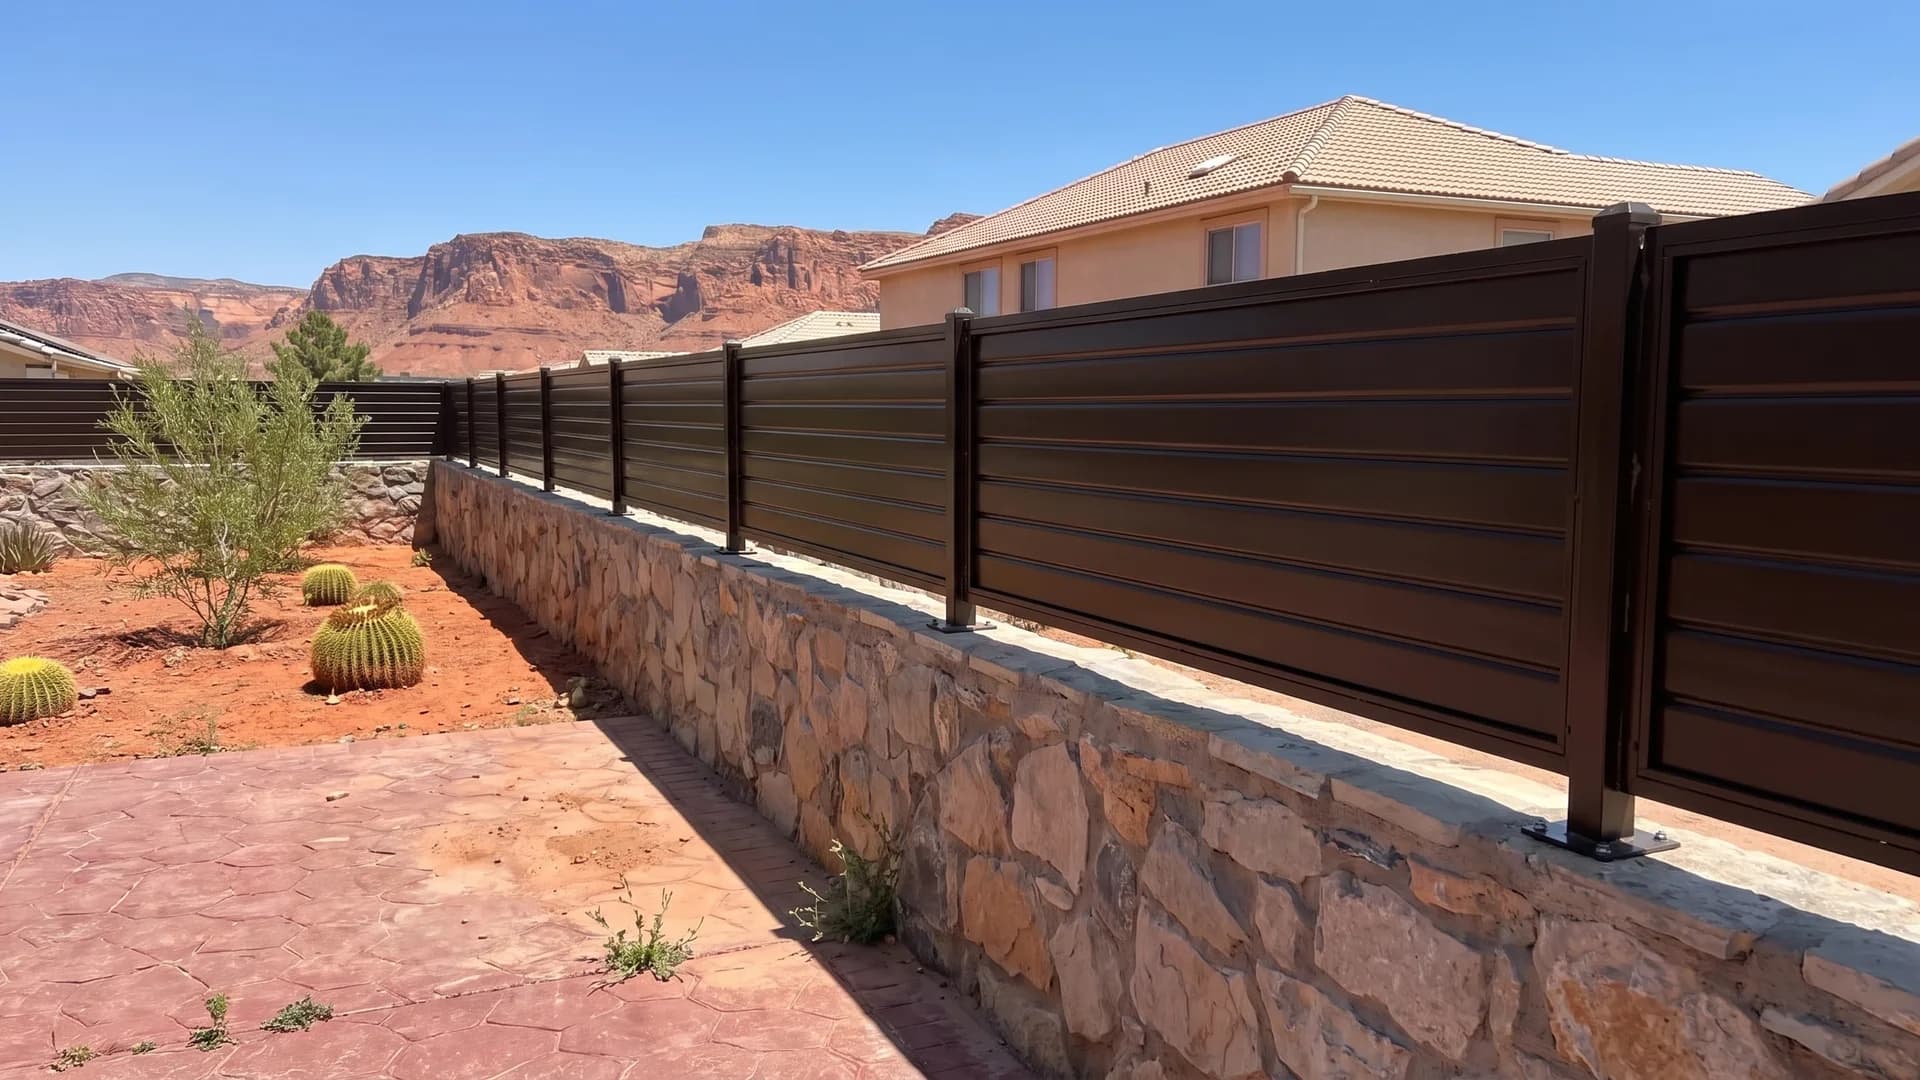
If you already have a retaining wall, it is the cheapest 3 feet of fence height you will ever get. Core-drill and epoxy the post bases into the cap stones rather than surface-fixing them. Bronze picks up the iron tones in sandstone, which is why it works here and cool grey would fight the rock.
27. Start composite above a block base
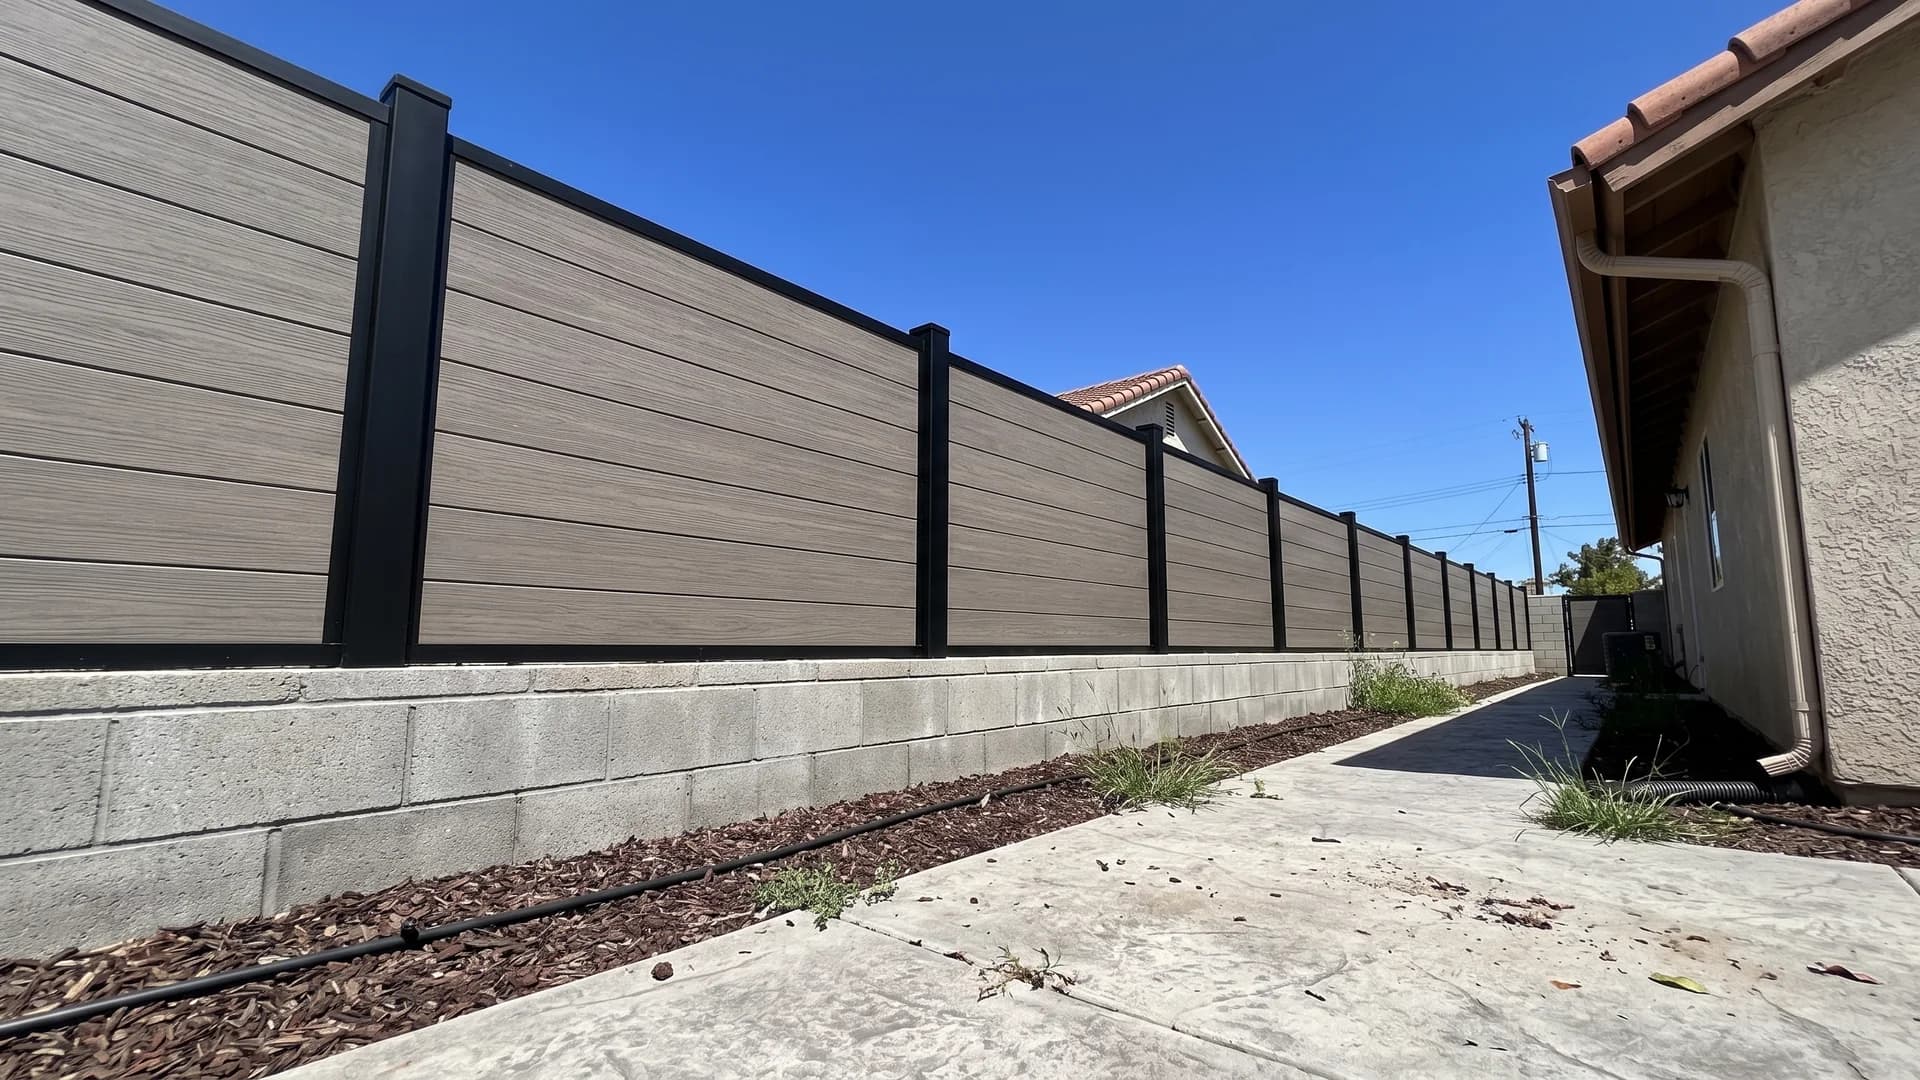
Starting the boards 18 inches up solves the detail that ruins most fences, which is the bottom board sitting in wet soil and mulch. A block base takes the string trimmer, the splashback, and the irrigation overspray. It also means a shorter fence panel is doing the work, so the posts see less wind load.
28. Fill the bays between block pillars
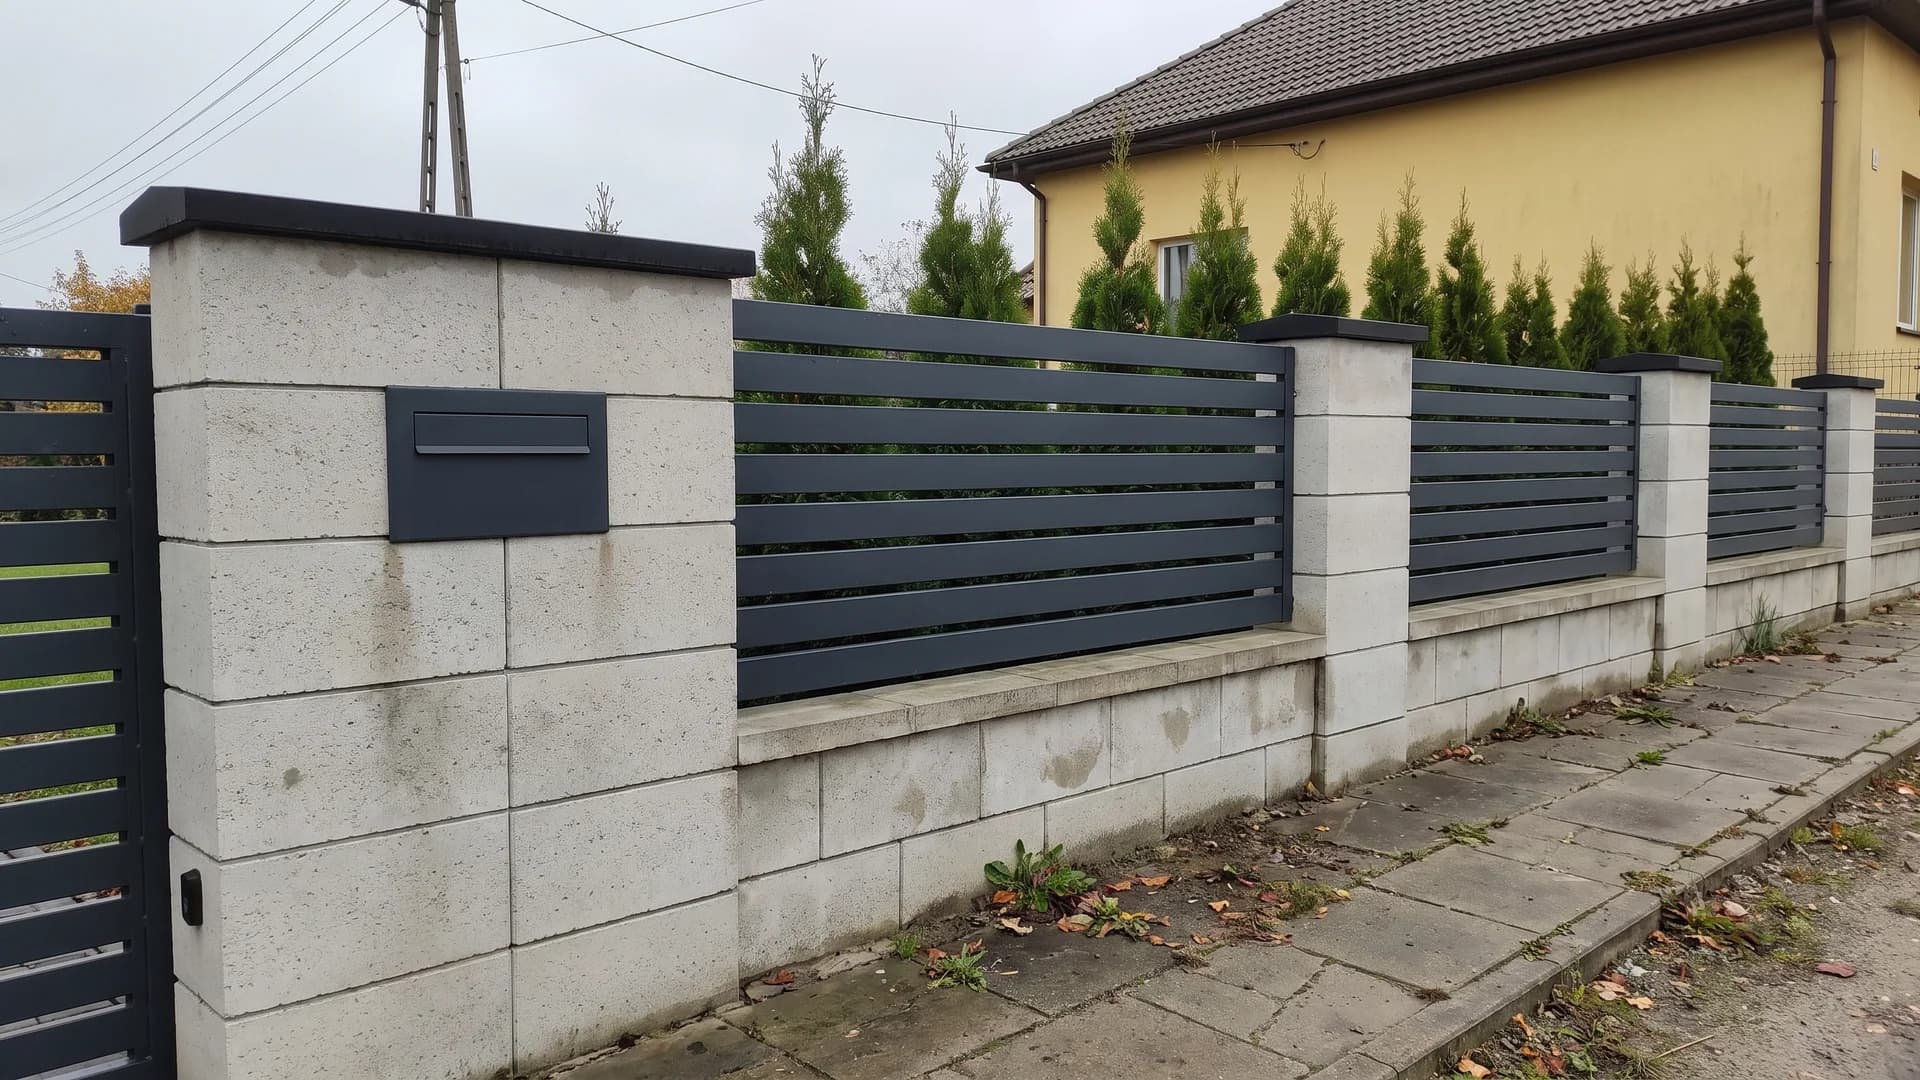
Masonry pillars every 8 feet with metal infill between them is the standard European street boundary, and it solves a problem American fences often ignore: what happens where the fence meets the driveway, the mailbox, and the meter. The pillars absorb all of it. Split-face block gives texture without the cost of real stone.
29. Set wood slats between stucco pillars
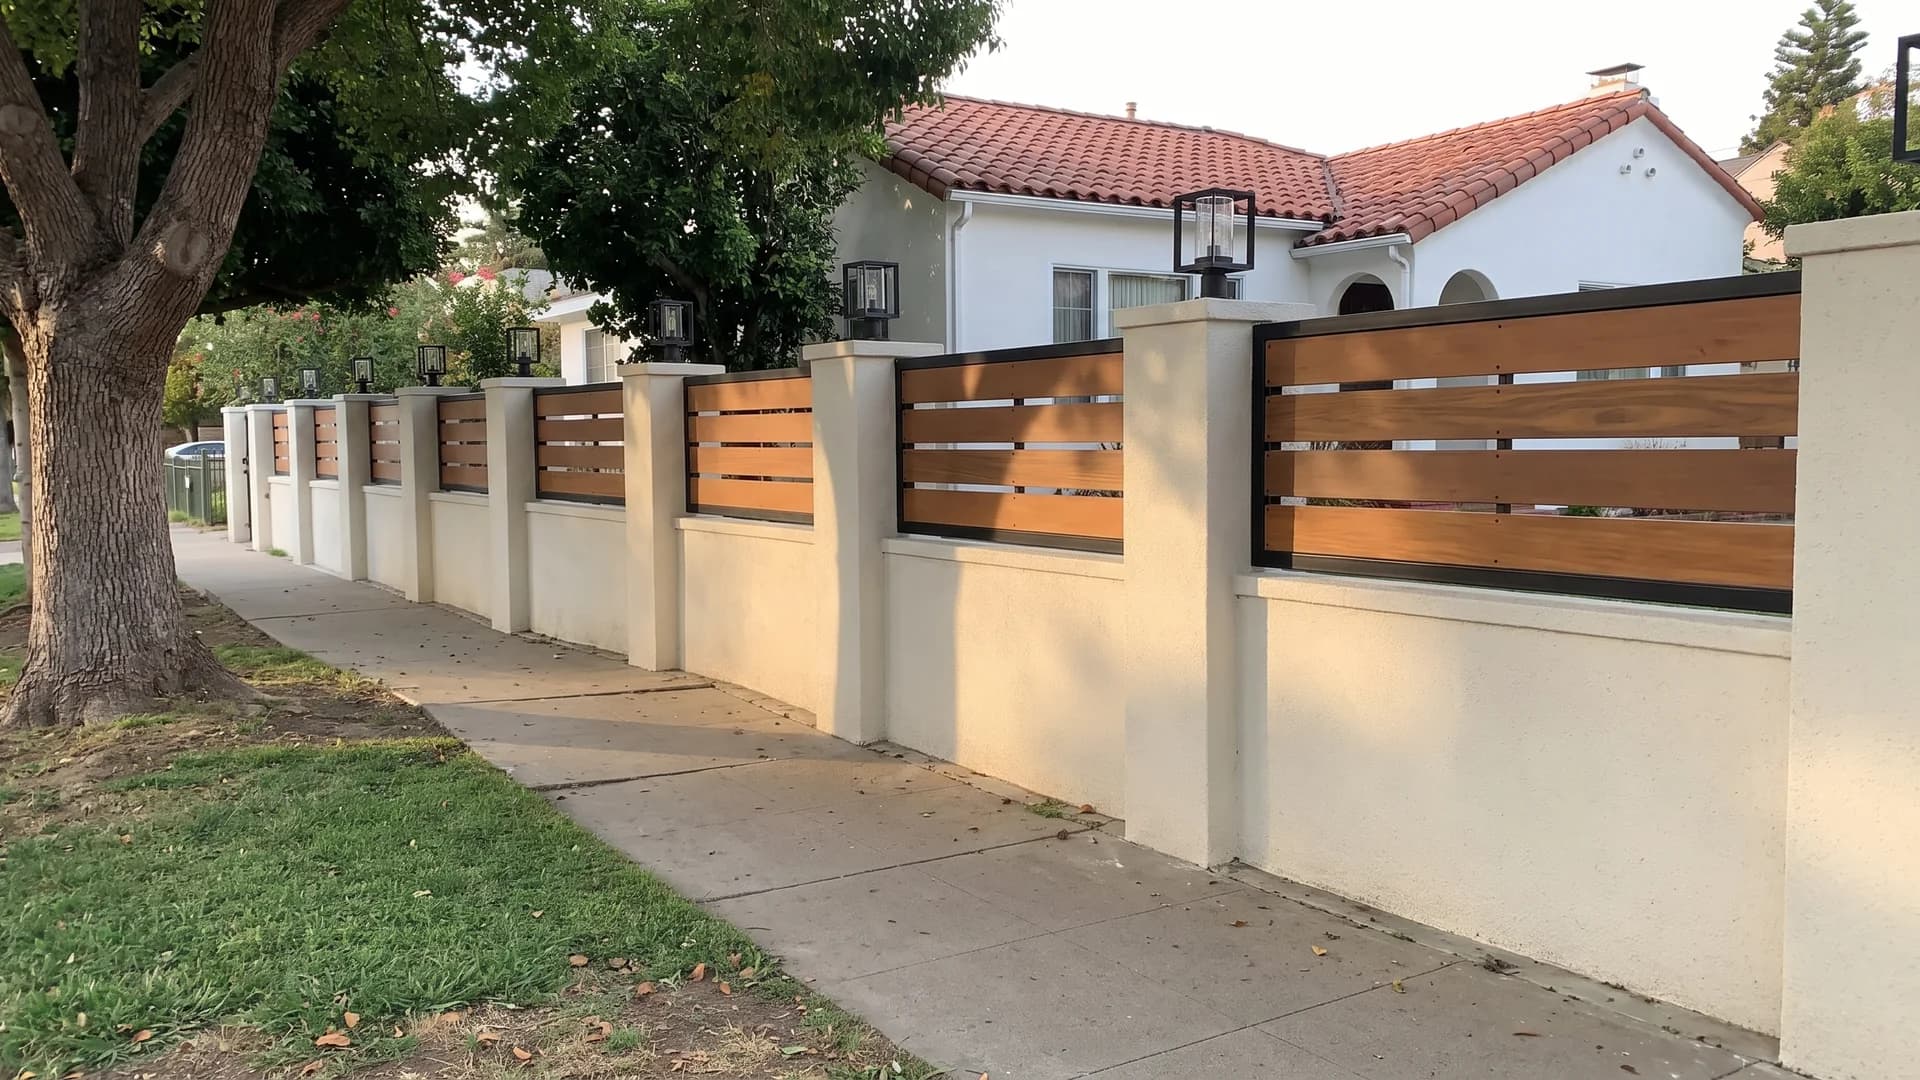
Cream stucco, black steel frames, honey hardwood slats, lanterns on the pillar caps. It is the most expensive build on this list and the one that most changes a house's curb appeal. The rendered knee wall between pillars hides the level changes along a sloping sidewalk, which is where a plain fence would show every step.
30. Drop slat panels into a rendered wall
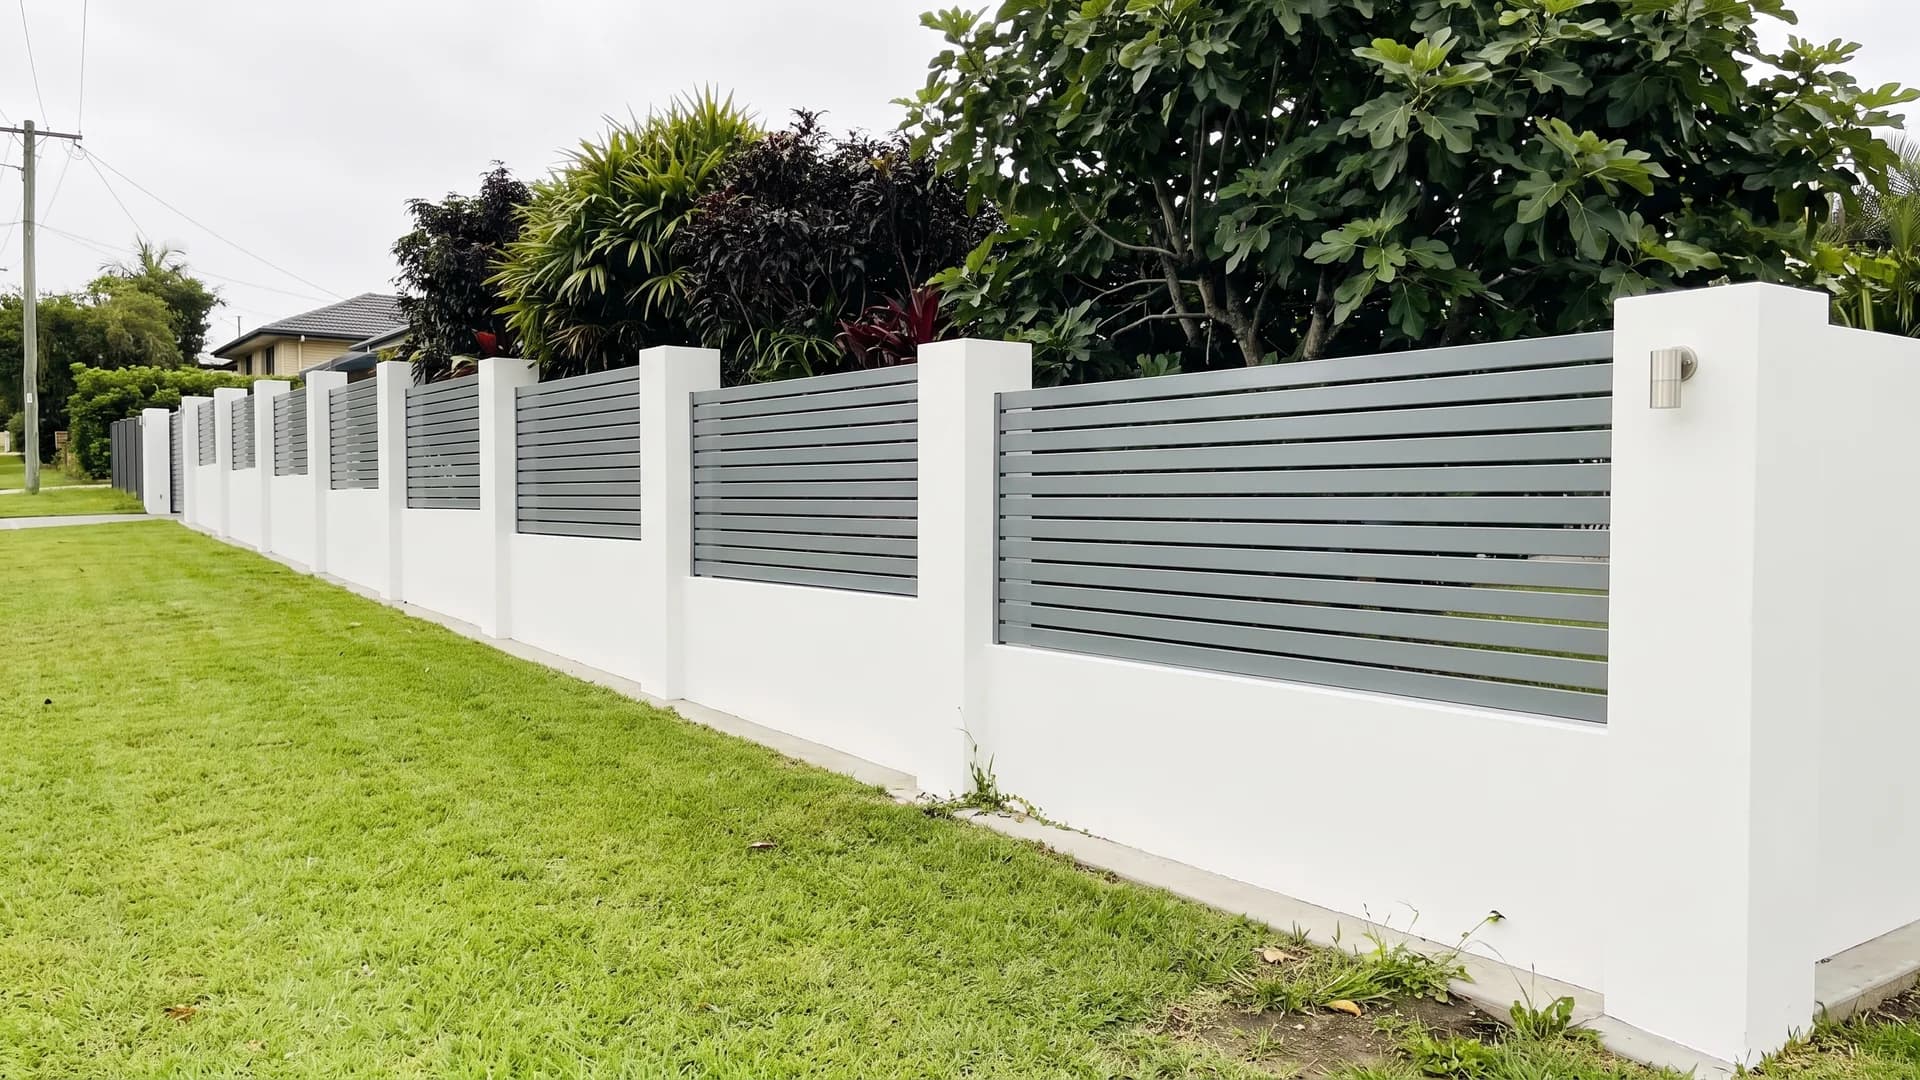
A full-height rendered wall would feel like a compound. Cutting slat panels into the upper half keeps the mass at ground level and lets light through above it. Render needs a proper drainage detail behind it and a bit of upkeep, so budget for a repaint every 7 to 10 years depending on your climate.
Details that change the whole run
31. Keep it low and let a hedge finish it
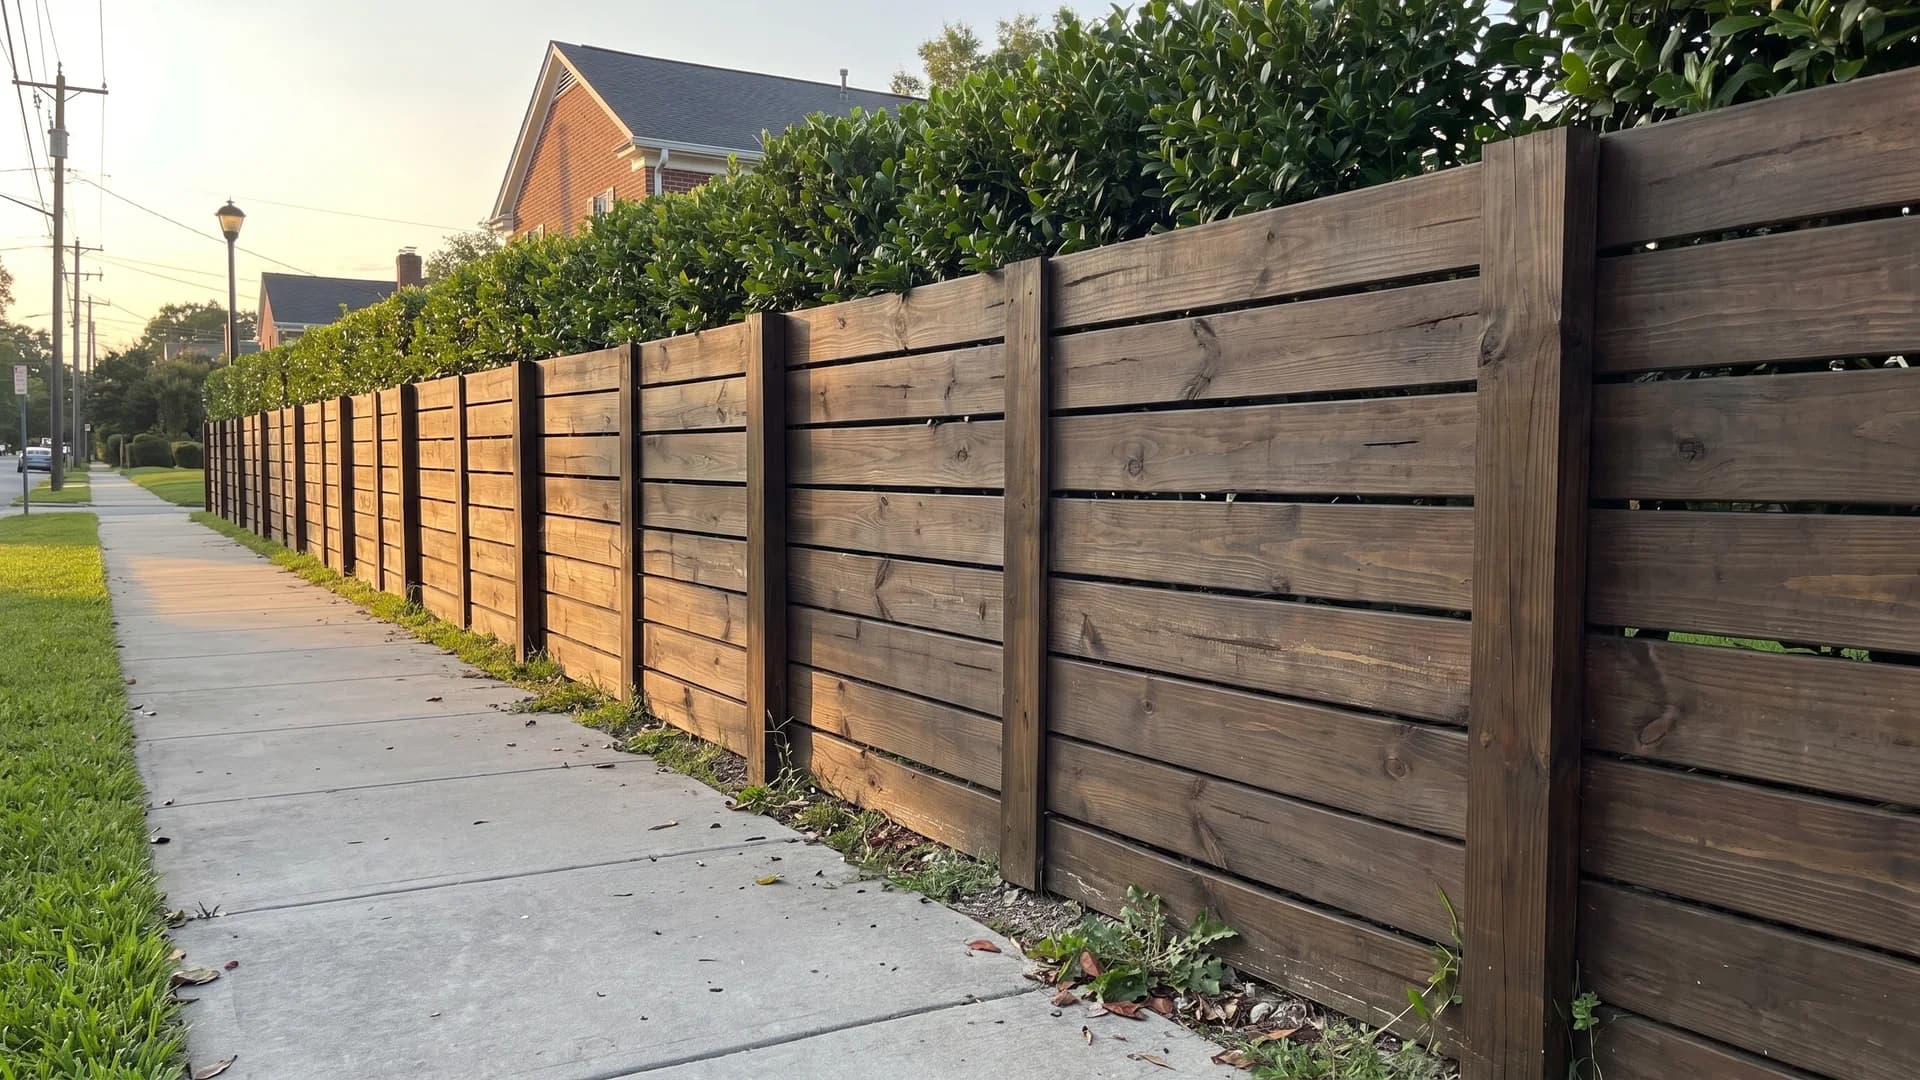
A 3.5-foot fence with a hedge growing 2 feet above it gets you 5 feet of screening while staying inside a front-yard height limit, because the code almost always measures the structure. The fence gives you privacy immediately and the hedge fills in over three or four seasons. Plant the hedge 18 inches off the boards so air can move behind it.
32. Build Venetian slats at two heights
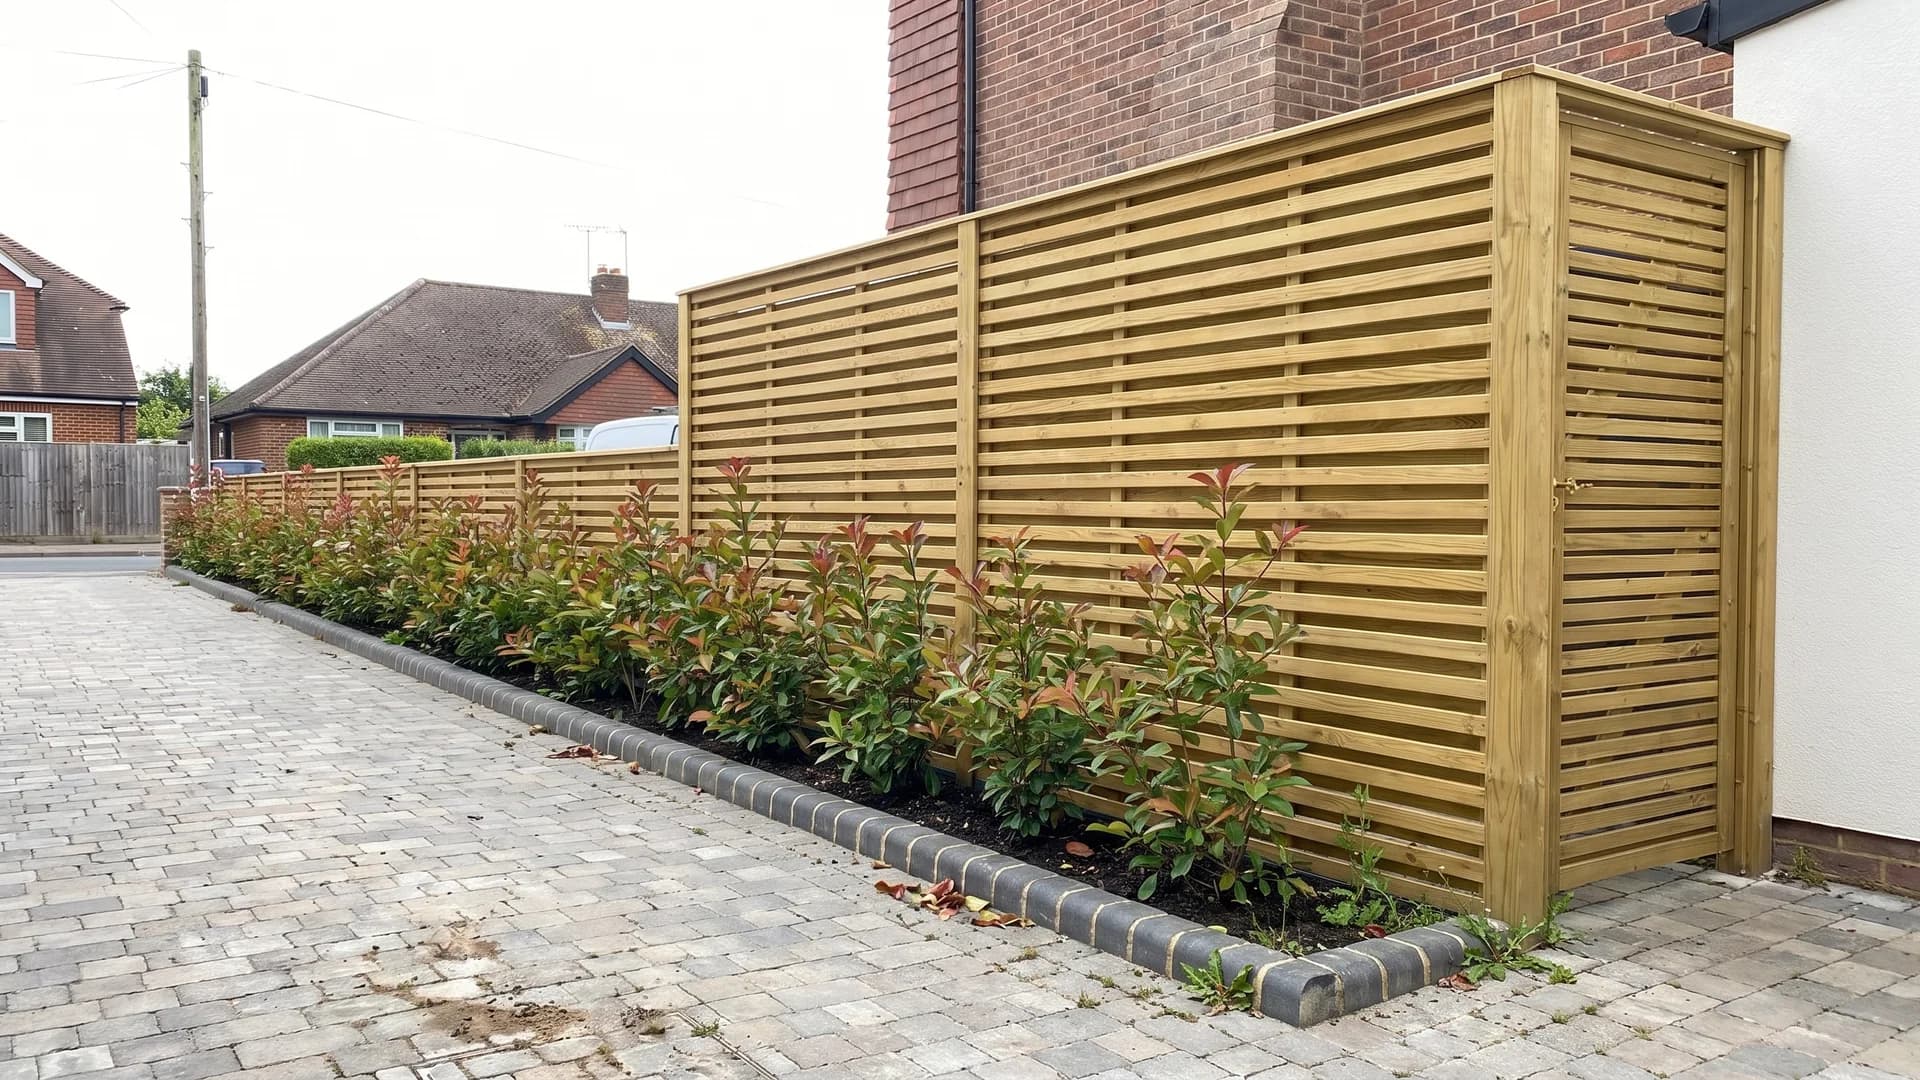
Running 4 feet along the front and stepping up to 6 feet where the fence turns beside the house gives privacy exactly where you sit and keeps the street frontage open. Slatted panels also stay light enough for one person to lift into place, unlike solid 6x6 panels, which is worth something on a DIY install.
33. Add a laser-cut panel above the boards
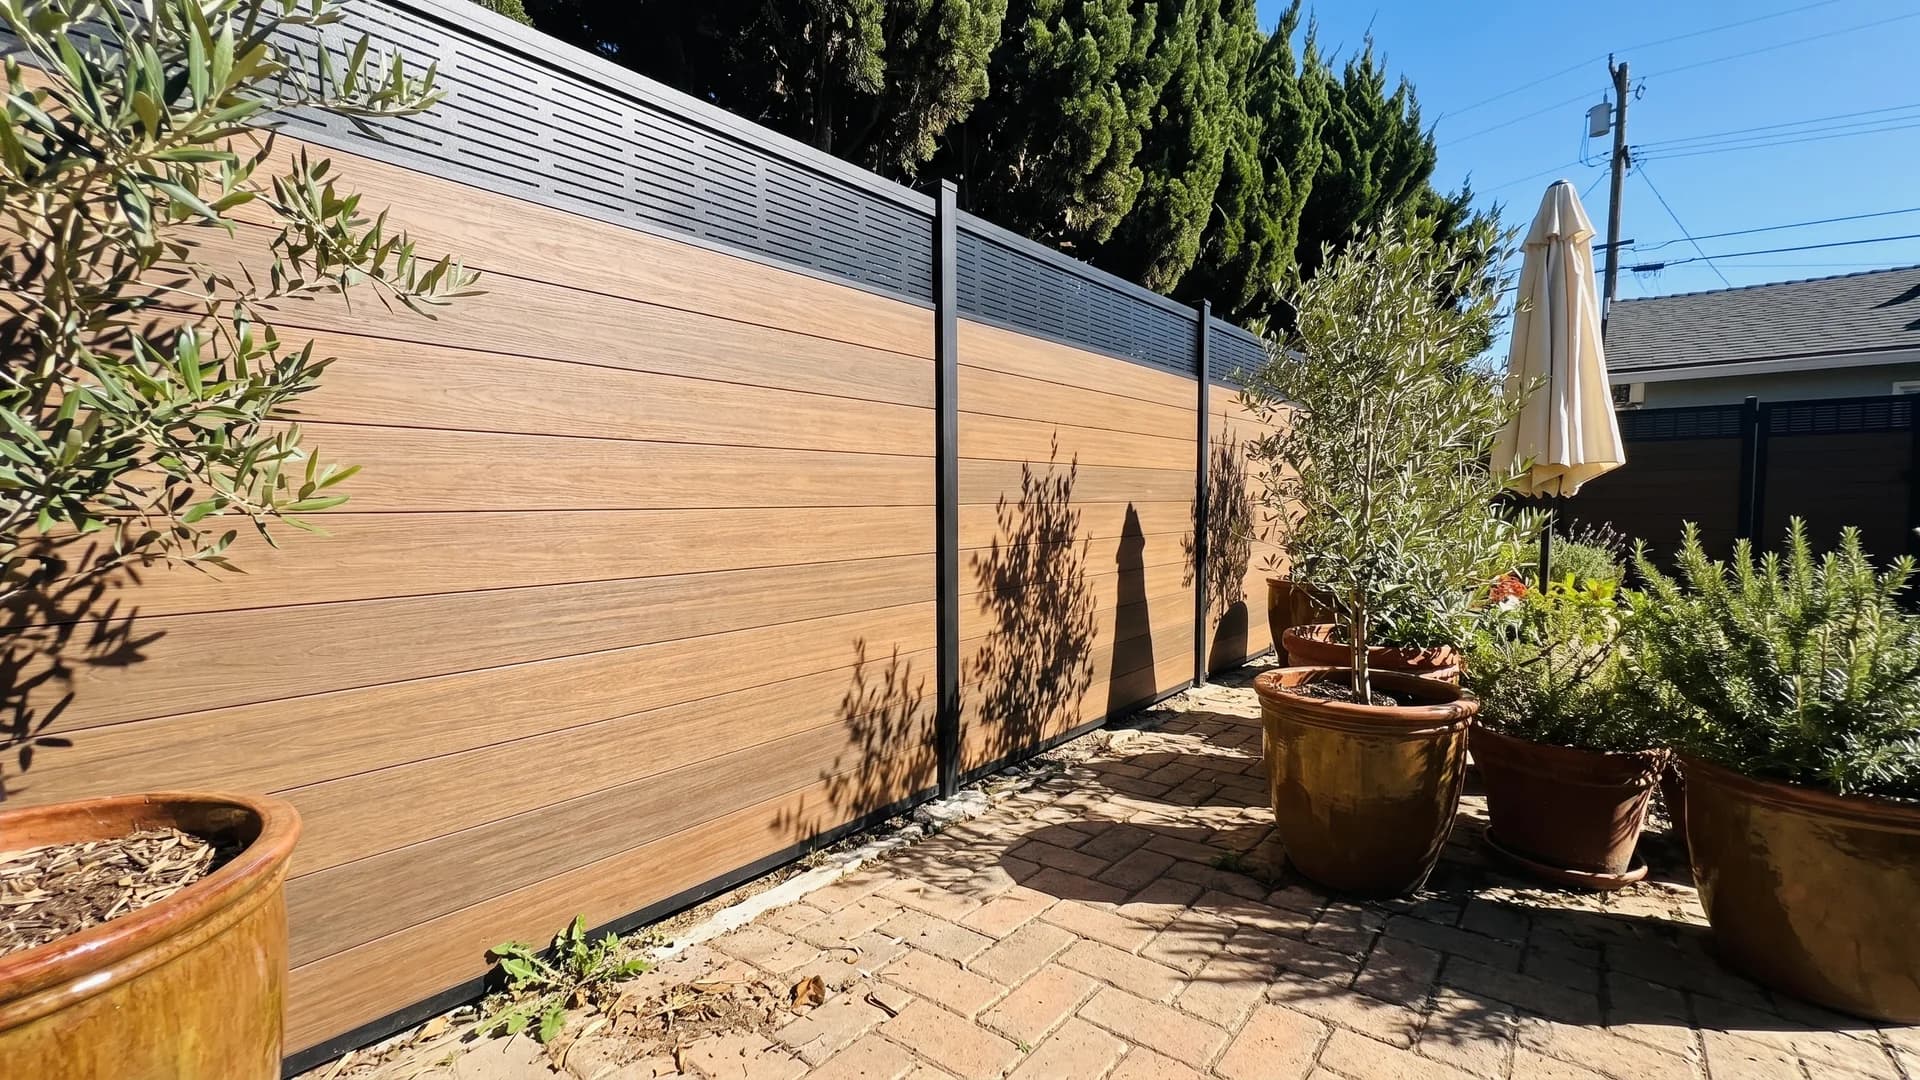
Solid boards to about 5 feet, then a 2-foot perforated metal topper. You gain the height without gaining the weight or the wind load, and evening light coming through the pattern gives the courtyard something to look at. Pick a fine linear cut over a busy motif unless you want the fence to be the main event.
34. Step the panels down a slope
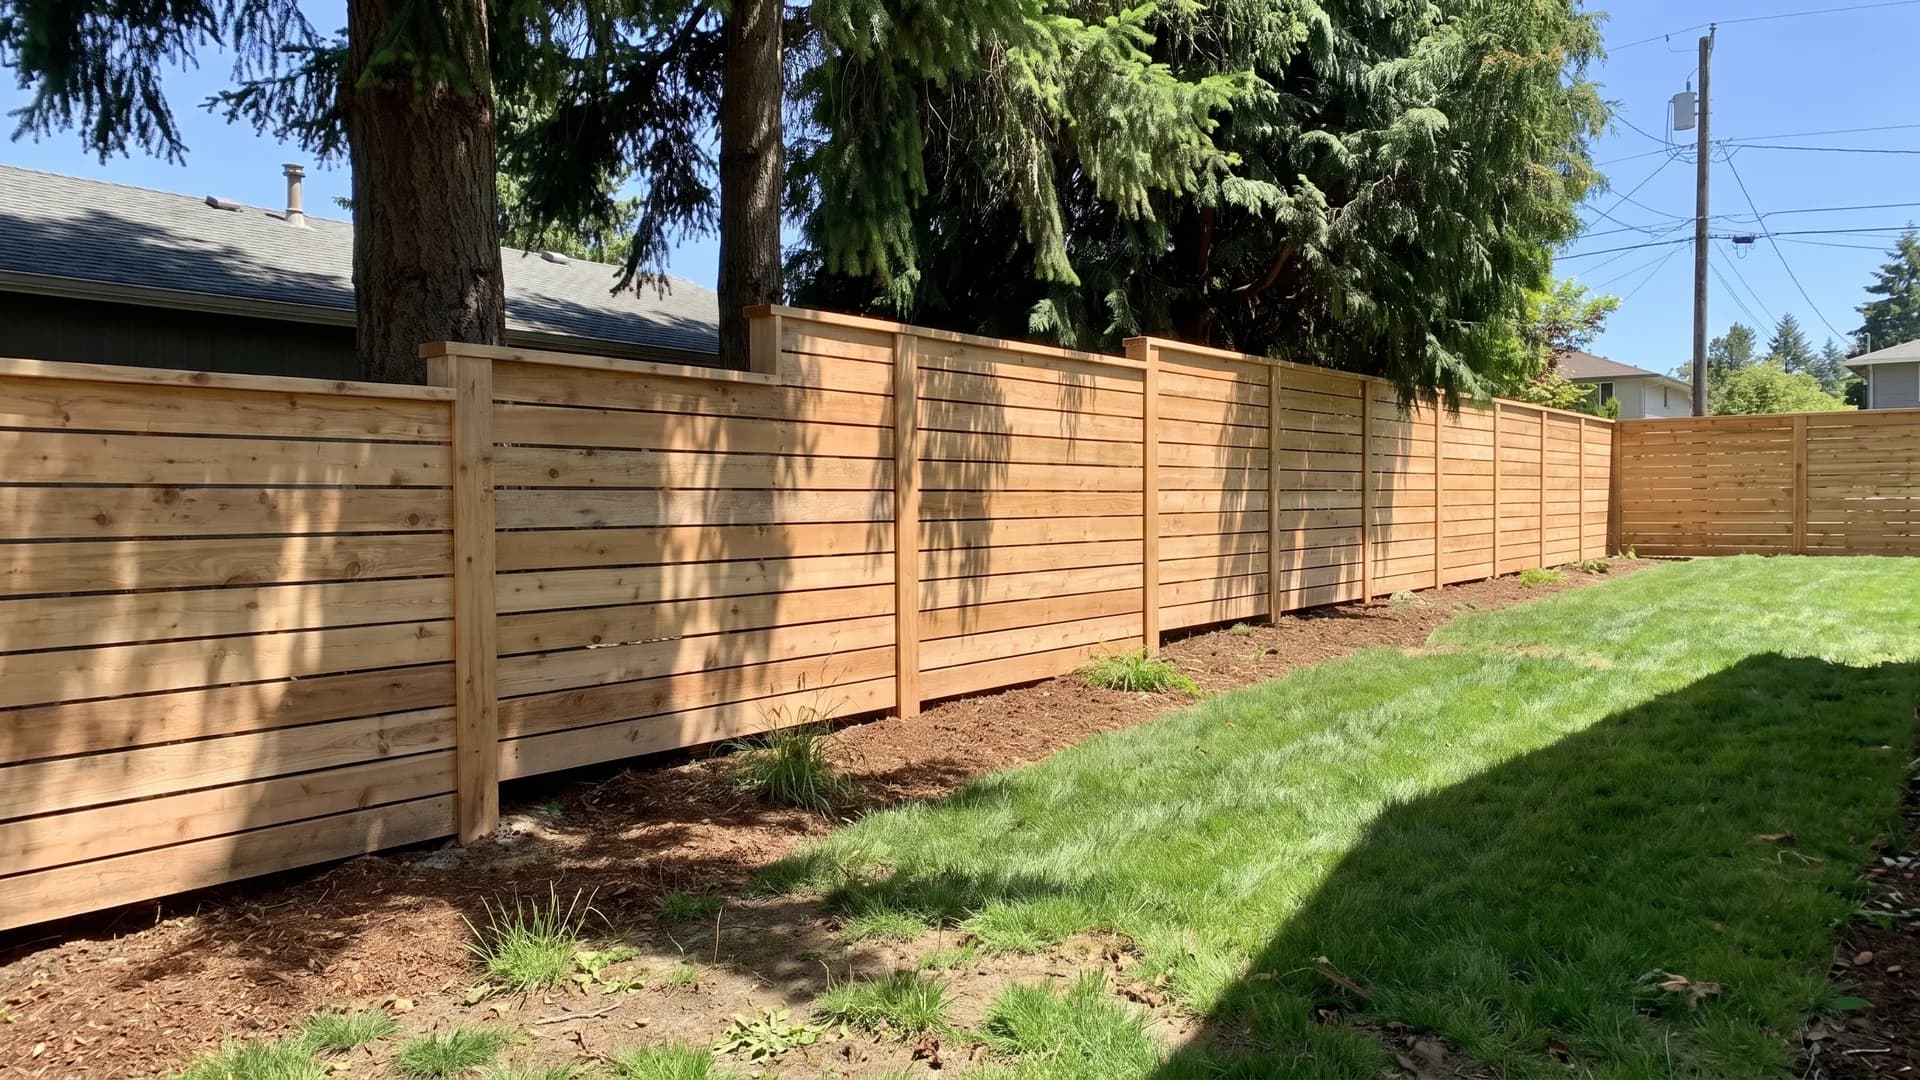
On sloping ground you either rack the panel to follow the grade or step it. Horizontal boards cannot rack, so stepping is the only honest answer, and it looks deliberate rather than compromised. Plan the step height first, then set the posts, and fill the triangular gap under each panel with a kickboard or gravel.
35. Light the fence in a narrow side yard
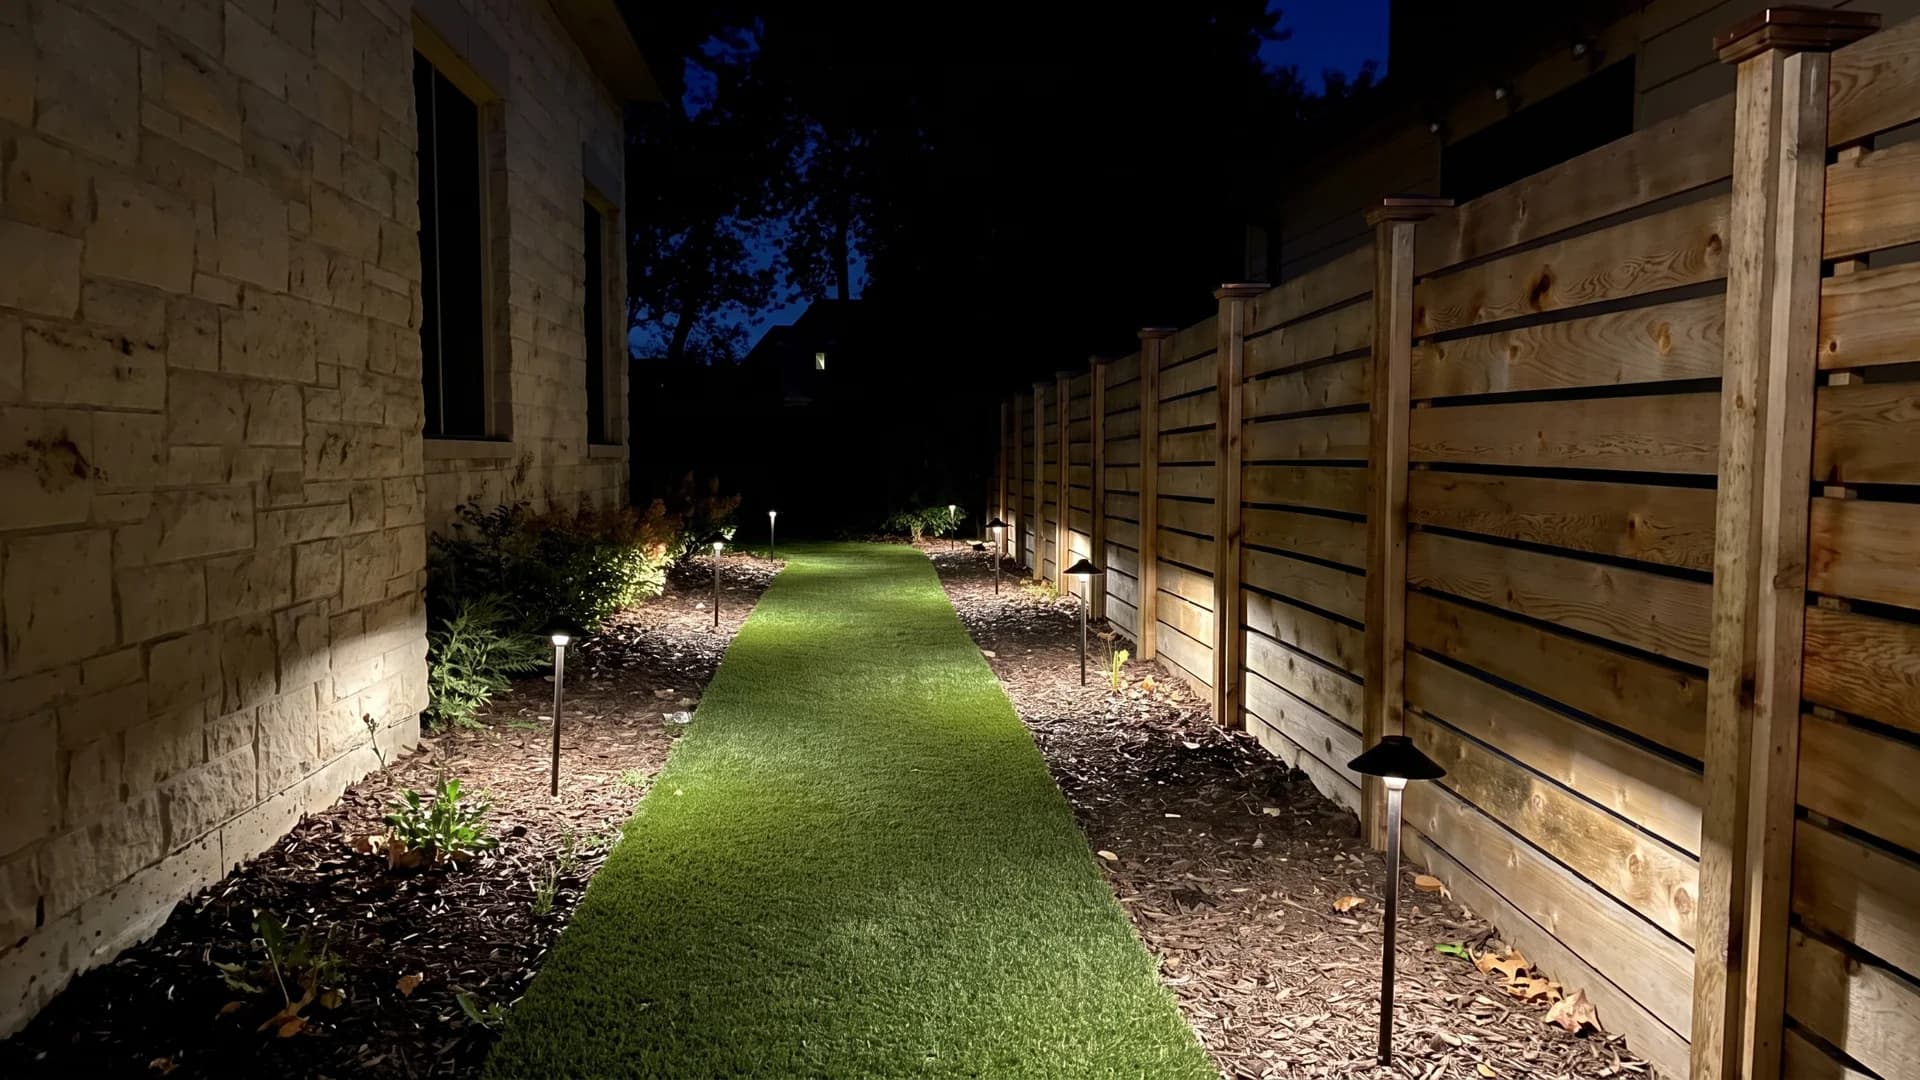
Horizontal boards are the ideal surface for landscape lighting because grazing light rakes across every board edge and picks out the shadow lines. Space low path lights every 8 to 10 feet, run 12-volt cable in a shallow trench, and aim for pools of light with dark between them rather than an even wash.
36. Use white vinyl around a pool
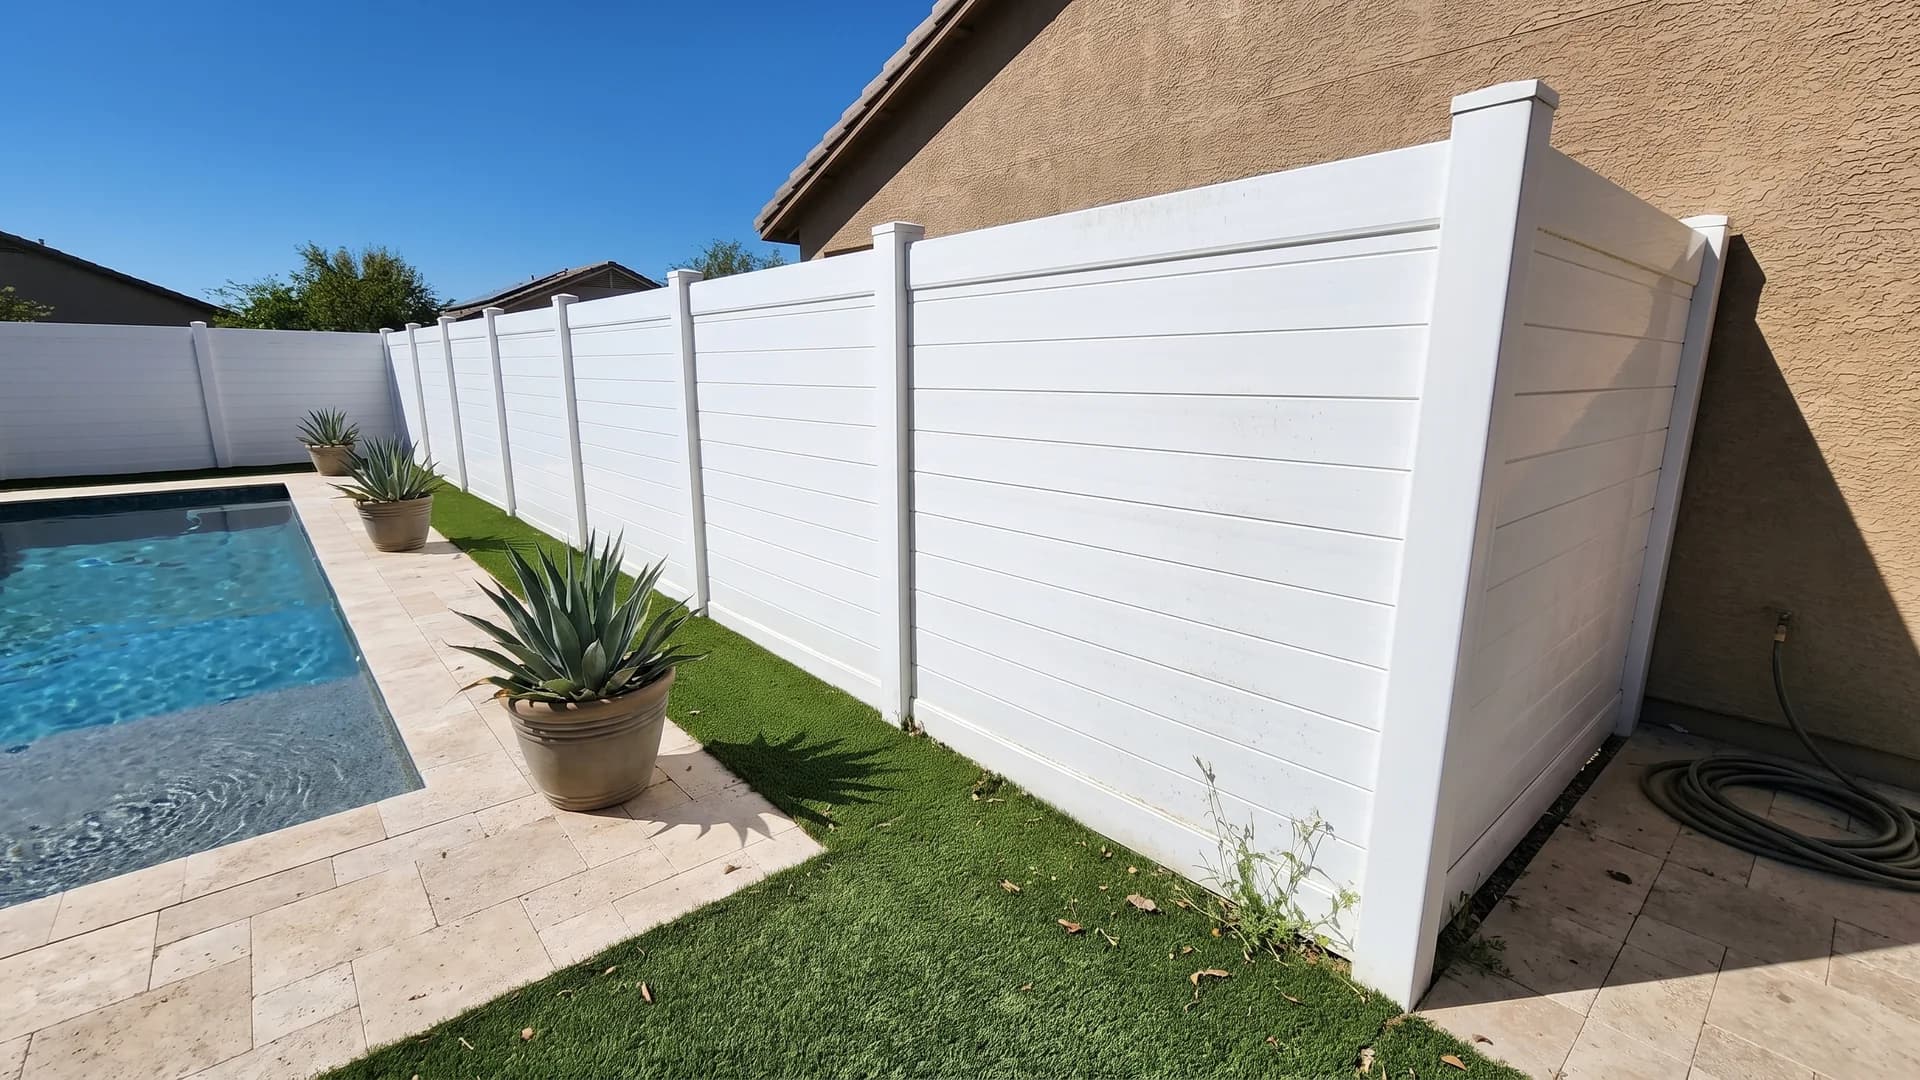
Vinyl is the sensible pool choice: chlorine splash and constant damp do not touch it, and it wipes clean. White reflects heat rather than storing it, which matters on a deck people walk on barefoot. Pool barrier codes are strict and separate from normal fence rules, covering height, gaps, and self-closing gates, so confirm yours before ordering panels.
37. Fit acoustic panels on a road-facing yard
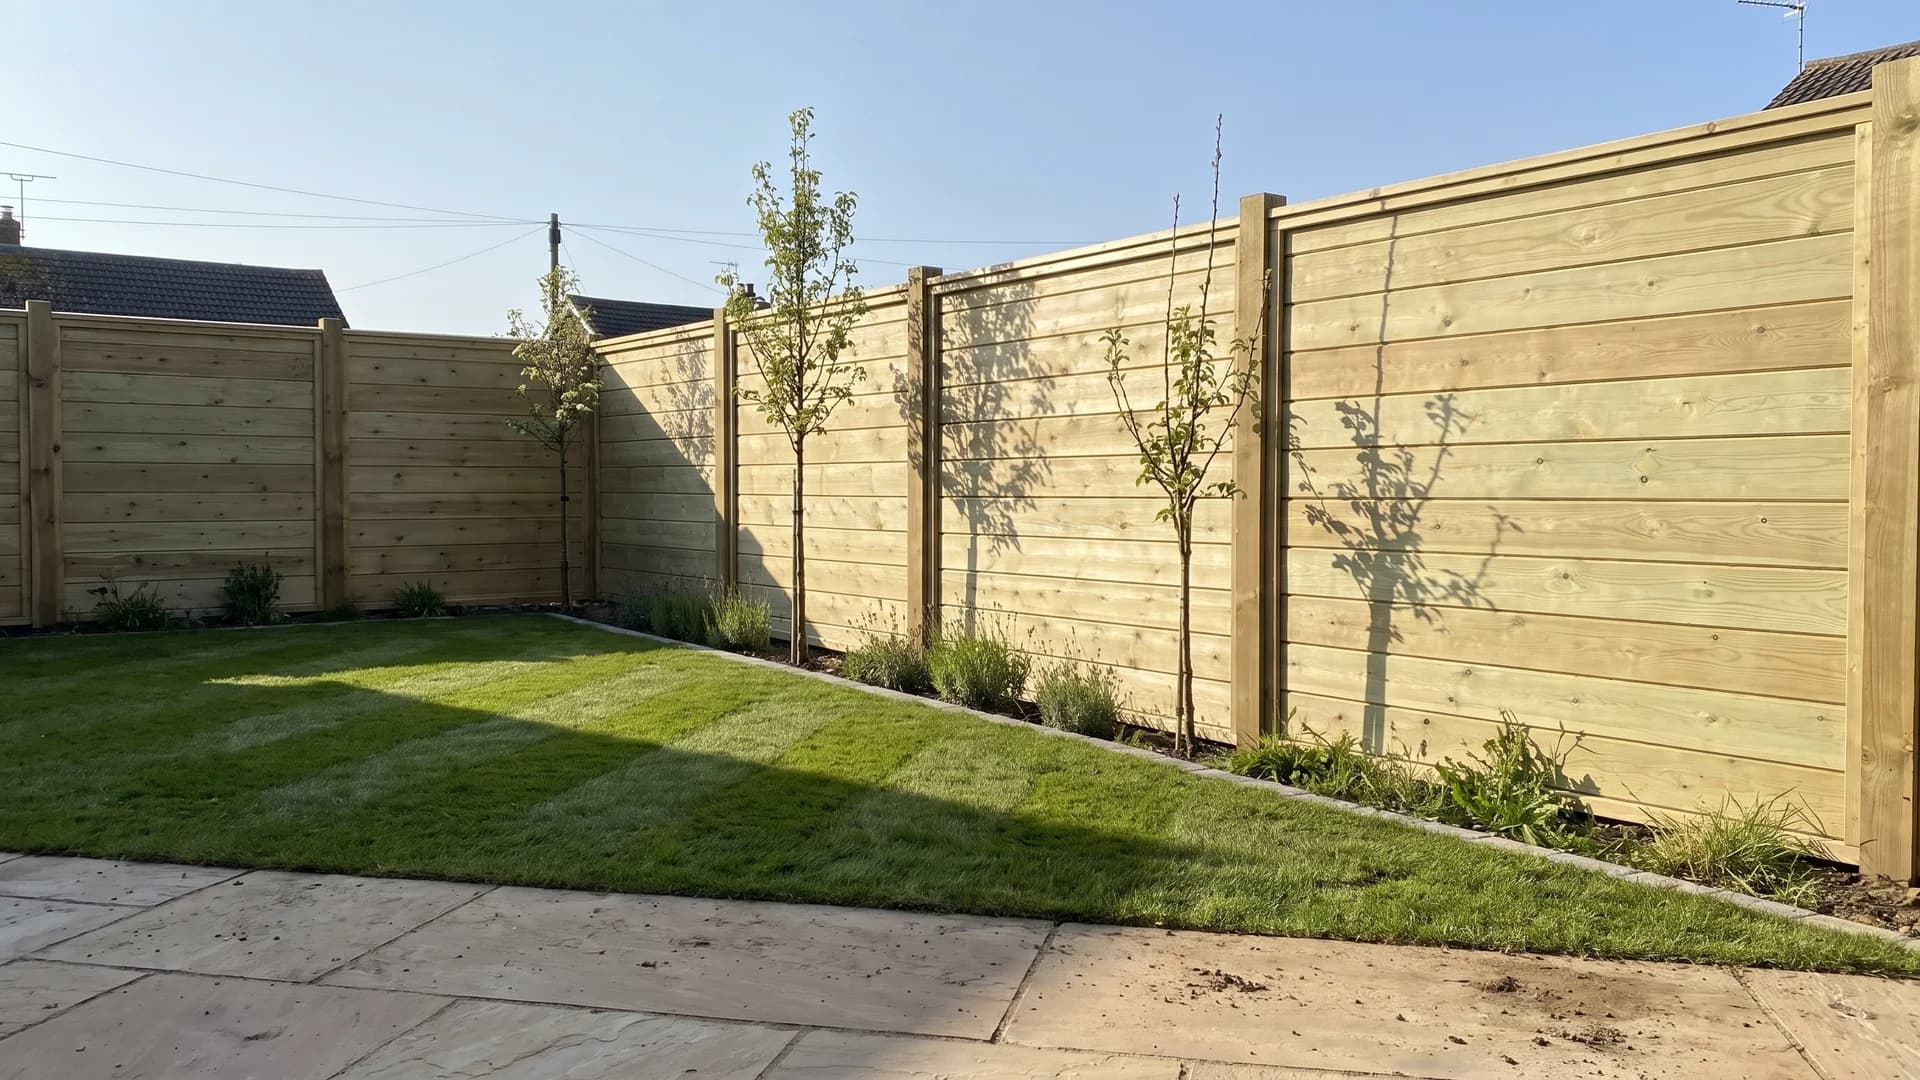
Acoustic fencing is heavy tongue-and-groove board with no gaps at all, because sound leaks through any opening a draught can pass. It reduces traffic noise rather than removing it, and only if it is tall enough to break the line of sight to the road. Panels are heavy, so posts and footings are sized up accordingly.
Which one fits your yard
- Tight budget, needs to happen this month: bare pressure-treated boards (1) or wide-gap painted boards (8).
- Full privacy from an overlooking window: board on board (2), tight louvers (21), or acoustic panels (37).
- You never want to maintain it: any composite (10 to 17) or powder-coated aluminium (18 to 23).
- Front yard with a height limit: a low fence under a hedge (31), slats on a knee wall (25), or two-height Venetian slats (32).
- Sloping ground: step the panels (34). Do not try to rack horizontal boards.
- Windy or coastal site: choose something the wind can pass through (4, 22) and deepen the footings.
- Once the fence is settled, the planting in front of it is the other half of the job. The fence line landscaping ideas guide covers what to put at the base.
- Down to two or three and still stuck: render the shortlist on a photo of the actual boundary with AI fence design, or compare the other options in our roundup of fence design apps. Colour and height are far easier to judge in place than off a sample board.
FAQ
Are horizontal fences more expensive than vertical ones?
Usually yes, by roughly 15 to 25 percent for the same material. Horizontal boards need posts every 6 feet instead of 8, so there are more posts and more footings, and they often use thicker or higher grade boards to resist sagging across the span. Composite and metal slat systems price similarly either way, since the panels are engineered for it.
How far apart should posts be on a horizontal fence?
Six feet is the usual maximum for 1x6 boards. Push it to 8 feet and the middle of each board will bow visibly within a couple of years, especially in hot climates. Thicker stock, 5/4 or a full 2x, can span further. Metal and composite panel systems specify their own spacing, and it is worth following exactly.
Do horizontal fence boards warp or sag over time?
They can, for two reasons. The span issue above, and the fact that a flat upward face holds water instead of shedding it like a vertical board does. Both are manageable: keep posts close, use a cap rail, seal the end grain, and keep the bottom board at least 2 inches clear of the soil.
What is the best wood for a horizontal fence?
Western red cedar for most people, since it resists rot without treatment and stays reasonably stable. Pressure-treated pine is the budget option and works fine if you accept more movement. Redwood and tropical hardwoods last longest and cost the most. Whichever you pick, buy the straightest boards on the pile, because a bow that is invisible upright is obvious lying flat.
Can I put a horizontal fence on a sloped yard?
Yes, but only by stepping it. Vertical fences can be racked so the panel follows the slope as a parallelogram, and horizontal boards cannot do that without leaving the boards visibly off level. Step each panel down by a consistent amount and close the gap underneath with a kickboard, gravel, or planting.
How tall can a horizontal fence be?
The material will happily go to 8 feet or more. Your municipality usually will not. Most US codes cap back-yard fences at 6 feet and front-yard fences at 3 or 4, with corner lots often restricted further for visibility. Check before you buy anything, and check whether your HOA has a separate rule, because it frequently does.