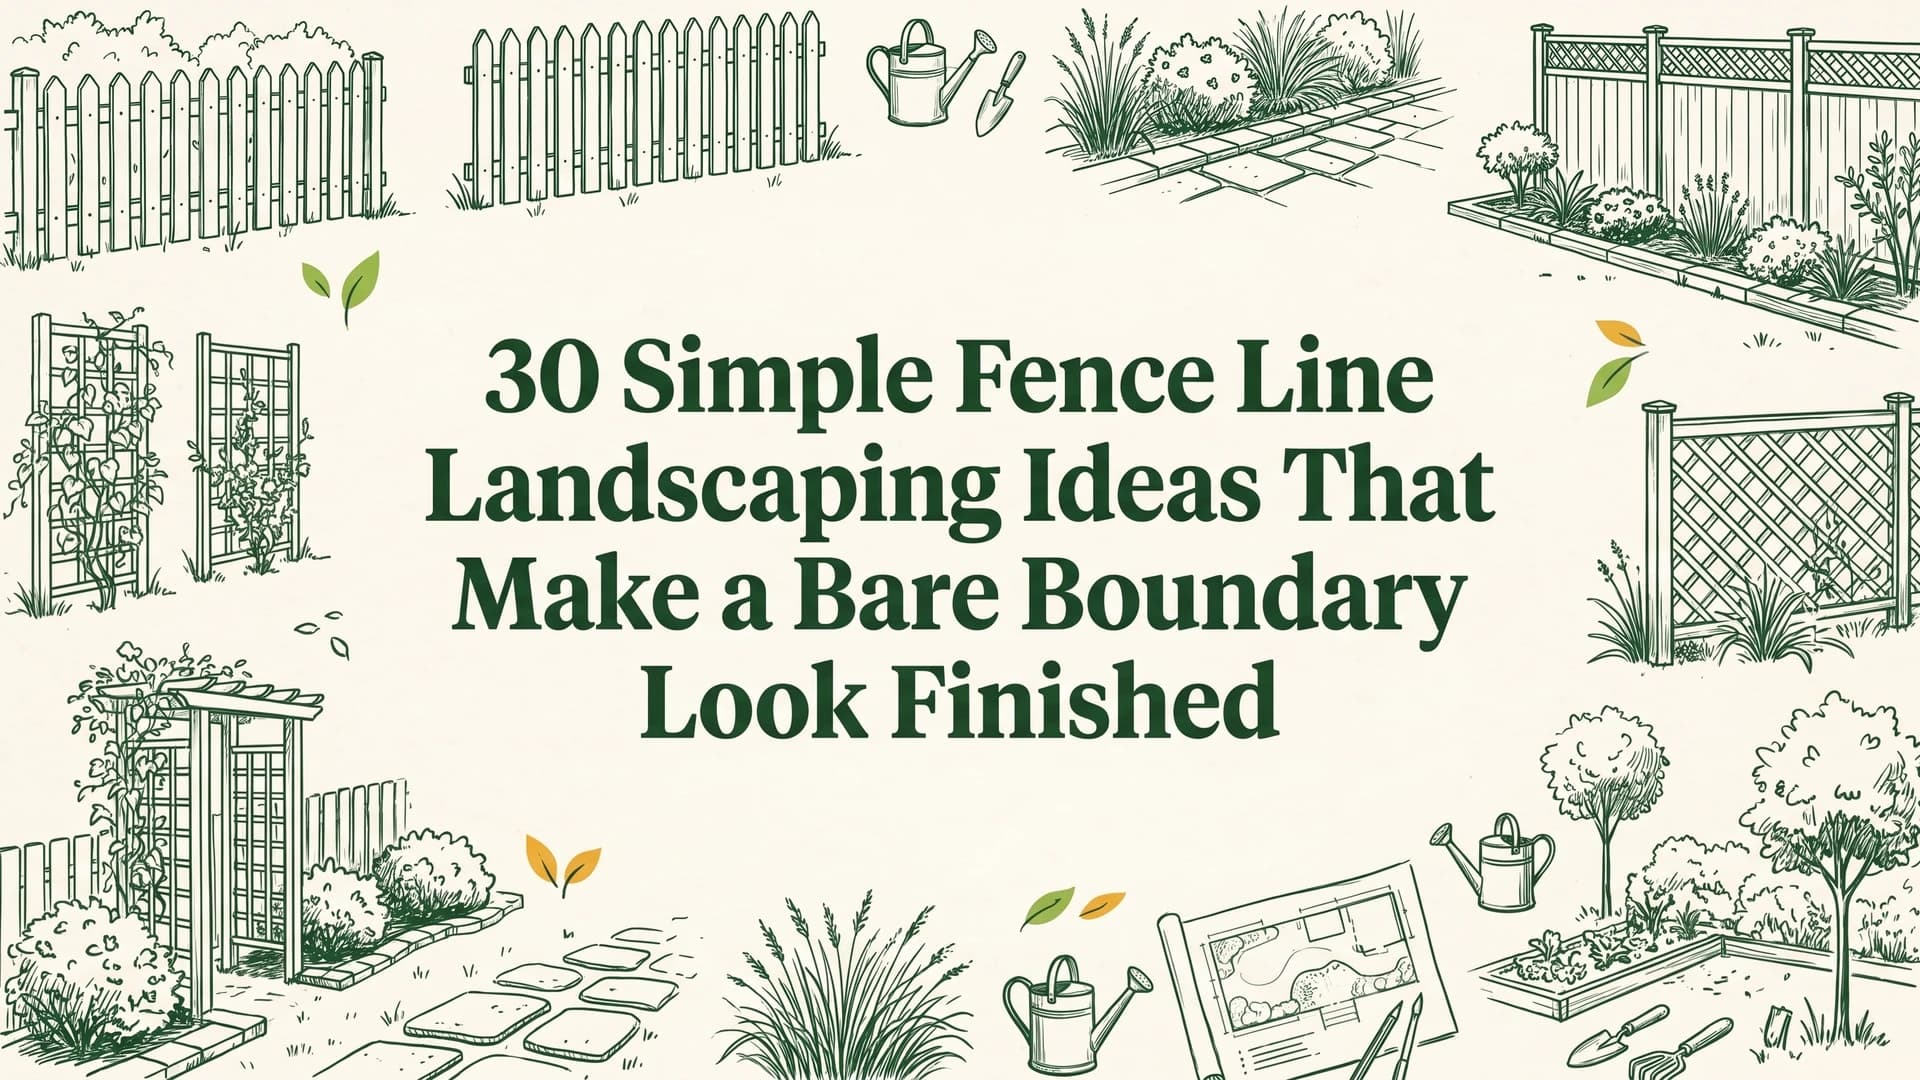
30 Simple Fence Line Landscaping Ideas That Make a Bare Boundary Look Finished
A new fence gives you sixty feet of blank board and a strip of bare dirt. These 30 ideas cover screens, layered beds, climbers, lighting, and gravel strips, with mature spacing, cost per linear foot, and the property-line rules nobody writes down.
A new fence solves the neighbor problem and hands you a fresh one: sixty feet of blank board running the length of the yard, with a ribbon of bare dirt at the bottom of it. Simple fence line landscaping ideas exist to fix exactly that, turning the boundary from the thing your eye slides past into the thing your eye lands on.
The 30 ideas below are grouped into living screens, layered beds, climbers, lighting, narrow-strip solutions, and cheap wins. Each one carries the numbers that decide whether it works: mature plant widths, spacing, hardiness zones, and rough cost per linear foot. After the list there's a short section on the parts everyone skips, including how far off the property line you can actually plant and why a raised bed pushed against wooden boards shortens the fence's life. Screening one window or hot tub is a different job, and our privacy landscaping ideas take it sightline by sightline. If the boards are not up yet, settle the fence styles themselves first.
Every image here is an AI-generated design concept built from a photo of an ordinary yard, the same kind of render AI fence design produces from a picture of your own fence. Nothing below is a stock photo of somebody else's finished garden.
Living screens along the fence
1. Run an arborvitae wall down the back fence
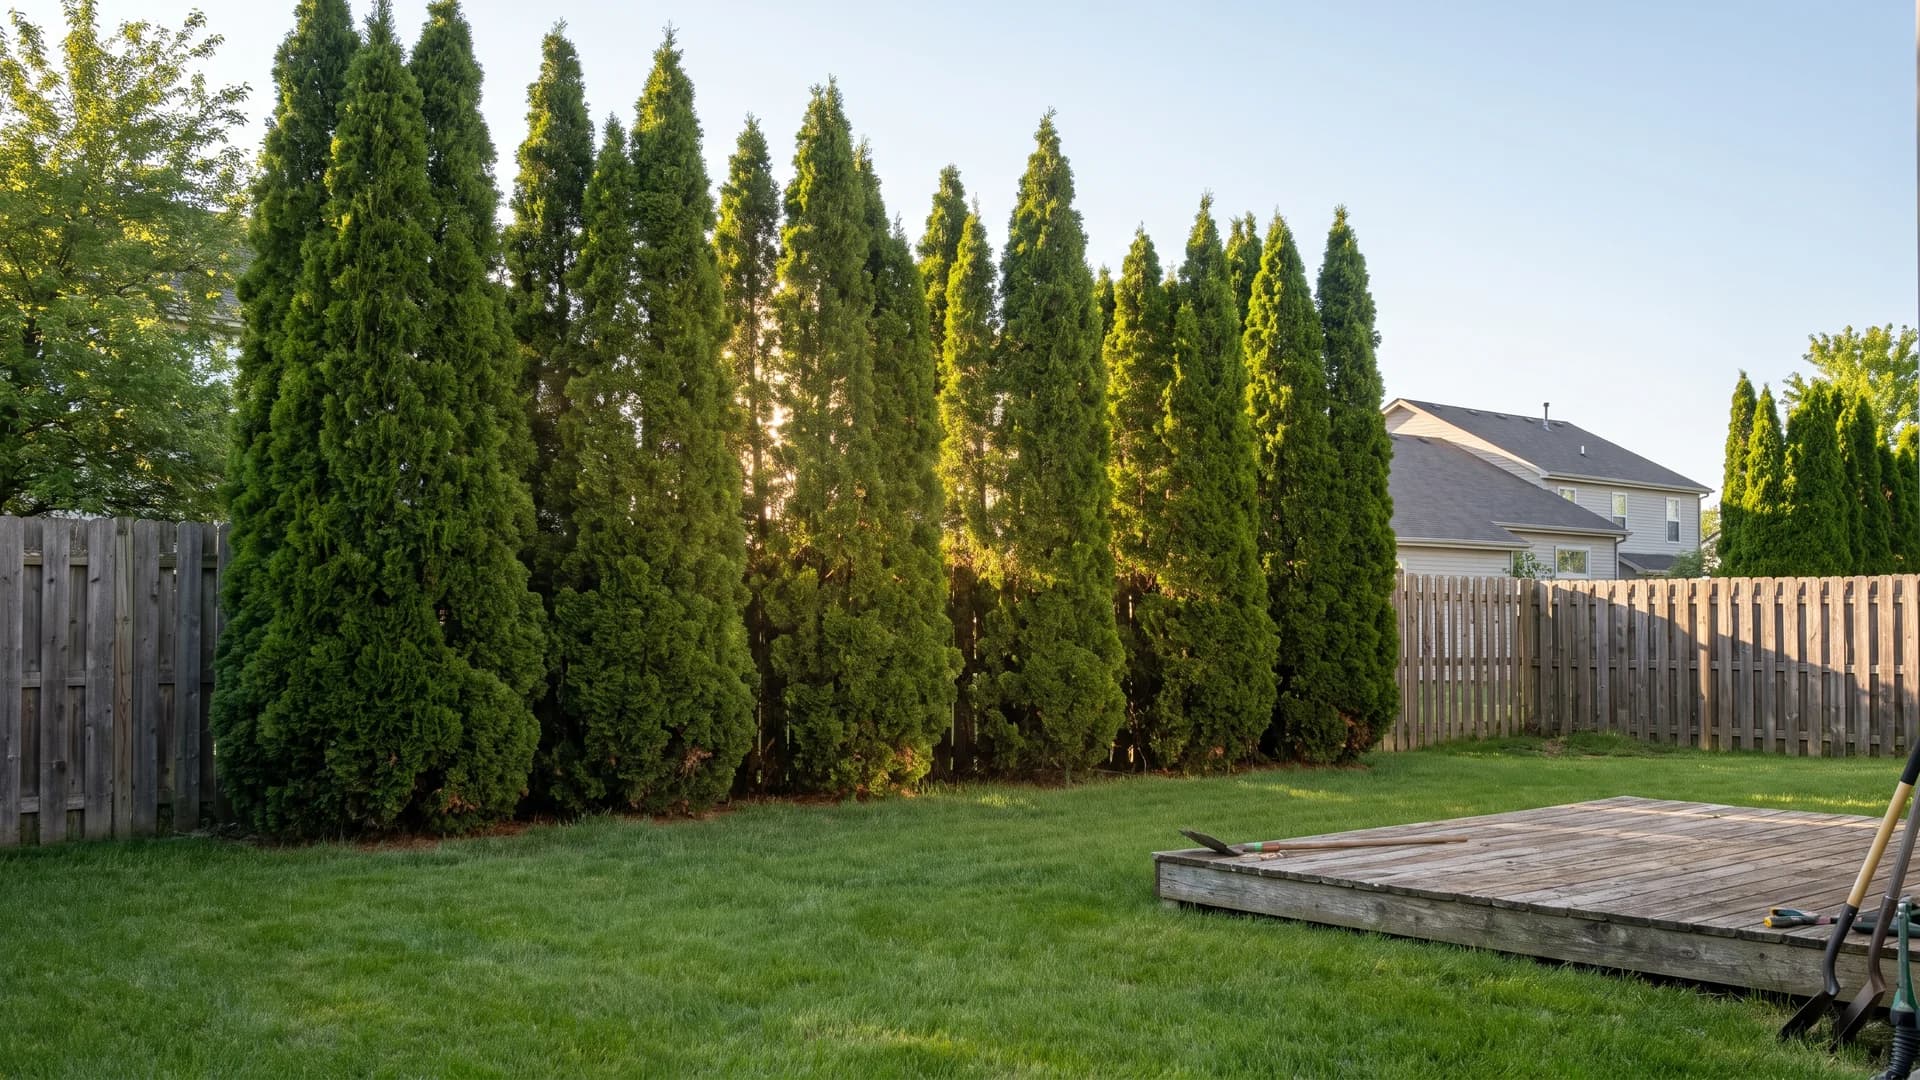
The back fence is the one you stare at from the kitchen window, so it earns the height. 'Green Giant' arborvitae (zones 5 to 8) reaches 20 to 30 feet and 8 to 12 feet wide, so plant it 5 to 6 feet apart and 5 feet off the boards. In a small yard use 'Emerald Green' instead: 12 to 15 feet tall, 3 to 4 feet wide, planted every 3 feet. Expect $40 to $80 per 5-gallon plant.
2. Put a photinia hedge against dark boards
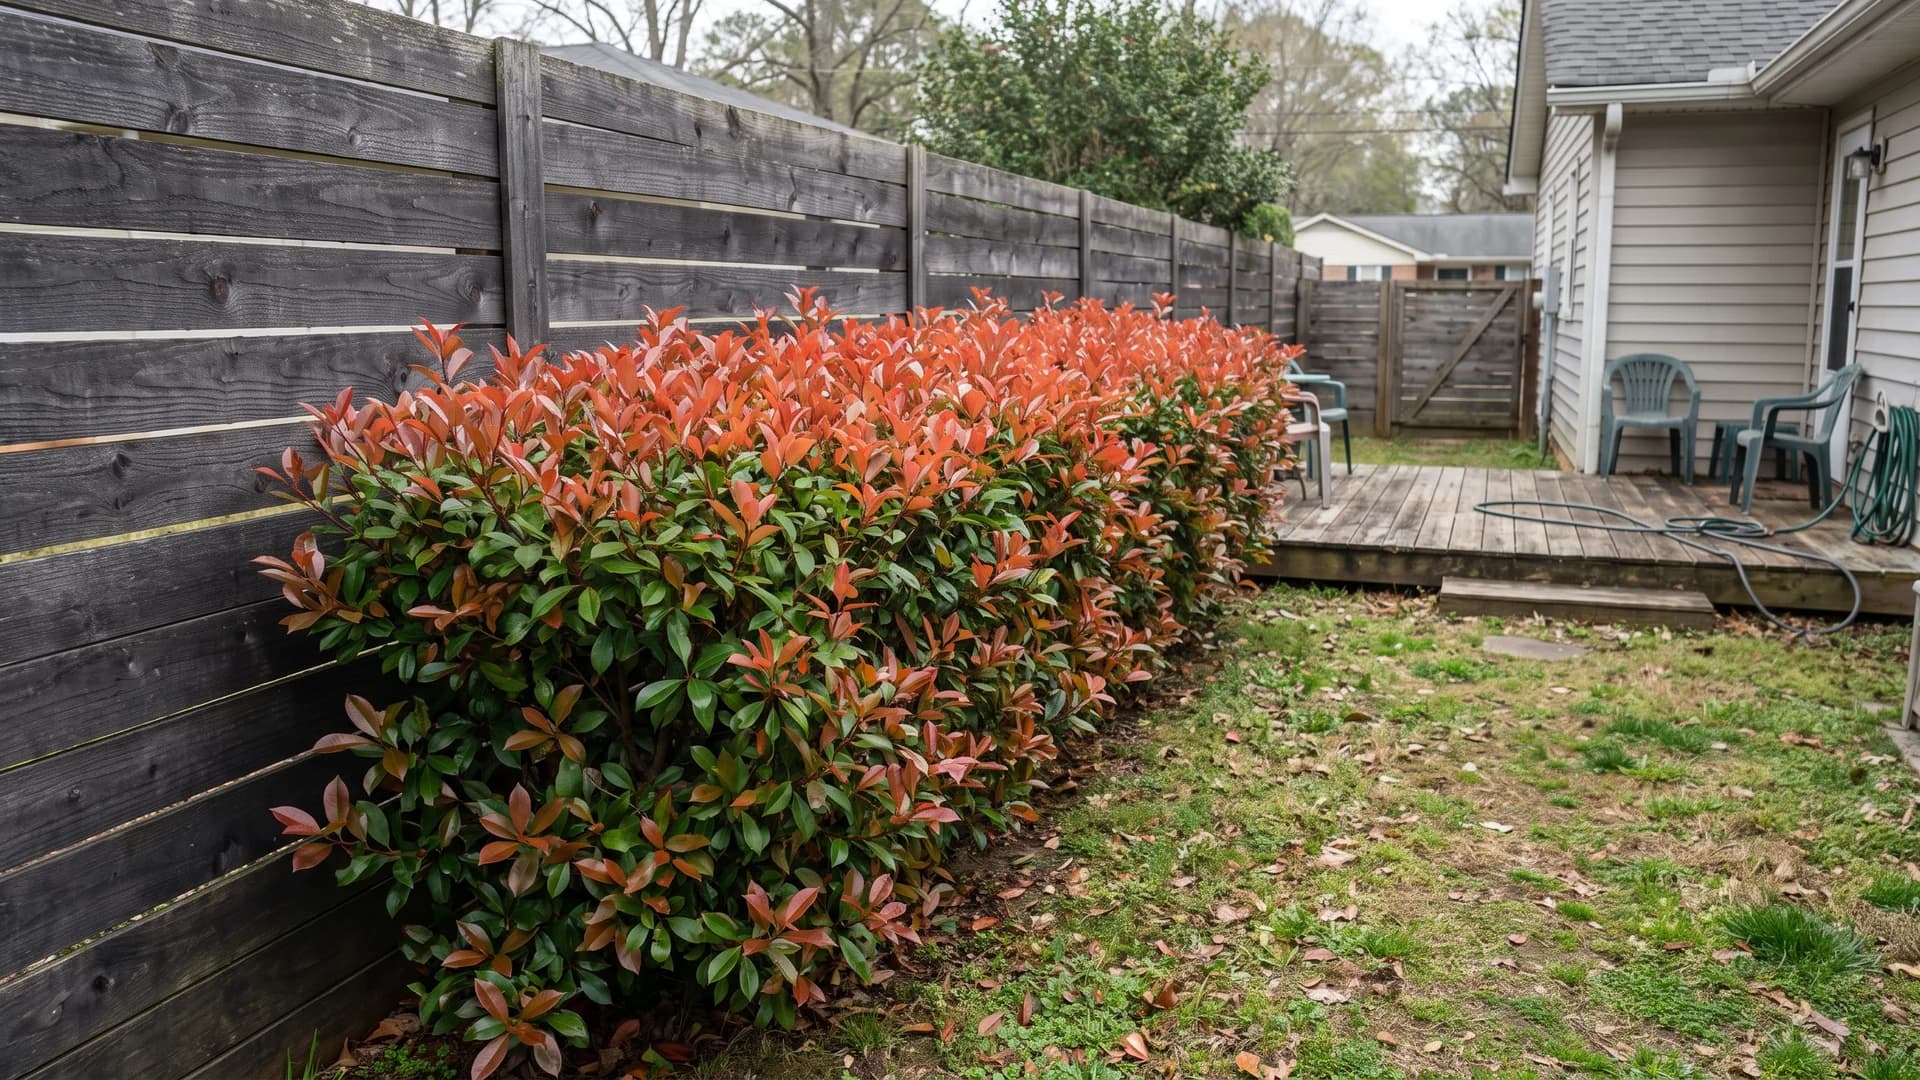
Red tip photinia flushes copper-red three or four times a season, and against a charcoal or black fence that new growth reads from across the yard. It suits zones 7 to 9, tops out around 10 to 15 feet, and wants 5 to 6 feet between plants. One caution for the humid Southeast: crowded photinia gets leaf spot. Give it the full spacing and air on both sides, or plant wax myrtle instead.
3. Mix three evergreens instead of planting one
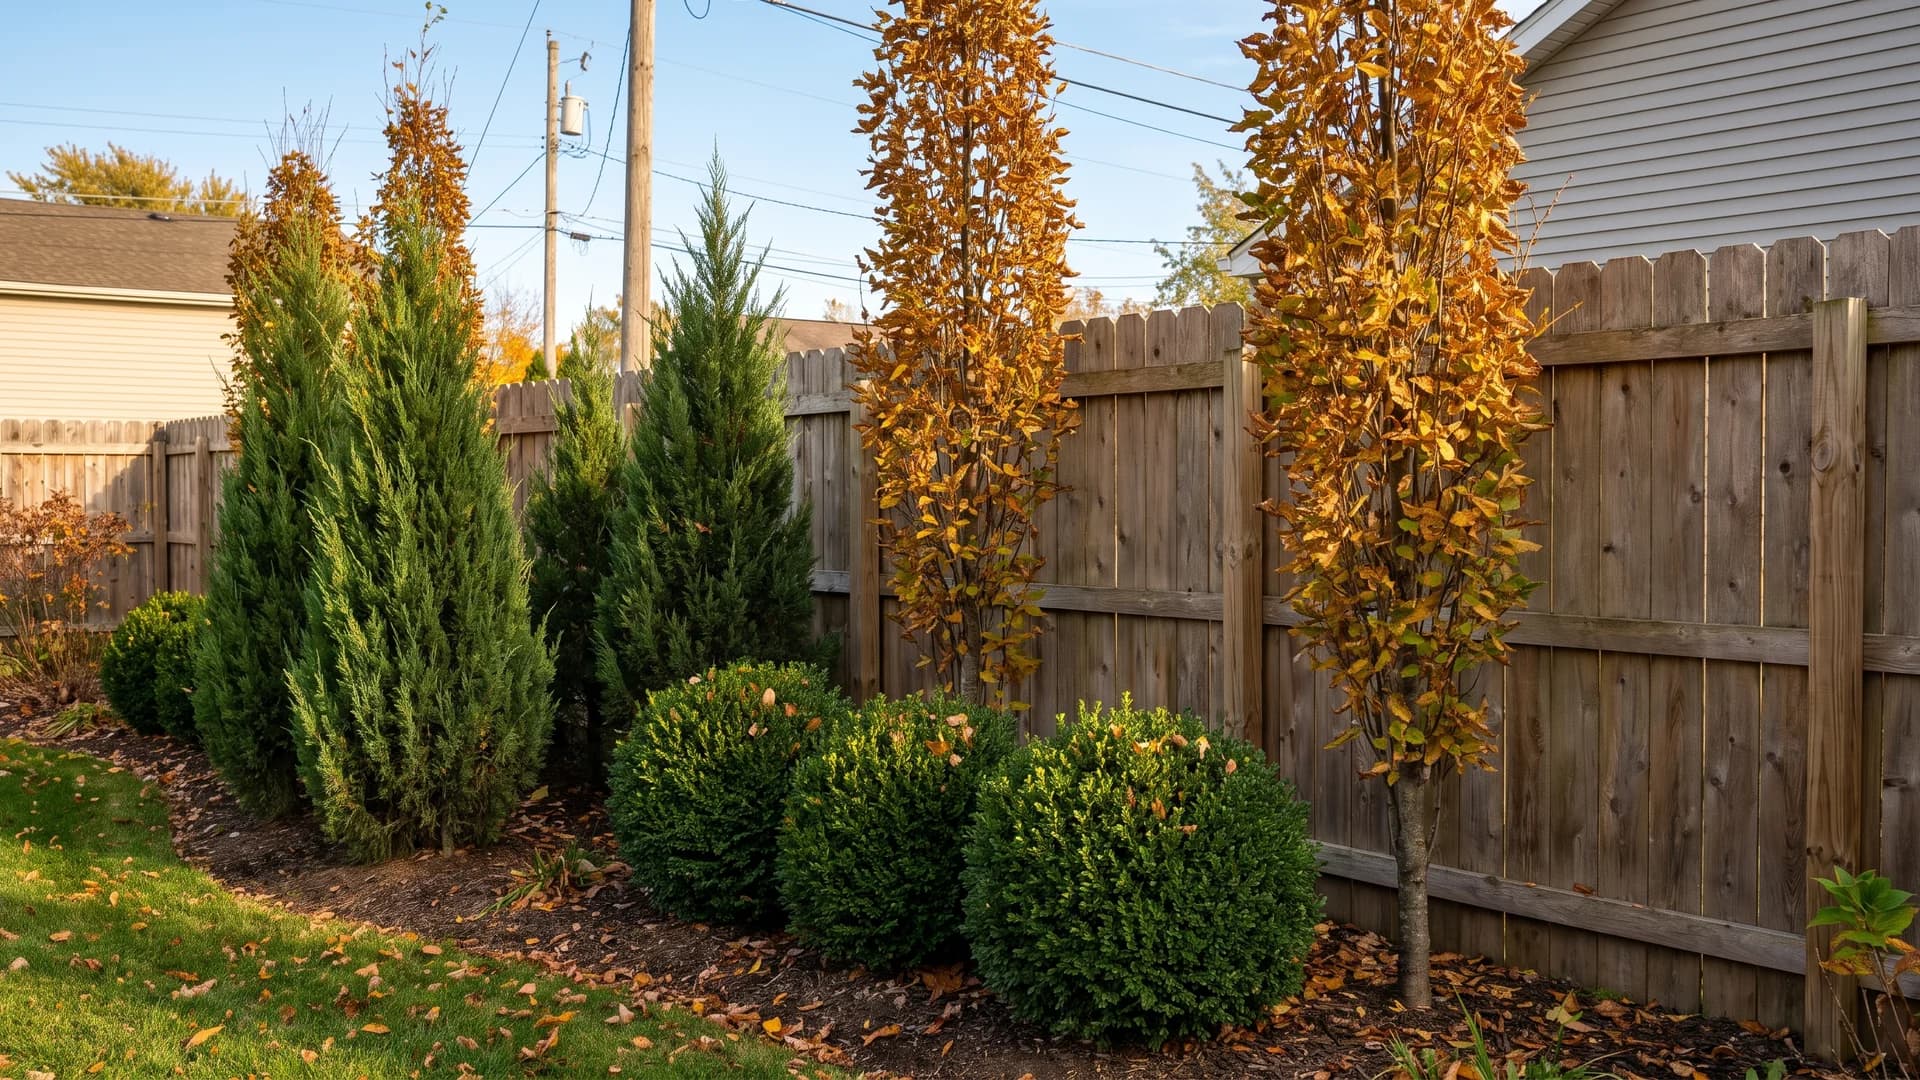
A single-species hedge is one disease away from a gap you cannot fill. Boxwood blight and bagworm both move through identical plants fast. Alternate upright juniper, boxwood, and columnar hornbeam in repeating groups of three and you get texture changes every 10 feet plus insurance. It costs the same as a monoculture and looks deliberately designed rather than ordered by the pallet.
4. Use clumping bamboo, and know which kind you bought
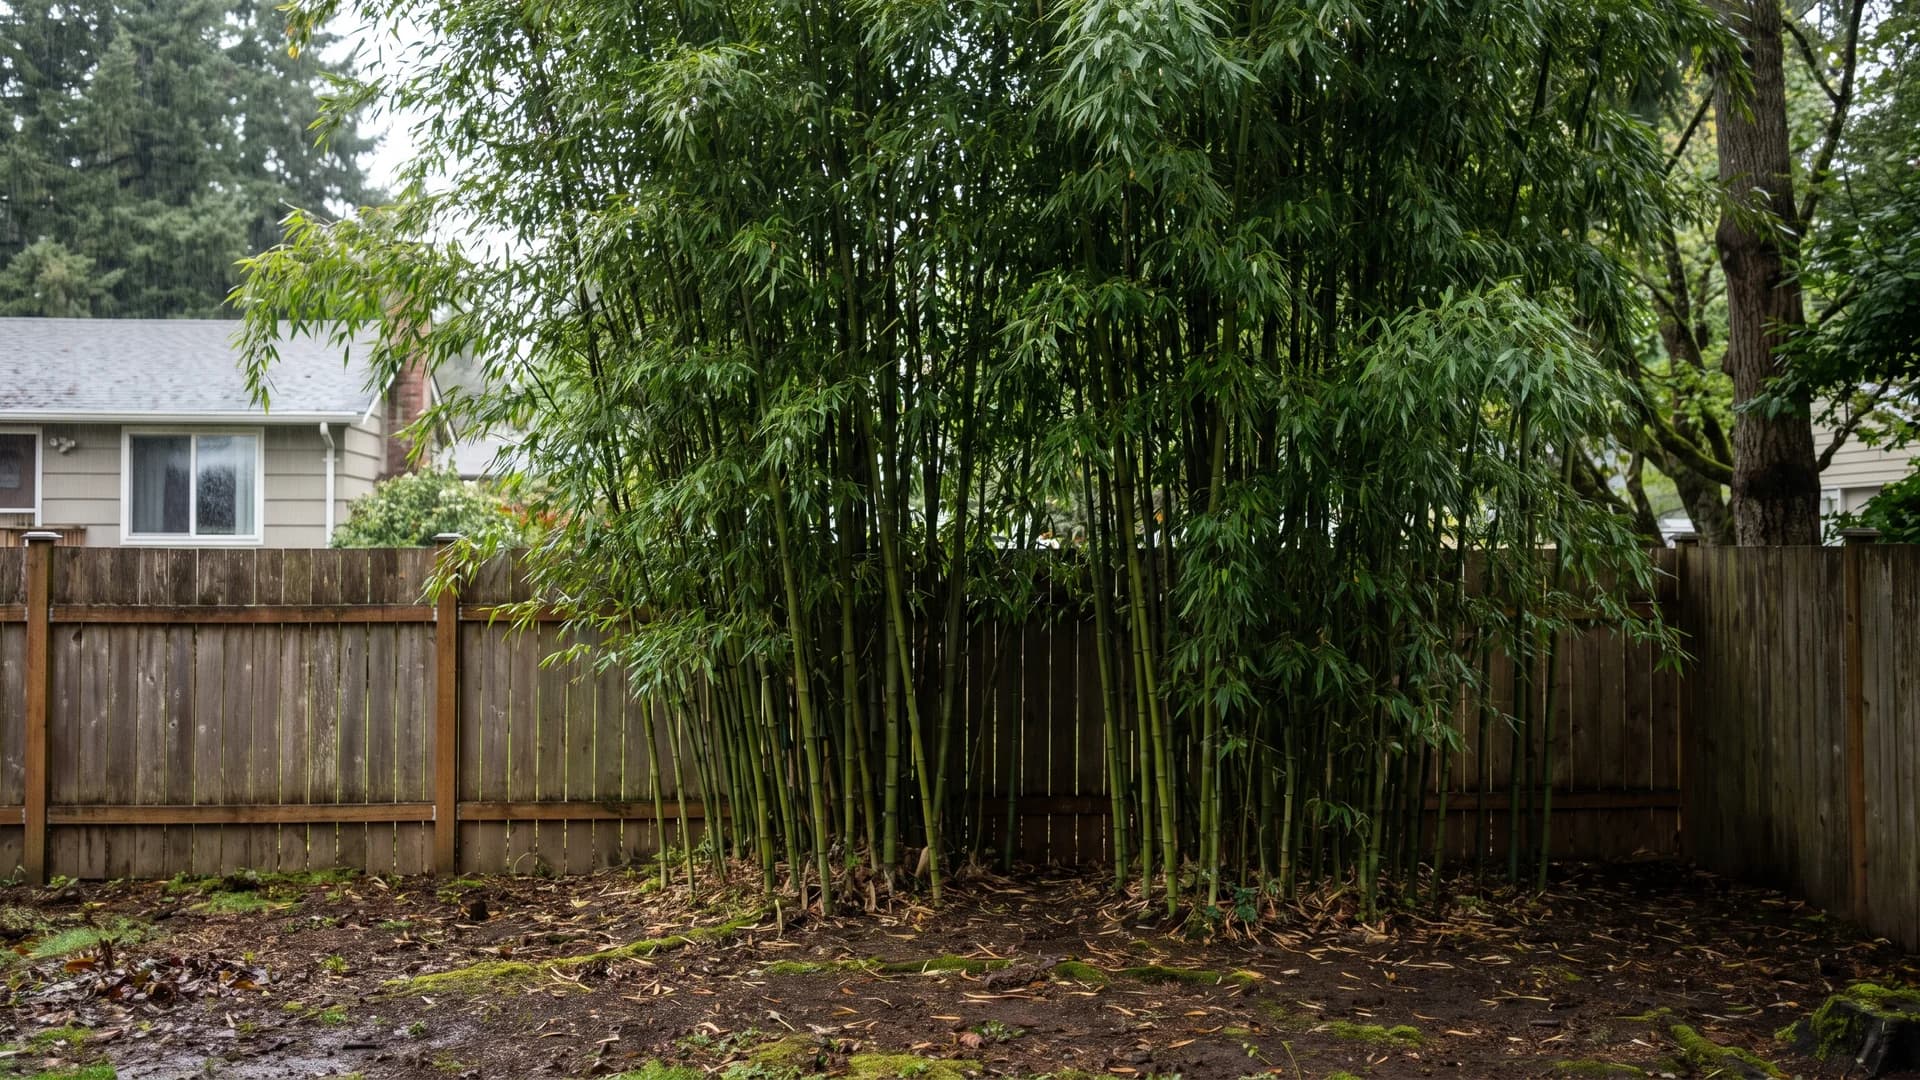
Bamboo gives you 10 feet of screen in two or three years, which nothing else does. Buy Fargesia, a clumping type hardy in zones 5 to 9 that expands a few inches a year and needs no containment. Running types like Phyllostachys need a 60-mil HDPE barrier buried 24 to 30 inches deep, at roughly $8 to $12 per linear foot. Skip the barrier and you will be digging rhizomes out of the neighbor's lawn.
5. Go columnar where there is height but no width
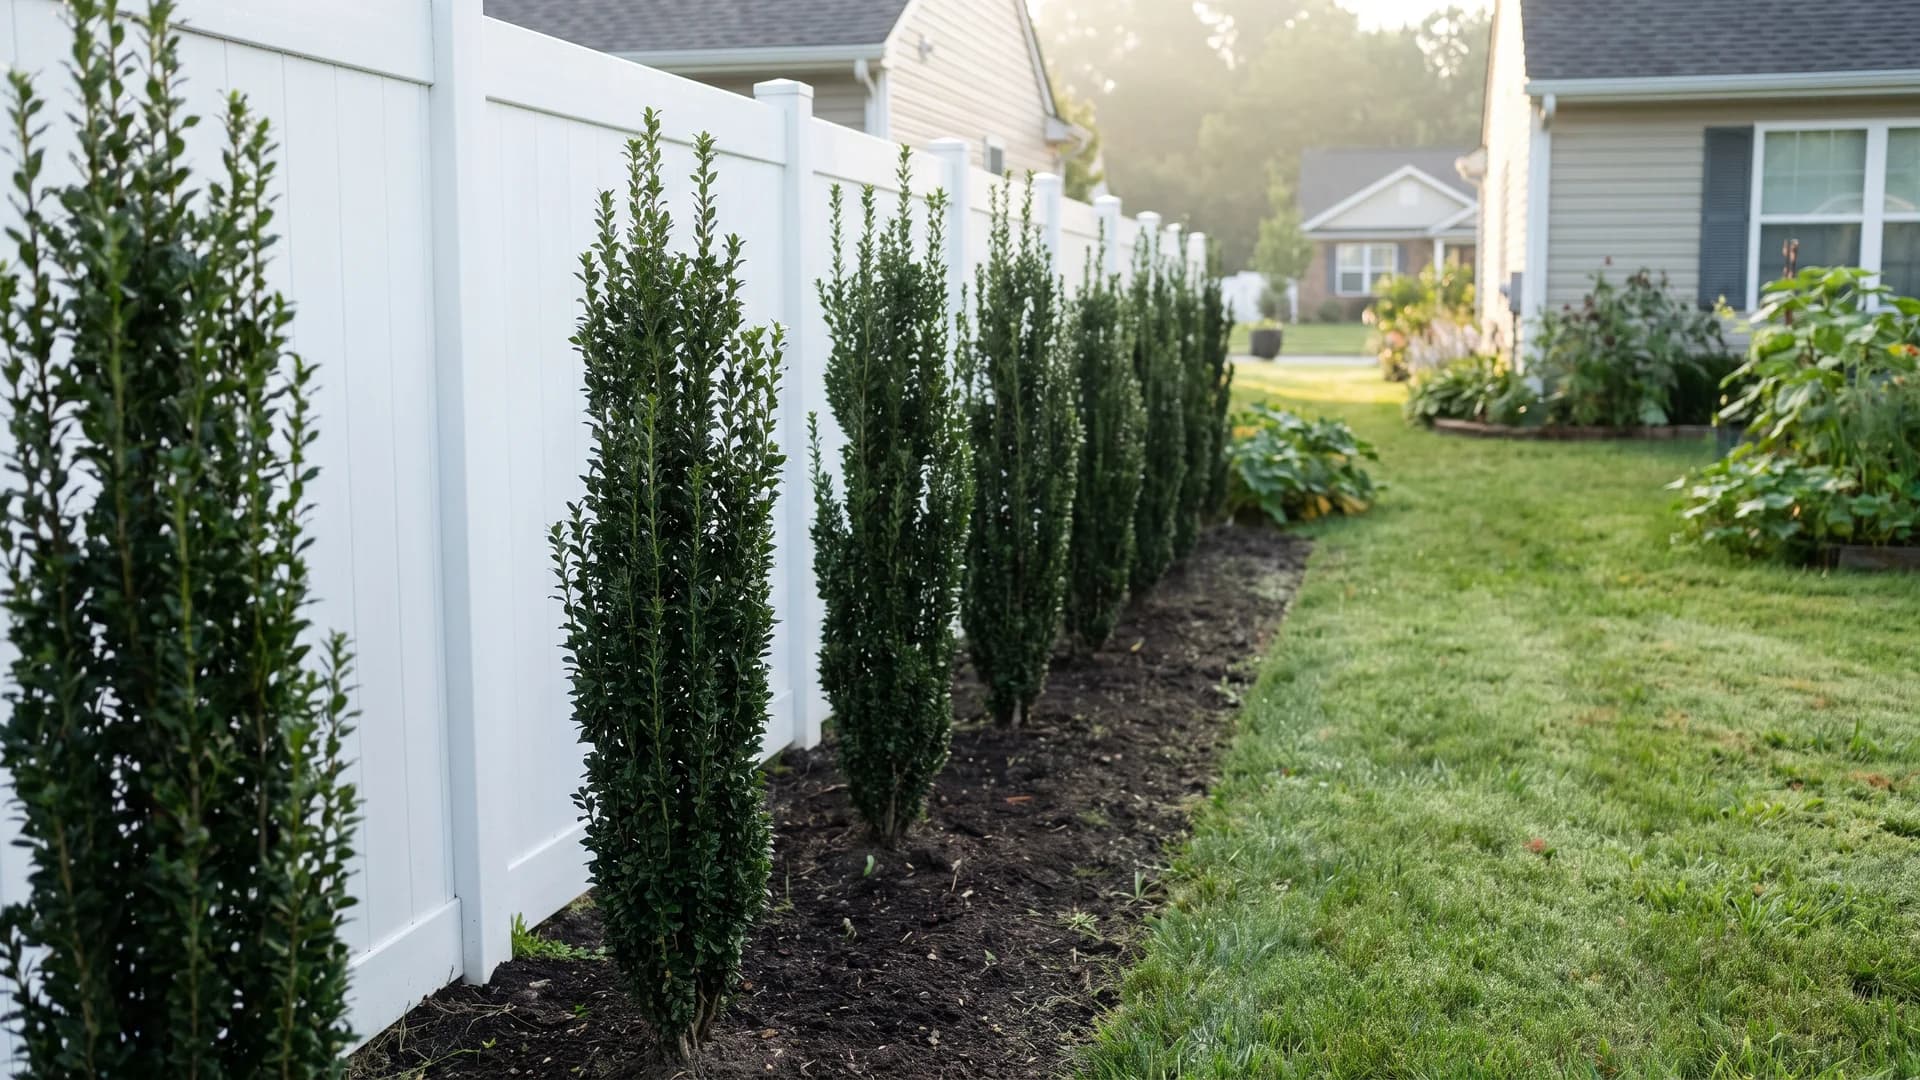
Some fence runs have 24 inches of soil and no more. 'Sky Pencil' holly holds a 2-to-3-foot width at 6 to 10 feet tall in zones 6 to 9, and Italian cypress does the same job in zones 7 to 11. Plant them 3 feet apart for a broken rhythm rather than a solid wall, because at that width a solid wall is not on offer anyway.
6. Turn a split rail into a flowering hedge
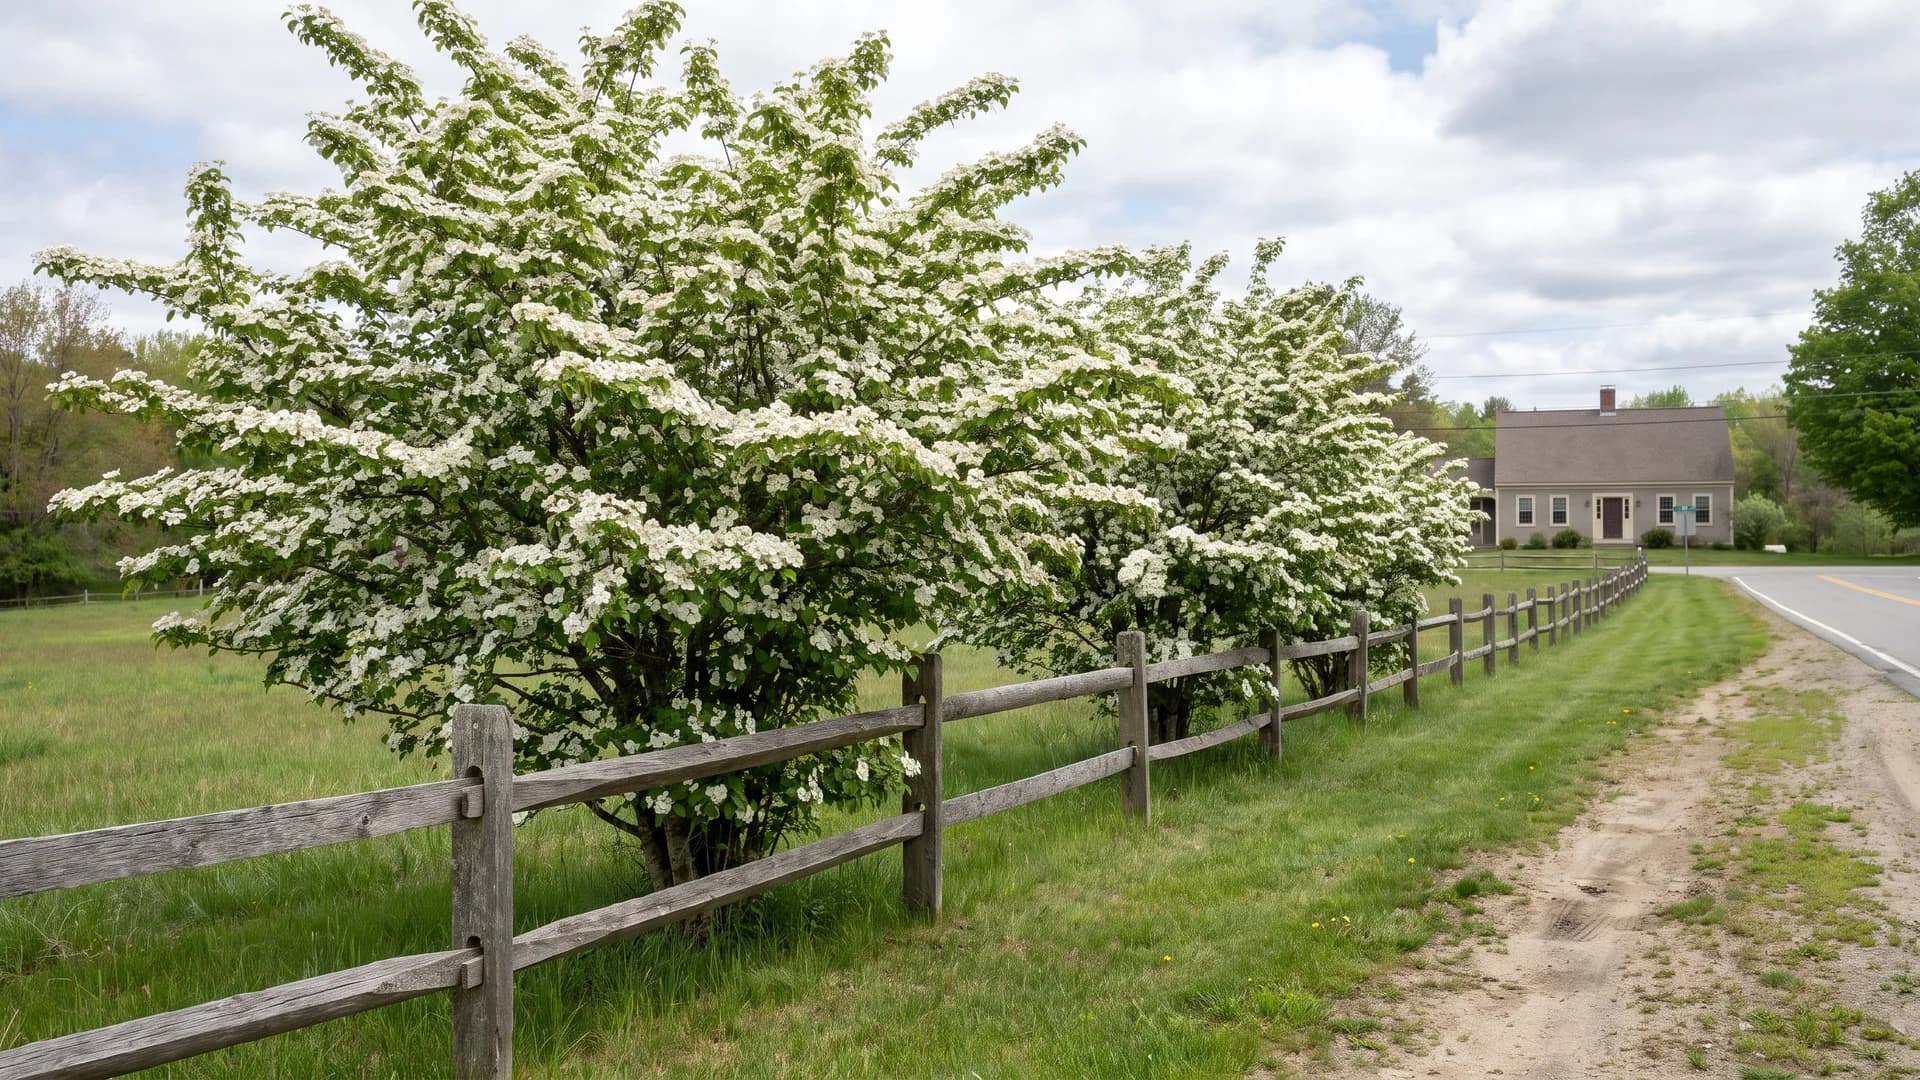
Split rail and wrought iron both let light through from two sides, which is why flowering shrubs thrive on them where they sulk against a solid privacy fence. Doublefile viburnum (zones 5 to 8) layers white blooms horizontally along the rails, and ninebark handles zones 3 to 7 with dark foliage all season. Keep the shrubs 3 feet back so the rails stay visible; hiding a rustic fence defeats the point of owning one.
Beds and borders along the run
7. Build the border in three layers
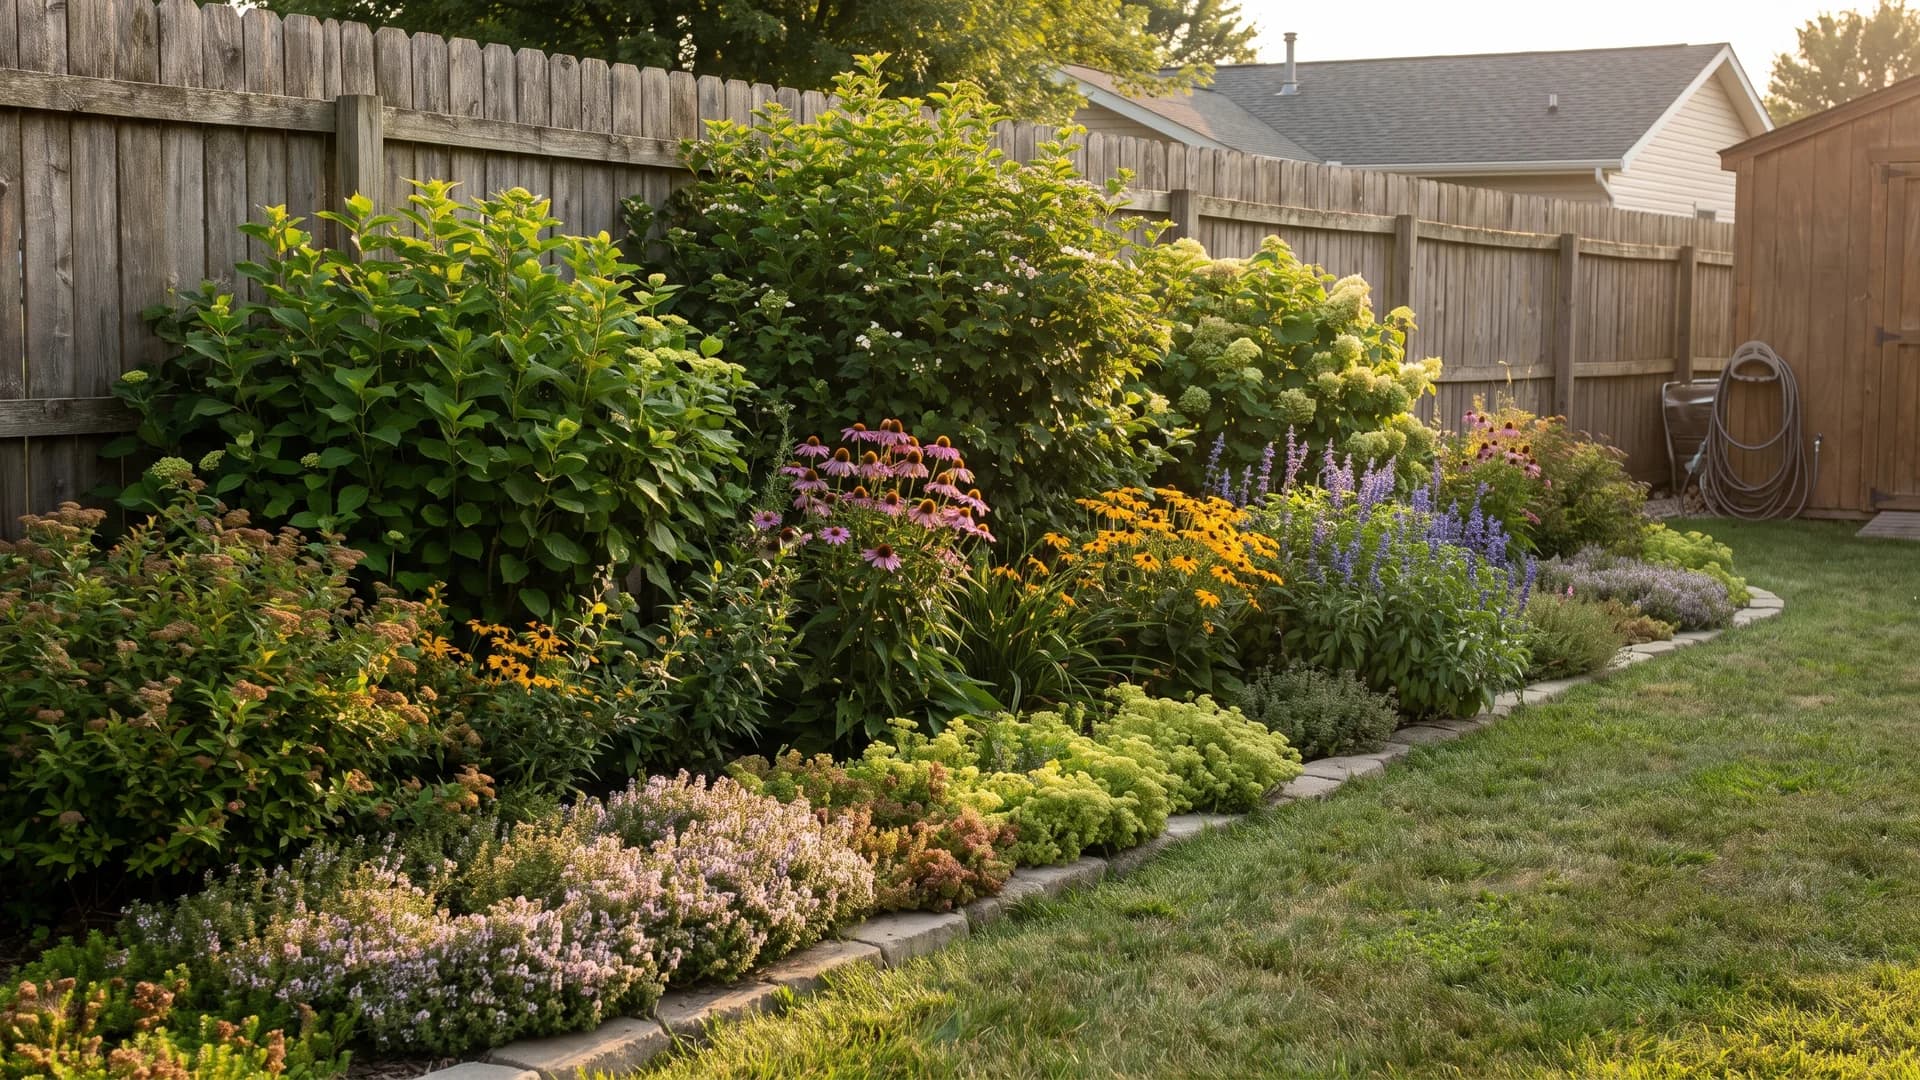
This is the single idea that fixes a flat fence. Tall shrubs at the back, knee-high perennials in the middle, groundcover spilling at the front, which gives the eye somewhere to travel instead of one green stripe. It needs 4 feet of bed depth minimum; anything shallower only holds two layers honestly. Where two fence runs meet at a corner, let the bed balloon to 6 feet, because that corner is the longest sightline in the yard.
8. Frame the run with a sleeper-edged raised bed
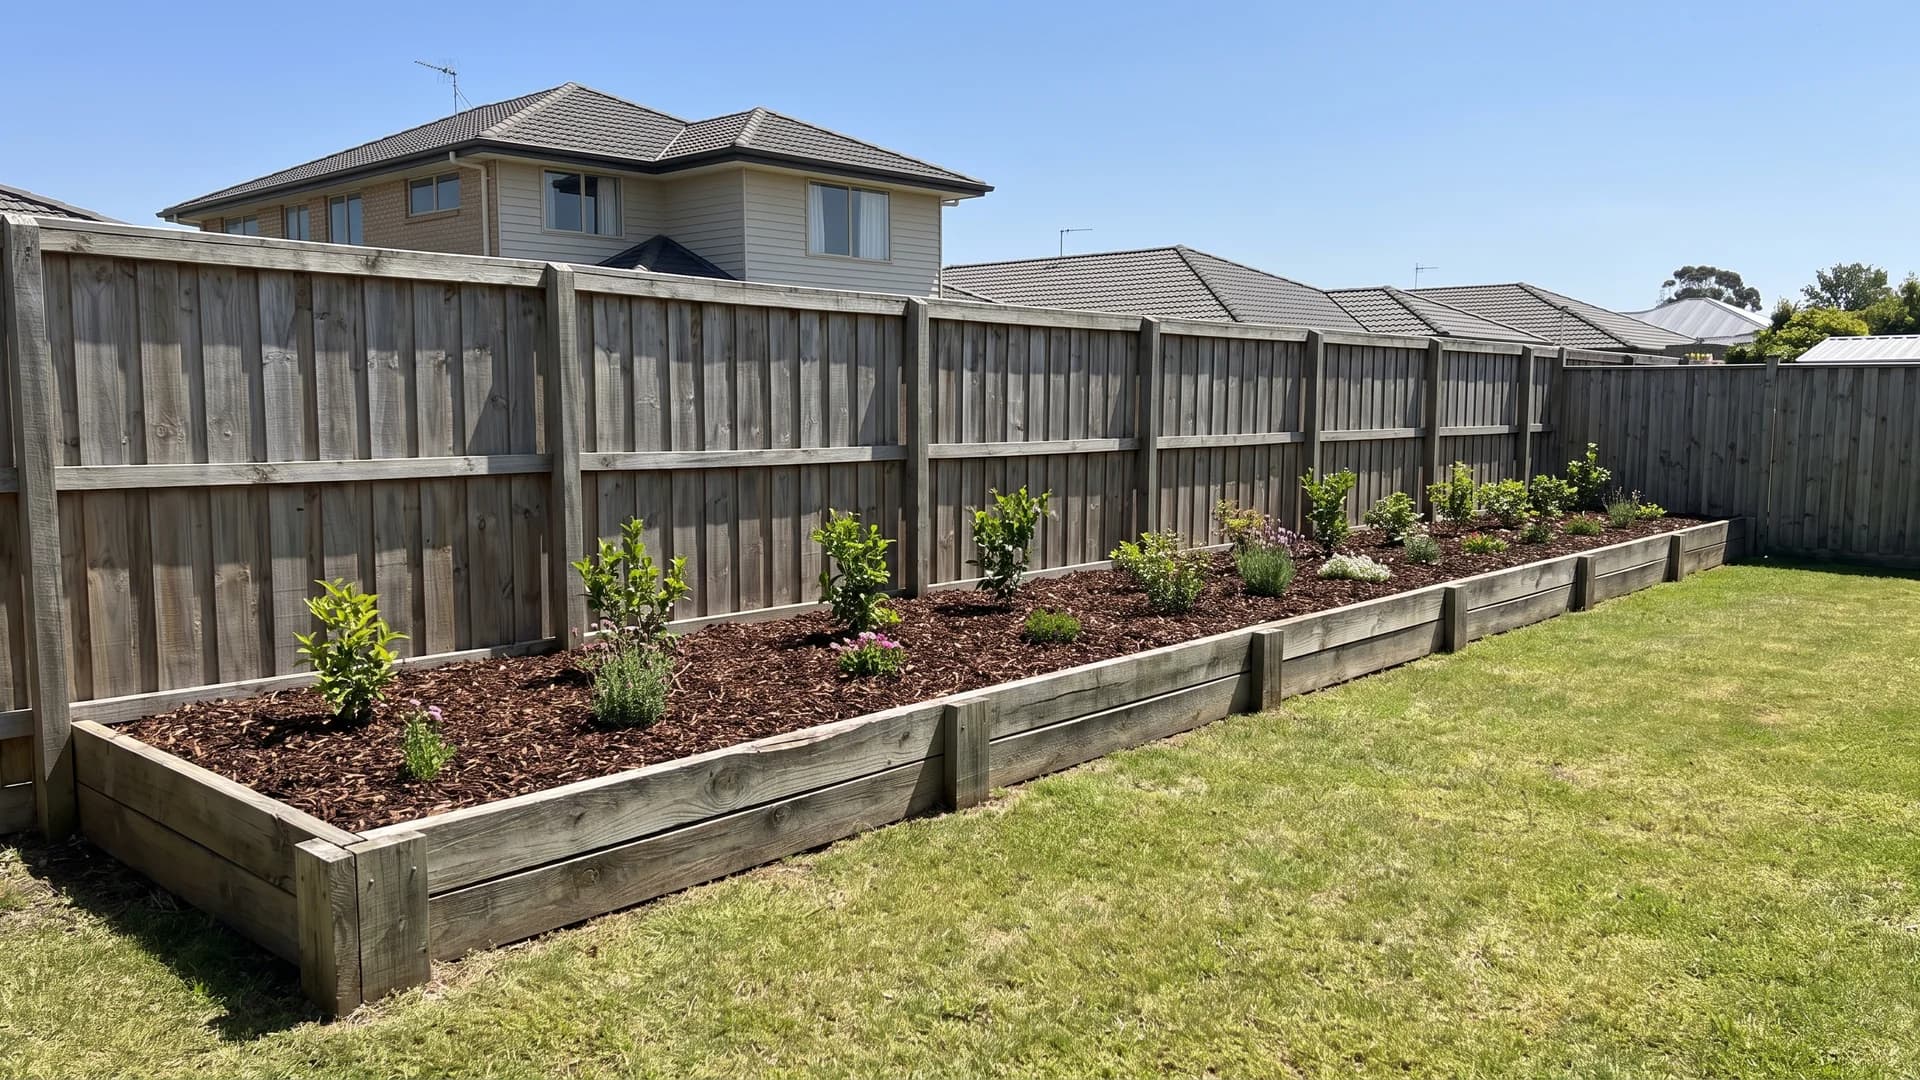
Structure first, planting second. A 12-to-18-inch raised bed in 6x6 timbers costs $8 to $14 per linear foot and gives you good soil in a spot that usually has builder's fill. One rule that saves a fence: leave 12 inches between the bed wall and the boards. Soil packed against wood holds moisture at the base and rots the pickets years early.
9. Curve the bed line so the fence stops looking like a ruler
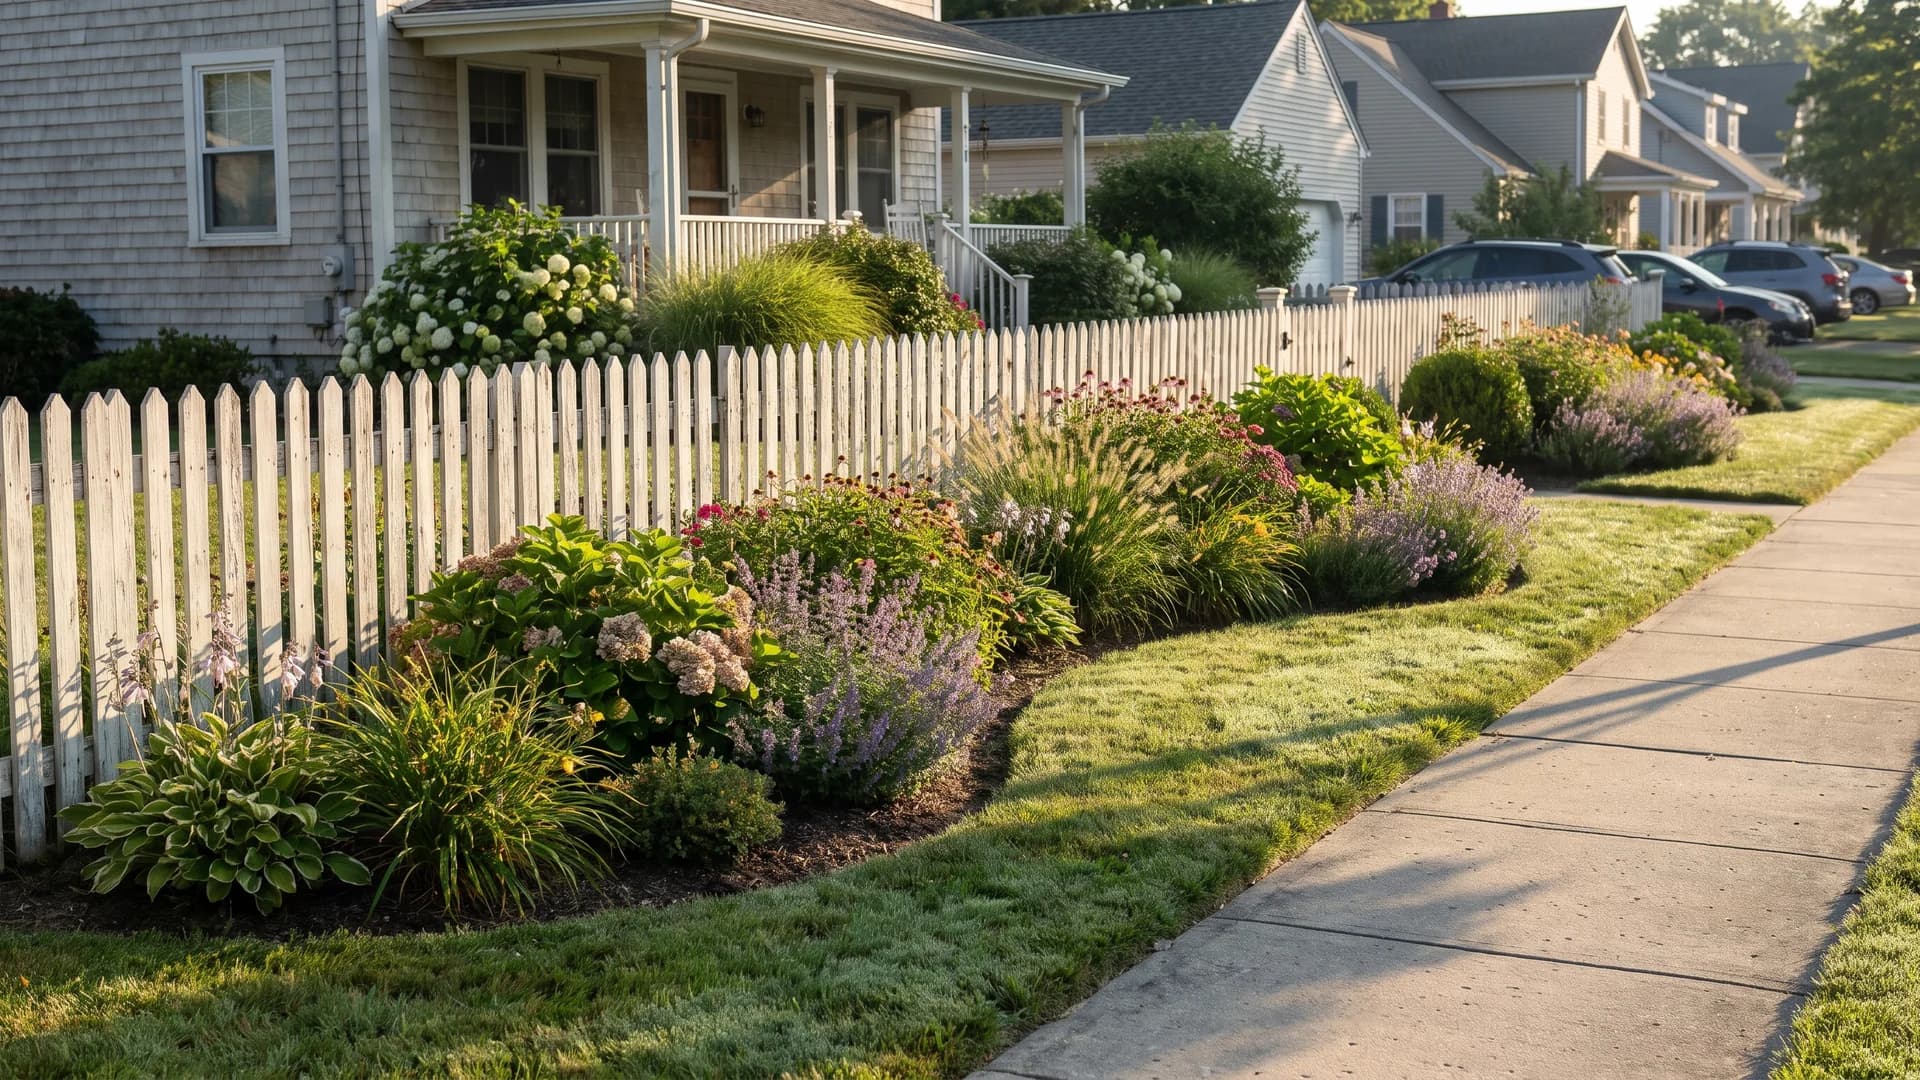
A fence is a dead straight line and your instinct is to plant a dead straight bed against it, which doubles the problem. Lay a garden hose on the grass instead, pull it into one slow curve, and cut the edge where it lands. Three feet at the pinch, six or seven at the belly. On a front boundary this reads as intentional from the street, where a straight strip reads as a job half done.
10. Plant cottage-style against a picket fence
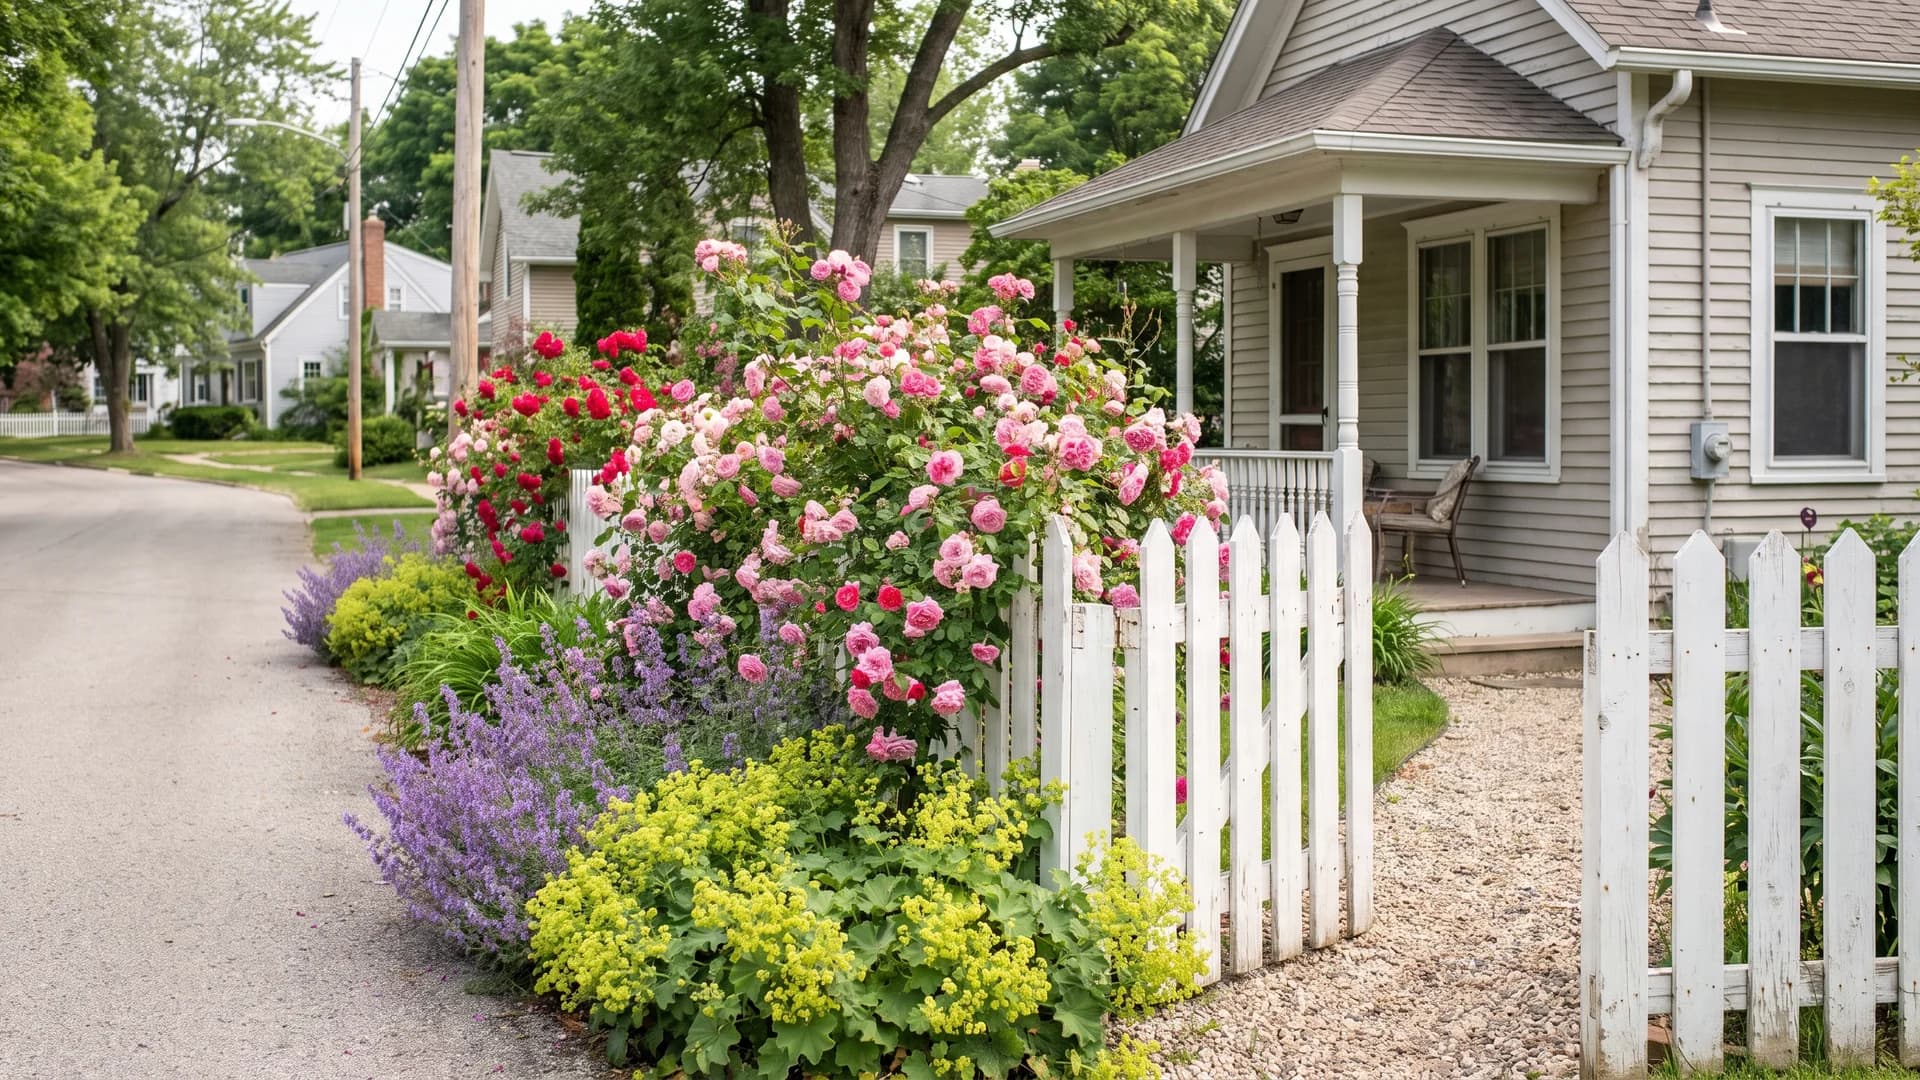
Pickets are only 3 or 4 feet tall, so plants can crest them, which is exactly what a cottage garden wants. Roses at the back, catmint 'Walker's Low' (zones 3 to 8) foaming through the middle, lady's mantle at the feet. Plant close and let it knit; the tidy spacing that suits a hedge would look wrong here. One shear after the first bloom keeps the catmint from flopping into the path.
11. Give an open fence a pollinator strip
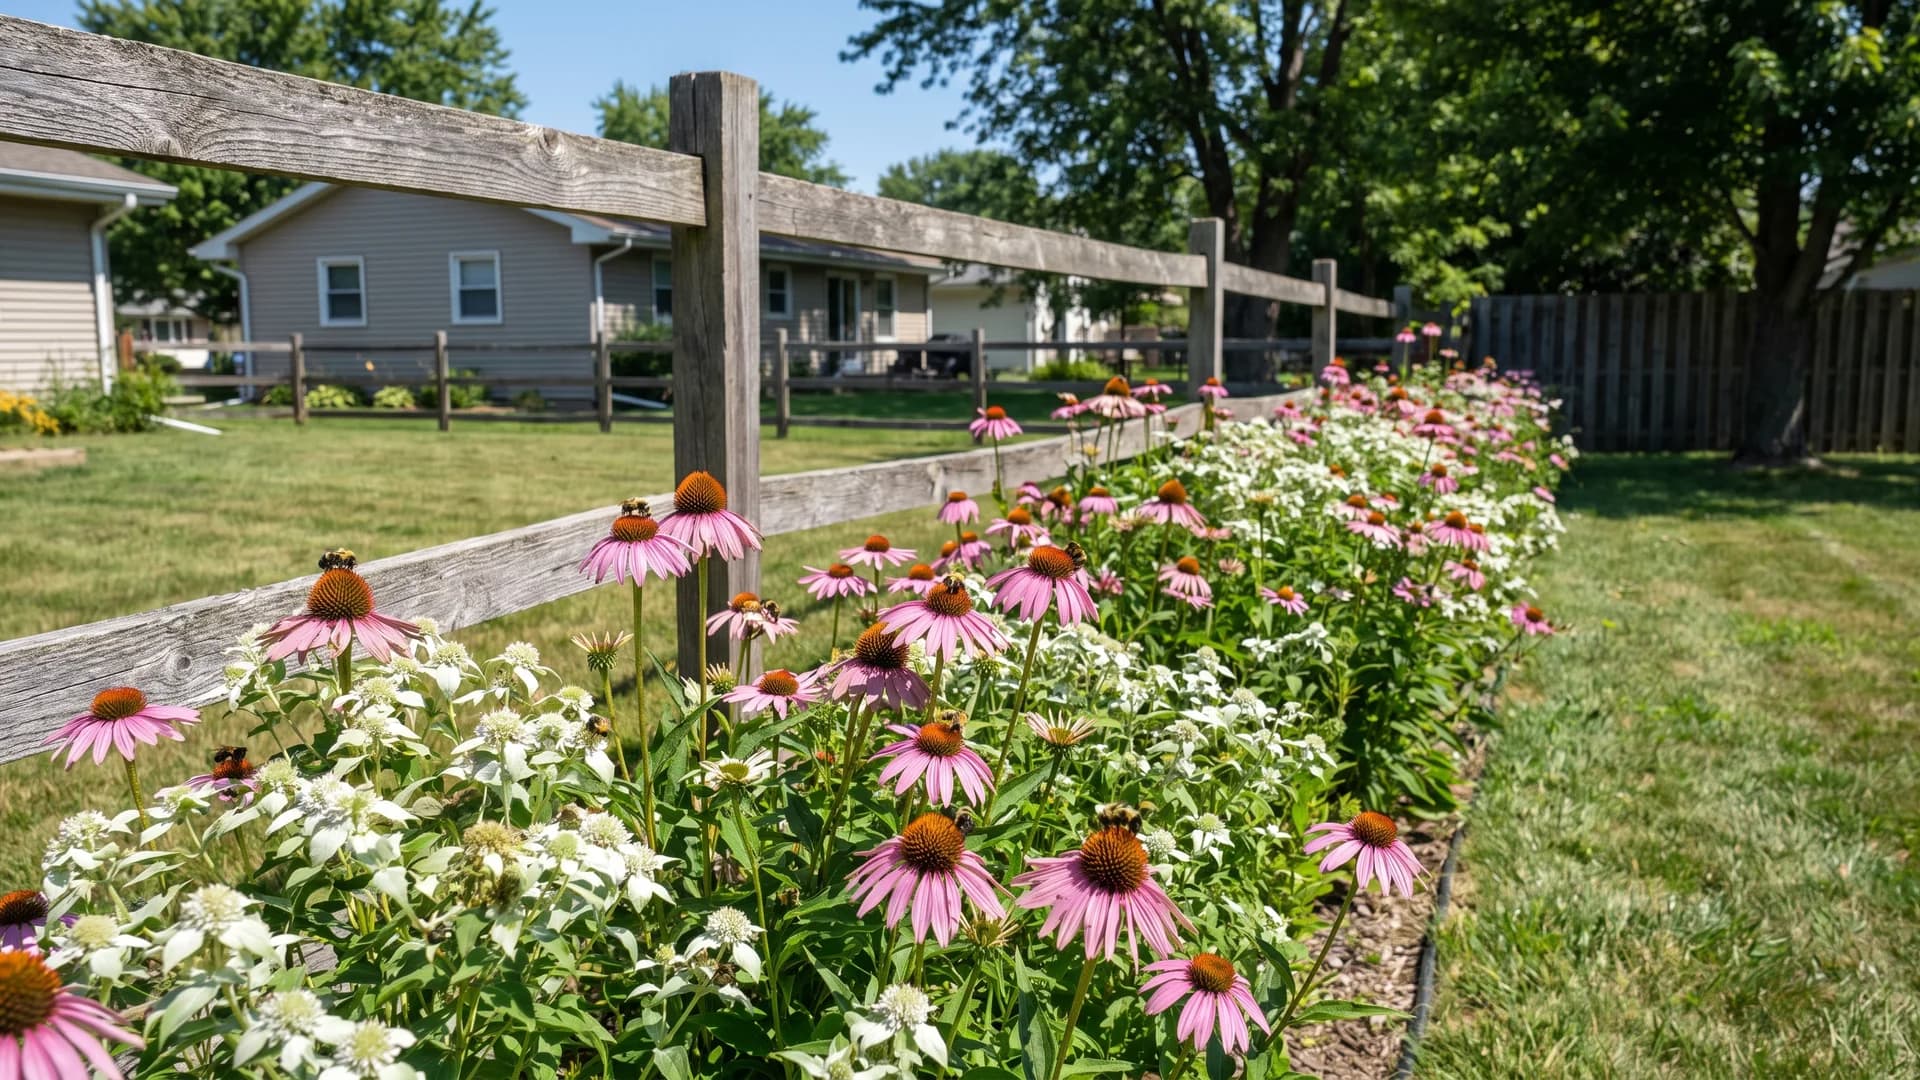
Where the fence lets sun through from both sides, a 3-foot strip of native plants will out-bloom anything you can buy in a flat. Aim for three bloom windows: spring golden alexanders, summer coneflower and mountain mint, fall aster and goldenrod. Buy plugs rather than gallons, at $4 to $7 each on 18-inch centers, and skip the deadheading so the seedheads feed birds through winter.
12. Ribbon ornamental grasses down the fence
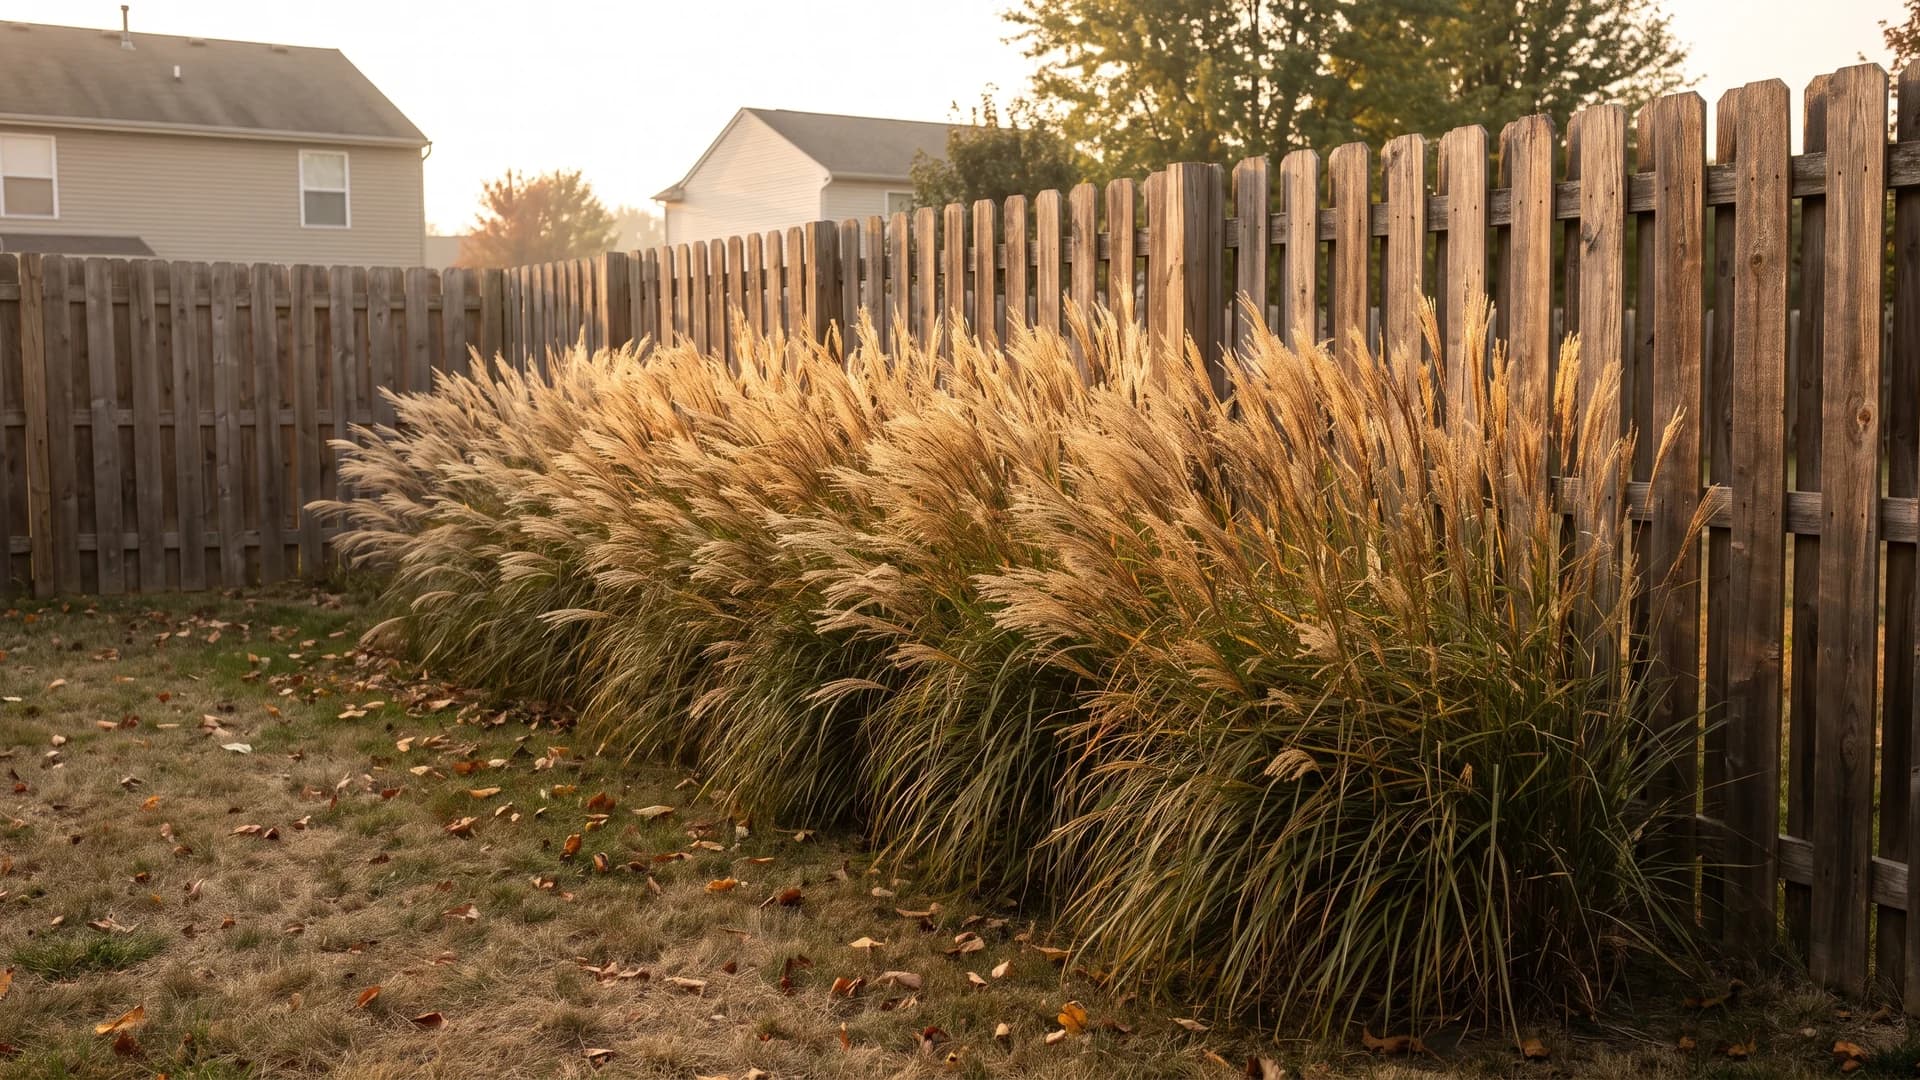
Grasses do something shrubs cannot: they move. 'Karl Foerster' feather reed grass (zones 4 to 9) stands 4 to 5 feet, holds its vertical shape through snow, and asks for one cutback in late winter. Plant on 18-to-24-inch centers and run it 20 feet or more, because a ribbon of grass reads as design where three clumps read as leftovers. Backlit against a fence in September it is the cheapest focal point in the yard.
13. Plant all white against a dark or vinyl fence
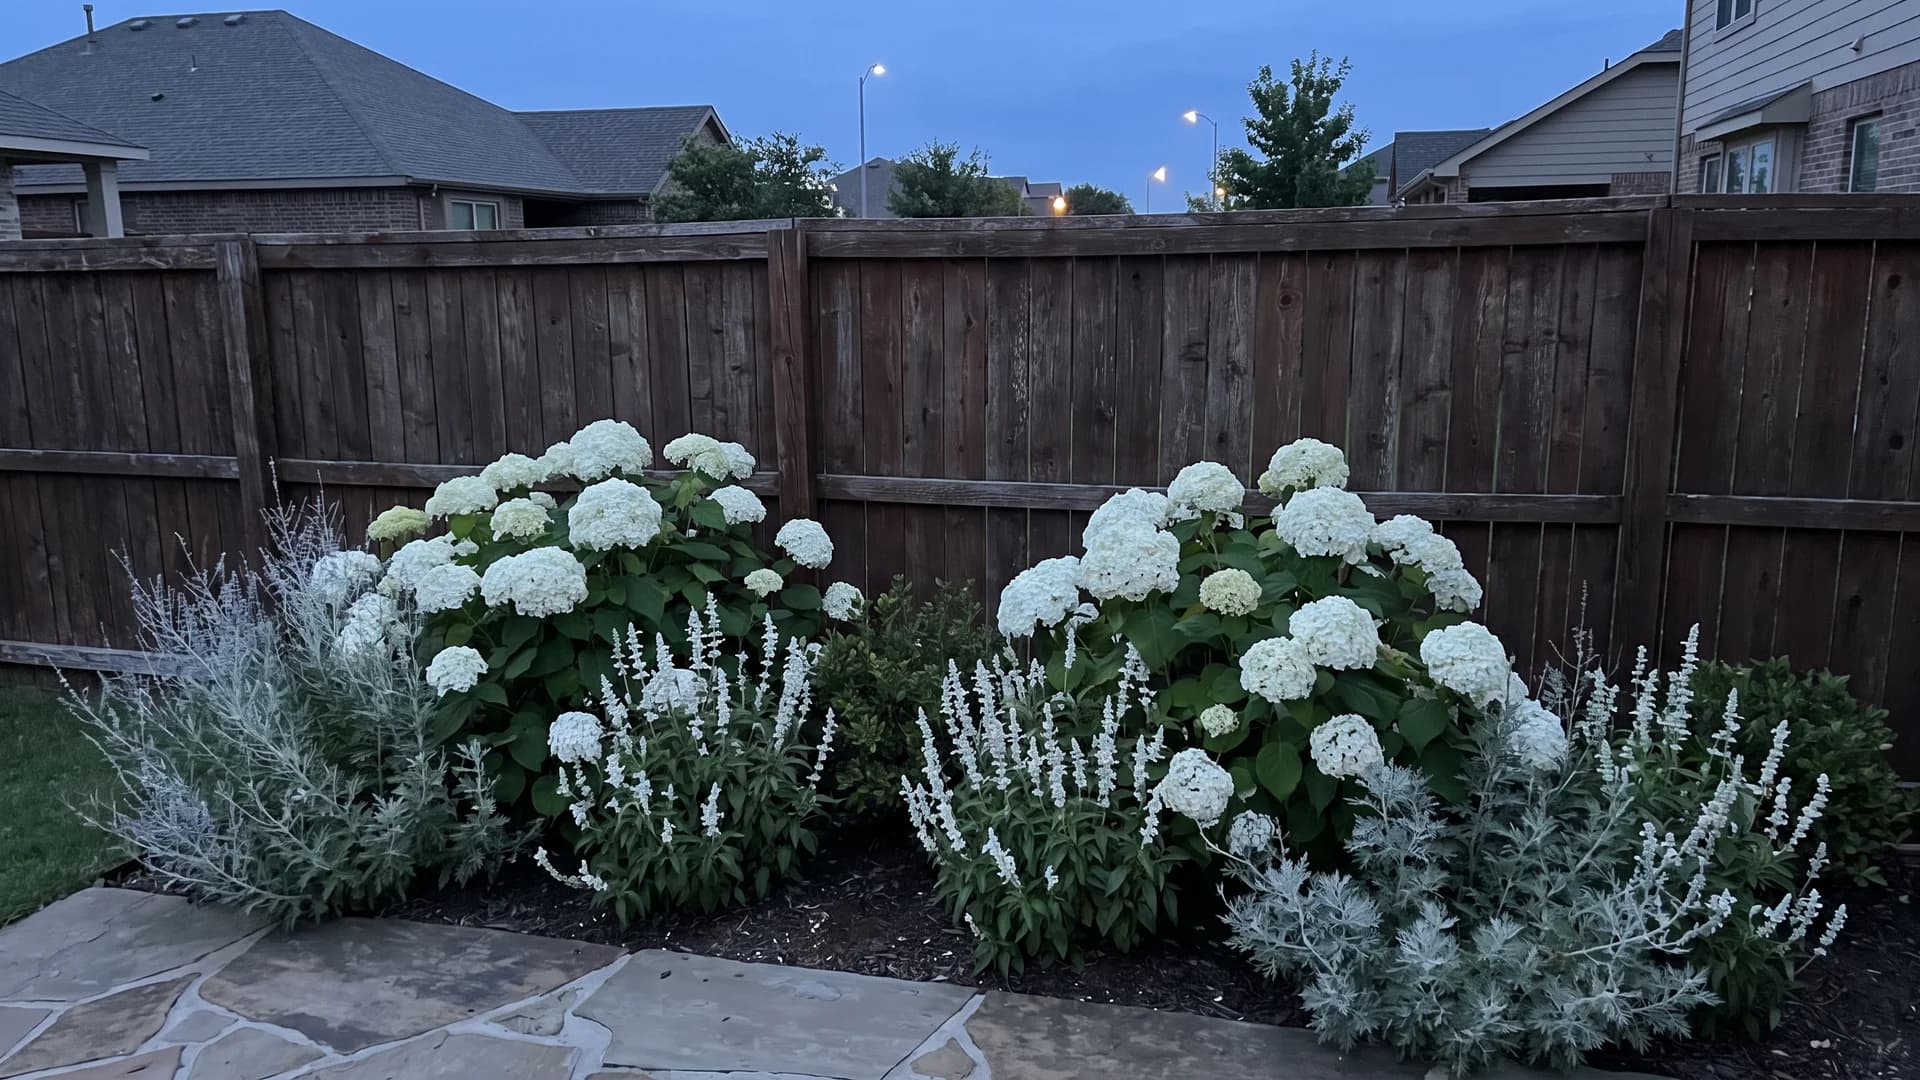
White is the last color the eye can read at dusk, which makes it the right choice on a fence you see from the patio after work. 'Annabelle' hydrangea (zones 3 to 9), white salvia, and silver artemisia hold their glow for a good hour past sunset. Against a white vinyl fence the same trick runs in reverse: plant deep greens and burgundies so the fence becomes a backdrop instead of the brightest thing out there.
Climbers and vertical layers
14. String the wires before you buy the climber
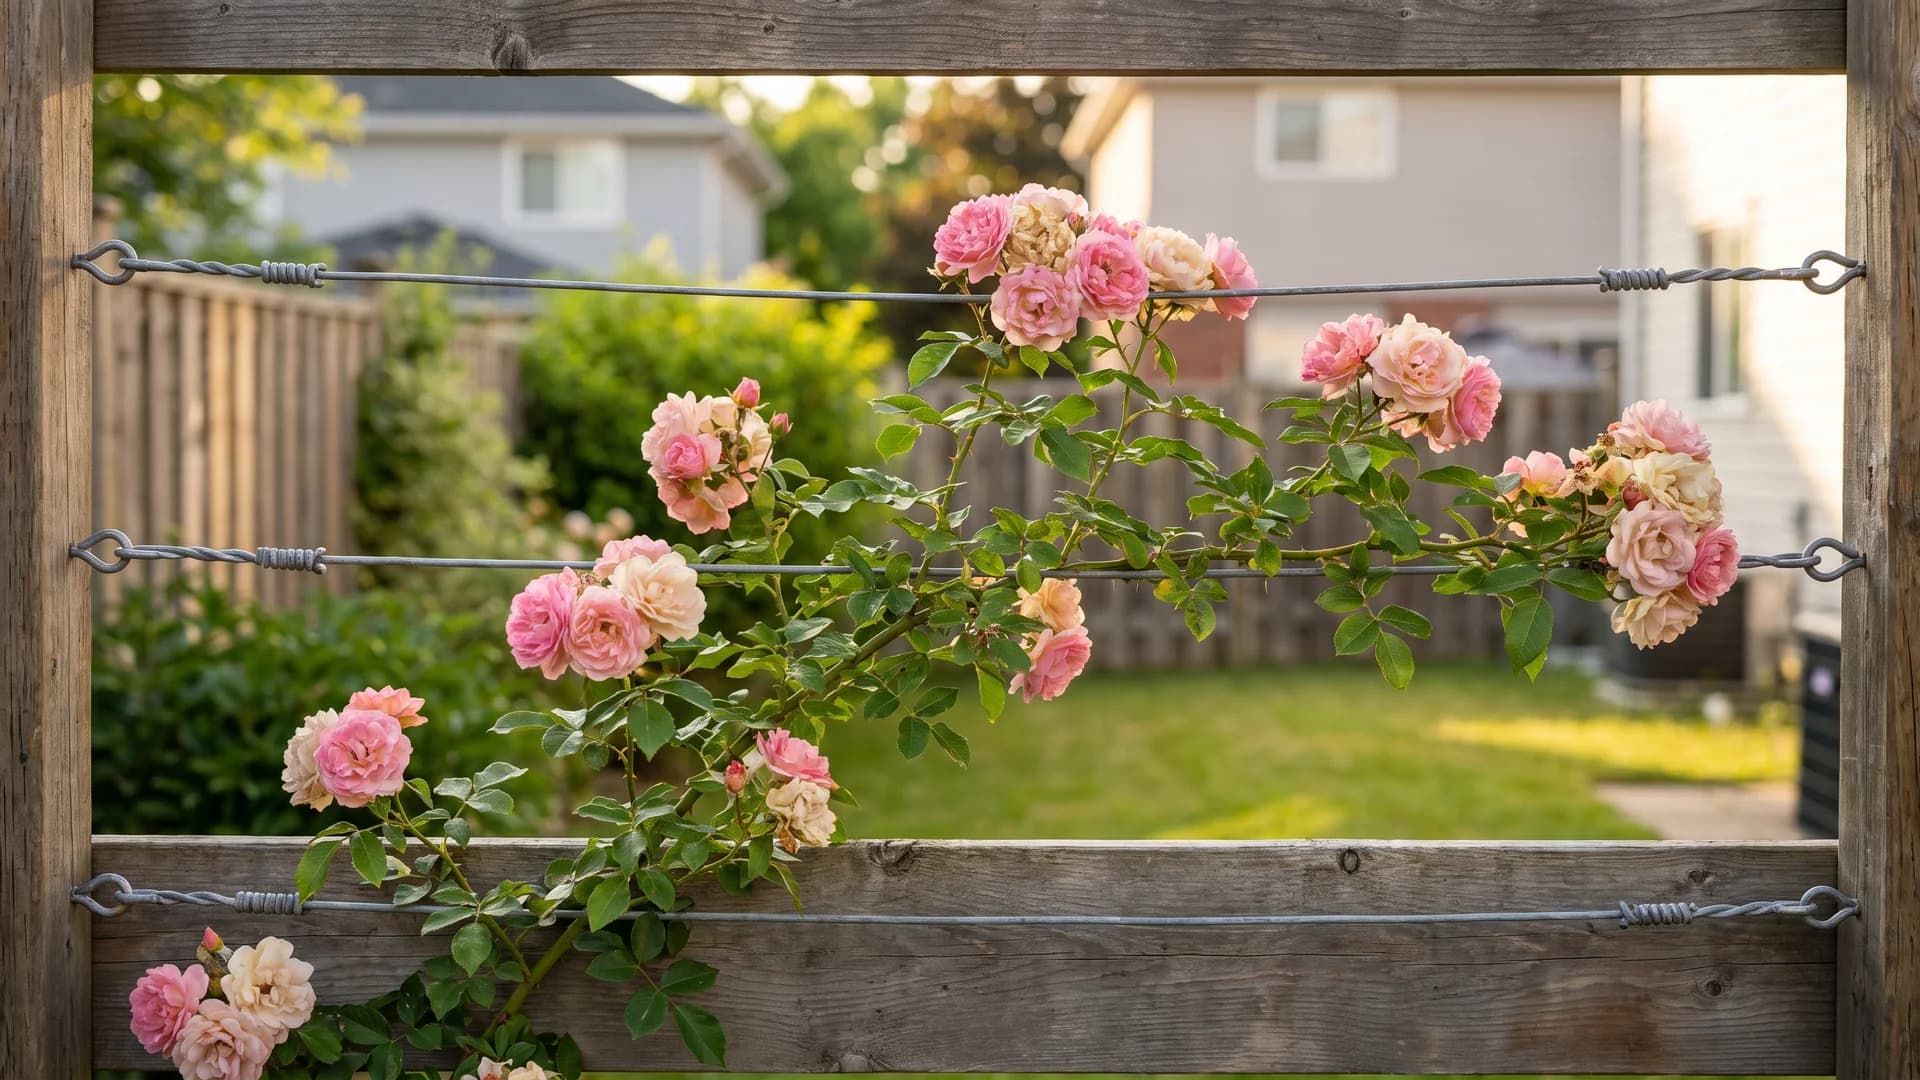
Almost nothing climbs a flat fence unaided. Screw vine eyes into the rails every 4 to 6 feet, run 12-gauge galvanized wire horizontally at 18-to-24-inch intervals, and set it 2 inches off the boards so air moves behind the foliage. Clematis in pruning group three and climbing roses both take to it, at about $25 in hardware for a 20-foot run. Wrought iron skips this step entirely: the climber weaves through the bars on its own.
15. Mount trellis panels where there is no bed
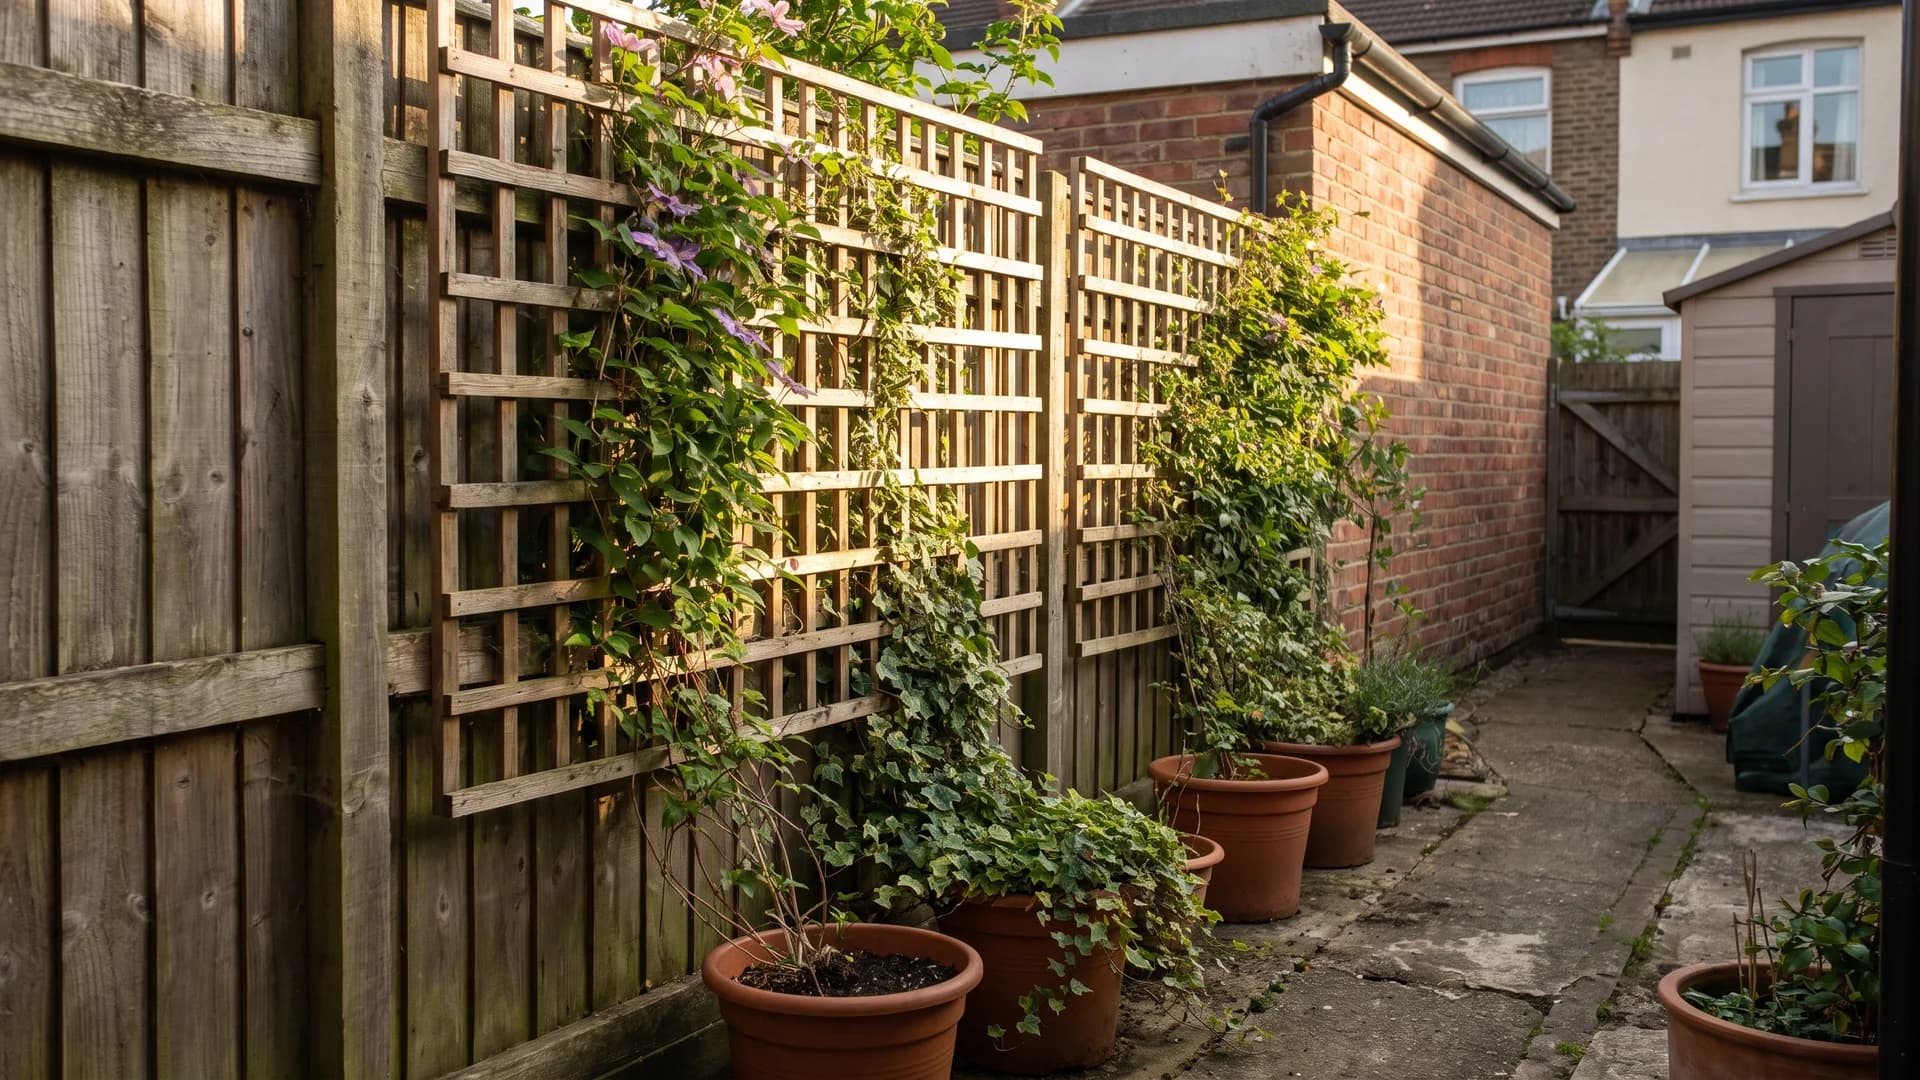
Sometimes the fence has concrete or a path at its feet and no soil at all. Panels at $30 to $70 each, mounted in a rhythm of two or three with gaps between, give the run vertical interest that pots below can grow into. Fix them on 2x4 furring strips rather than flat to the boards. That 1.5-inch gap keeps the fence drying out and makes staining possible without unscrewing everything.
16. Espalier fruit flat against the boards
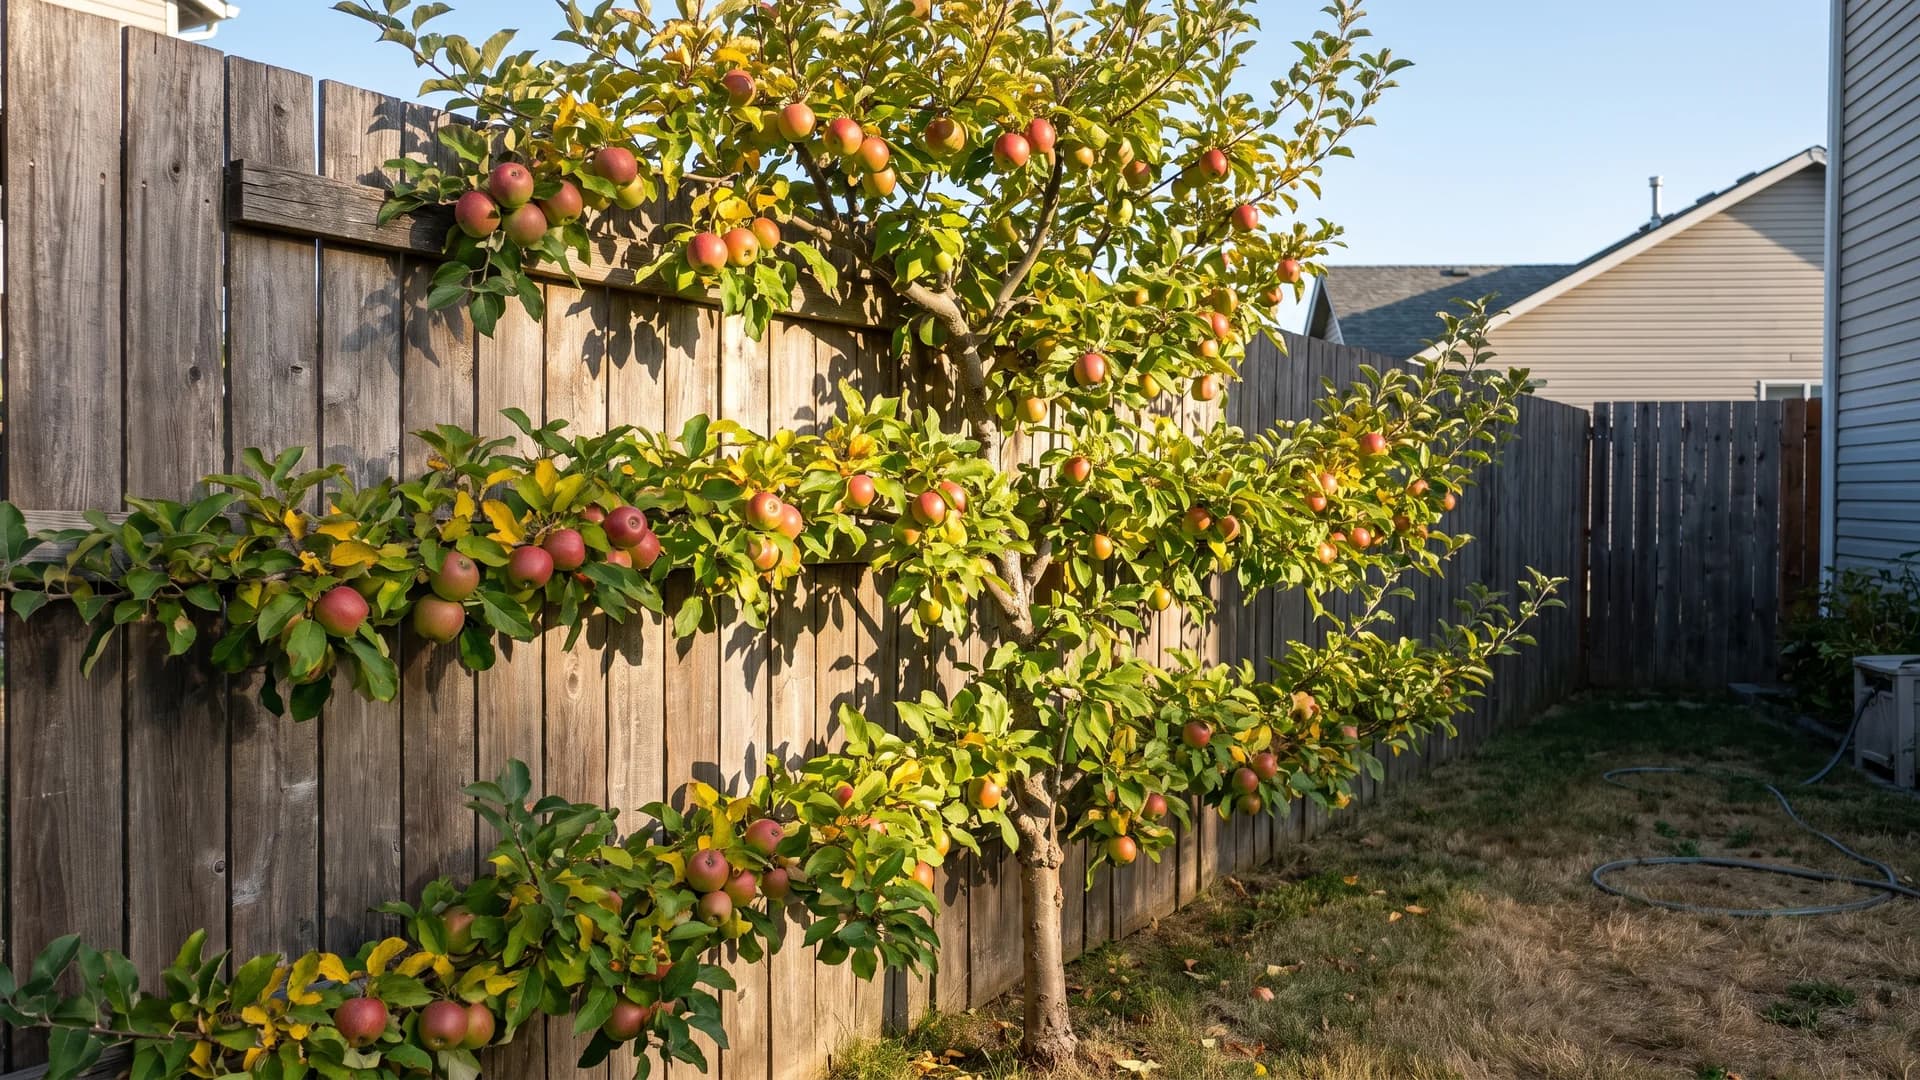
The best return on a 12-inch strip of soil is a fruit tree trained flat. Apple or pear on a dwarf rootstock, three tiers of horizontal cordons spaced 18 inches apart, on a south or west-facing run for the heat the fence radiates back. Bare-root trained trees run $50 to $90 in winter. Two prunes a year keep the shape, and a mature espalier yields real fruit off a footprint the width of a doormat.
17. Hang the garden if you cannot dig
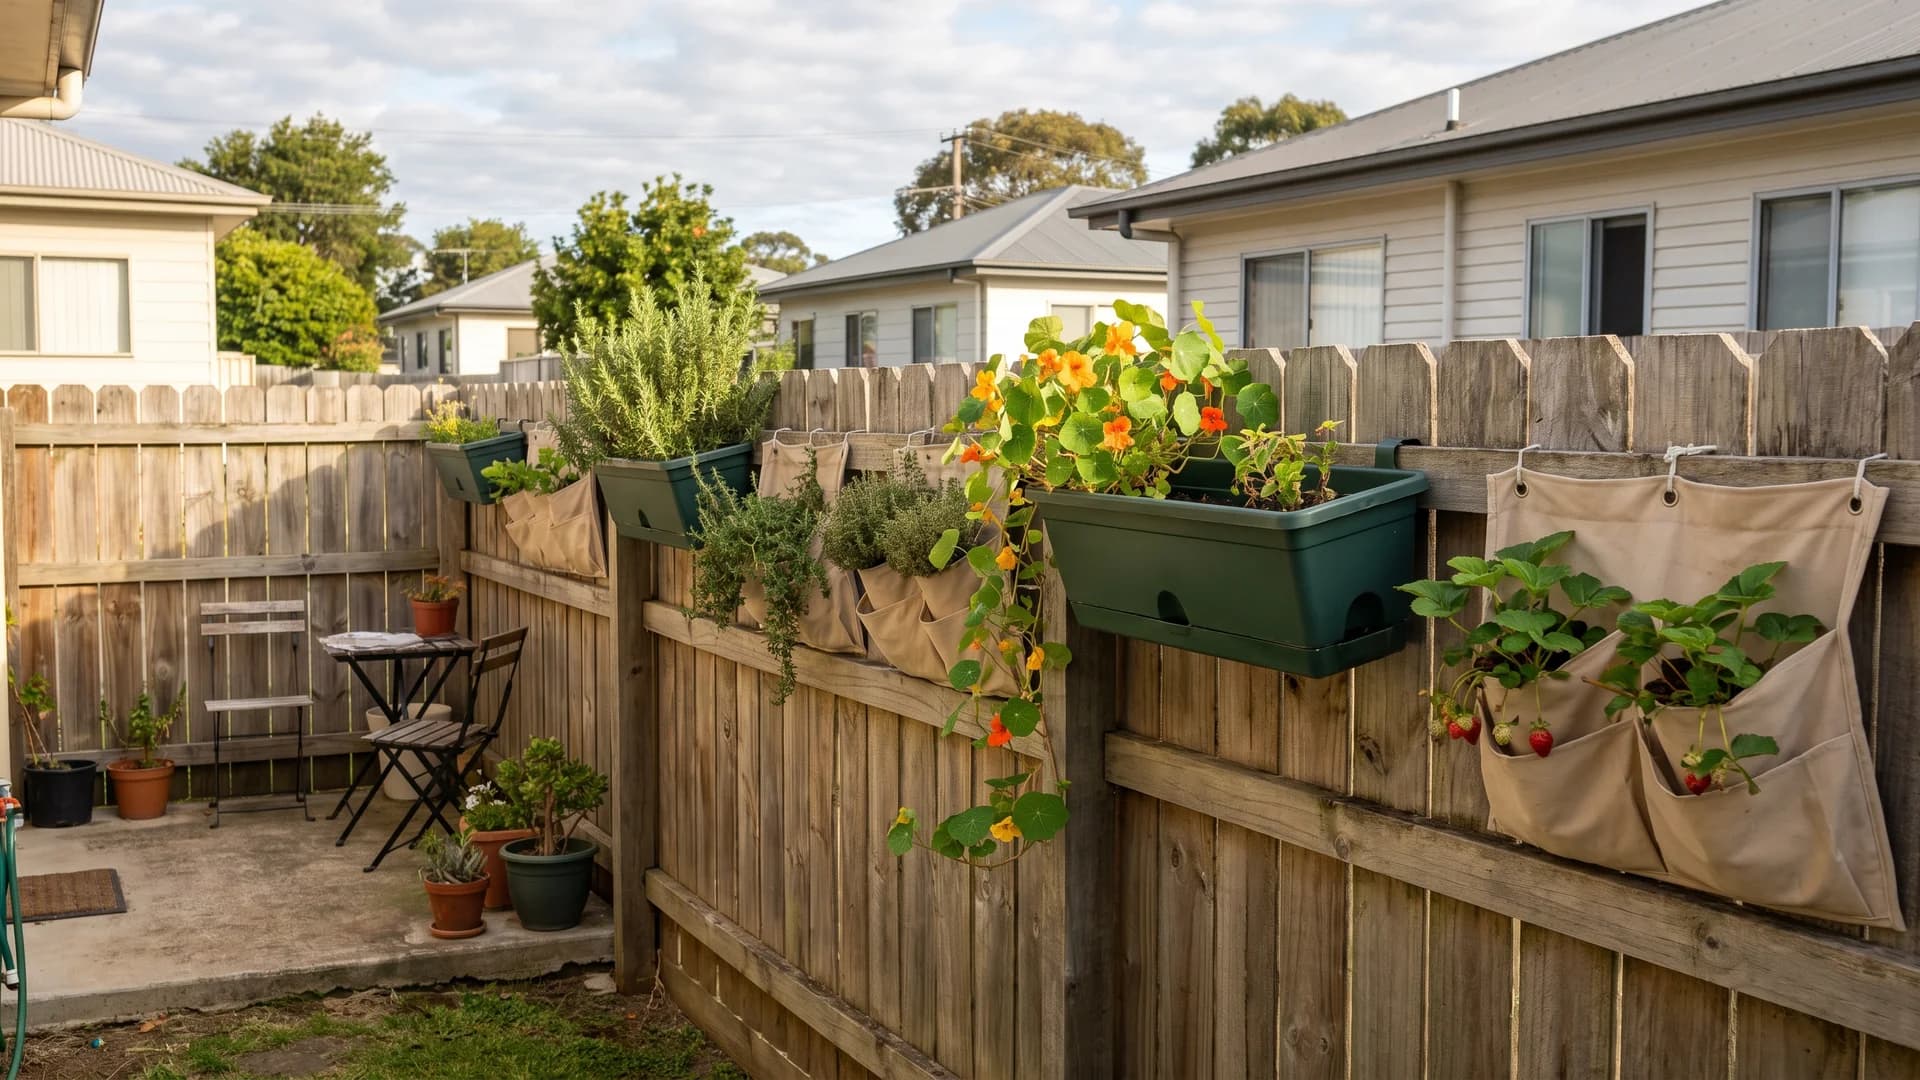
Renters and anyone with a concrete apron can still plant the fence. Over-rail hooks and hanging pockets cost $15 to $40 for a set and leave nothing behind but two screw holes. Fabric pockets dry out brutally fast, so pick self-watering pots or plan on a daily can in July. Trailing herbs, nasturtium, and strawberries all work; anything with a deep taproot will not.
Lighting the fence line
18. Wash the boards with sconces between posts
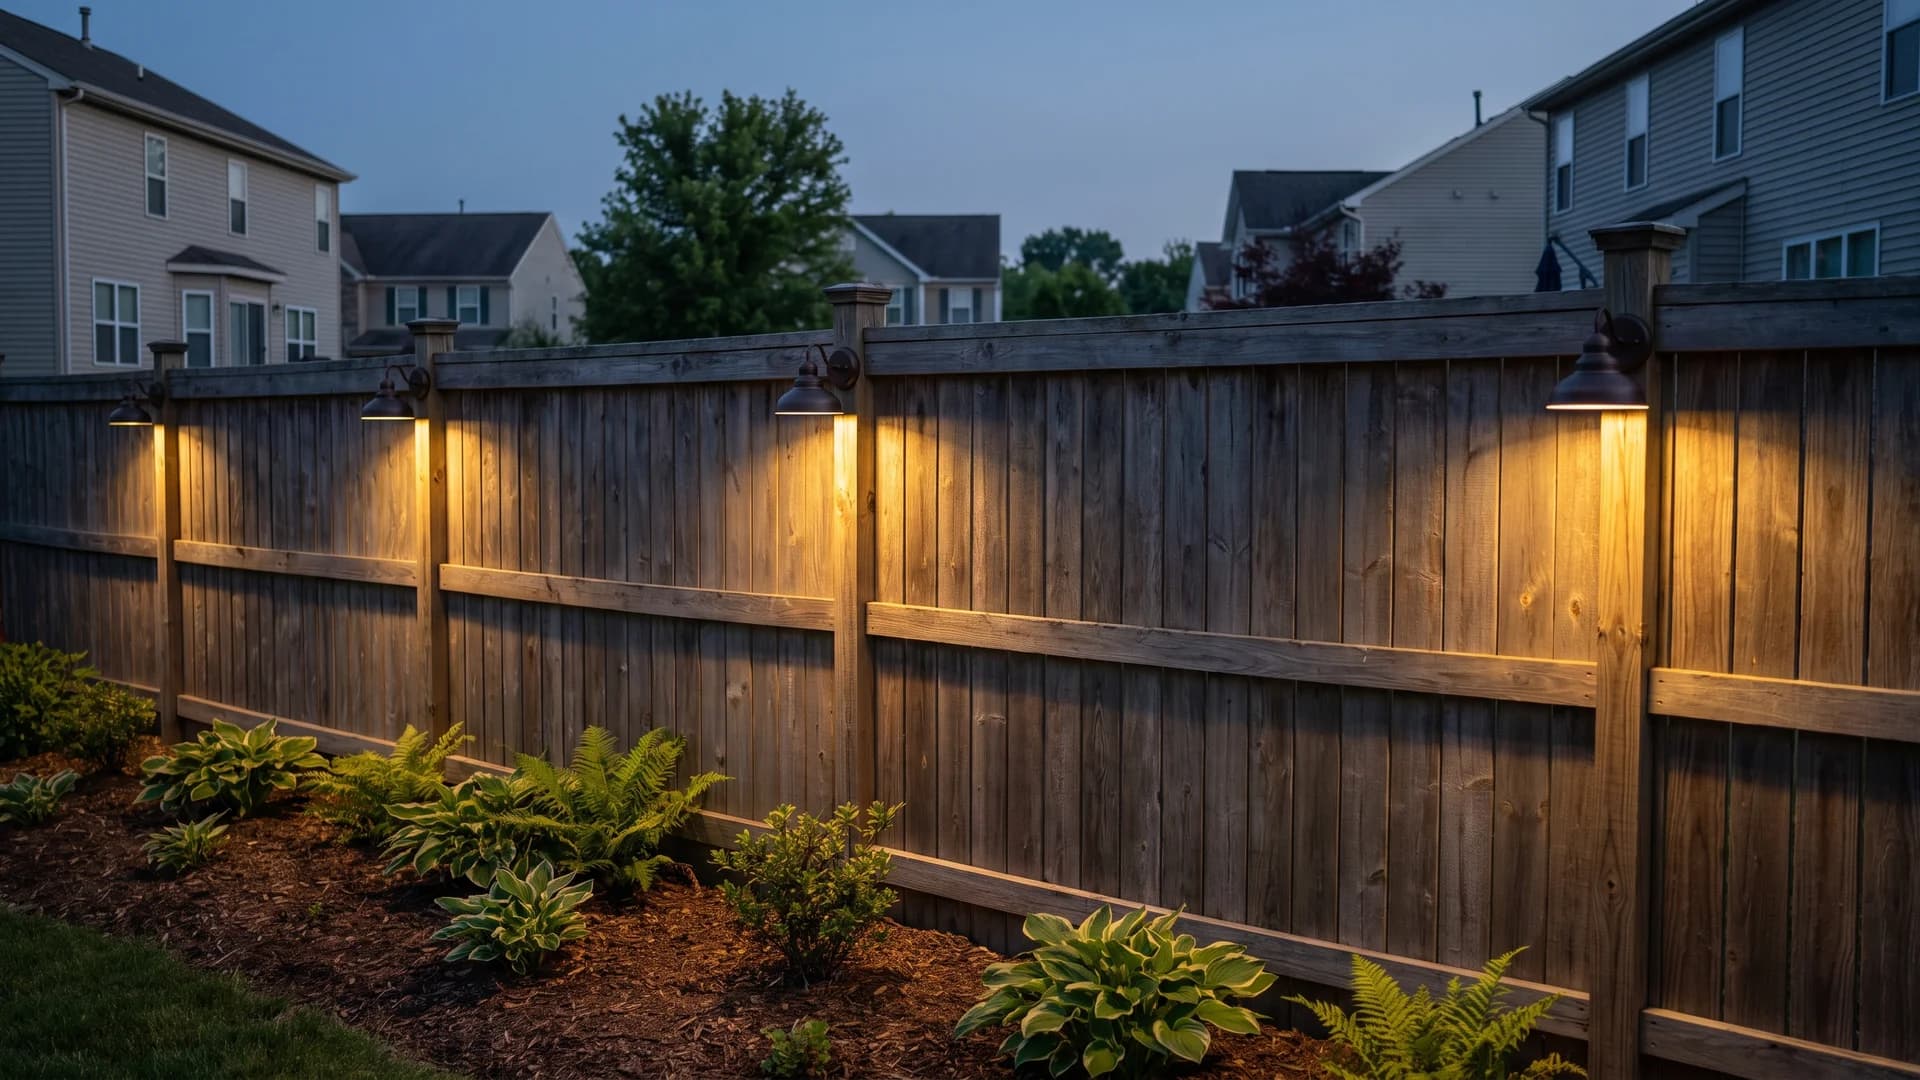
After dark a fence disappears and the yard feels boundless in the wrong way. Deck sconces mounted at 5 to 6 feet on every other post throw a soft scallop of light down the boards and pull the whole run back into the picture. Use a 12V low-voltage system in 2700K warm white; a $90 transformer carries a dozen fixtures. This is the single highest-impact piece of landscape lighting on a boundary.
19. Uplight one shrub, not all of them
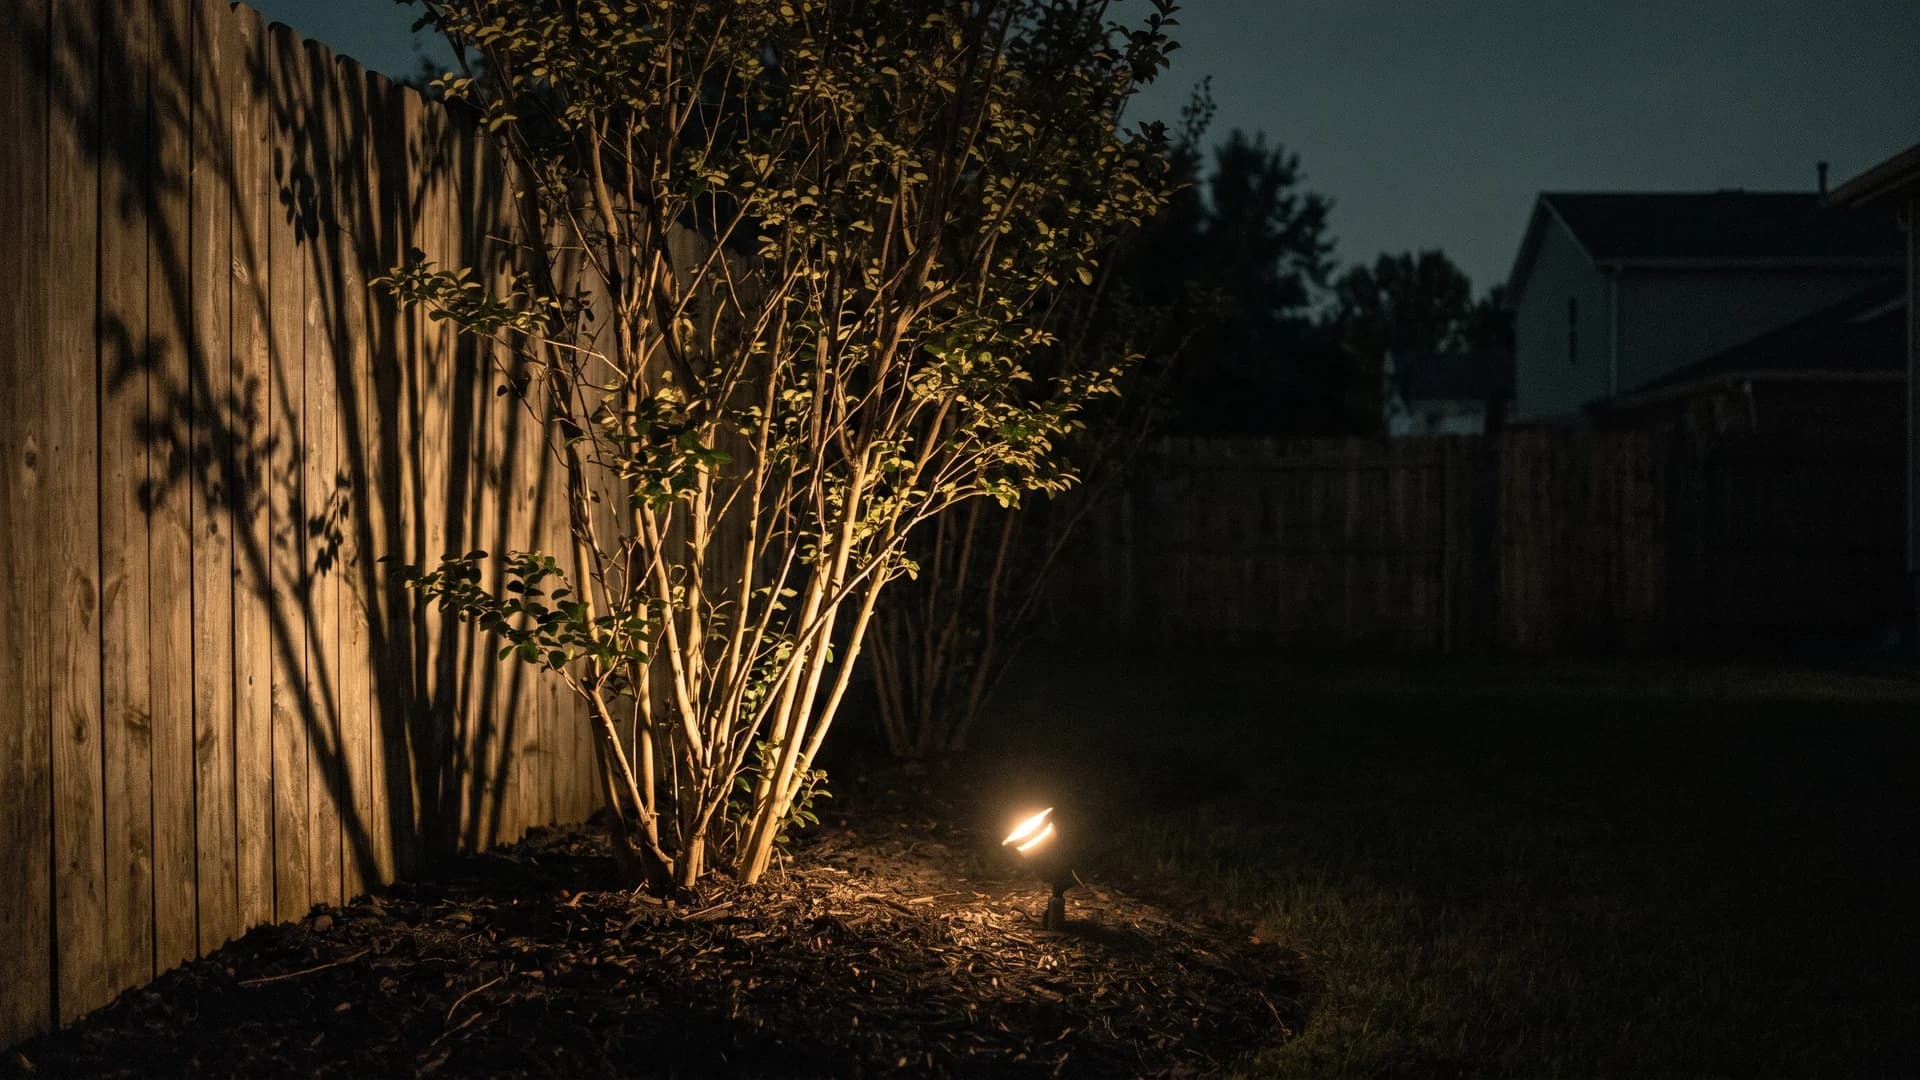
Light every plant and you get a flat wall of glare. Pick two or three specimens with real structure, a multi-stem shrub or an ornamental grass, and set a 3-to-5-watt spot 18 inches out aimed up through the branches. The shadow it throws on the boards does more work than the light itself. Restraint is the whole technique: three fixtures across 60 feet beats twelve.
20. Space solar lights in clusters, never in a row
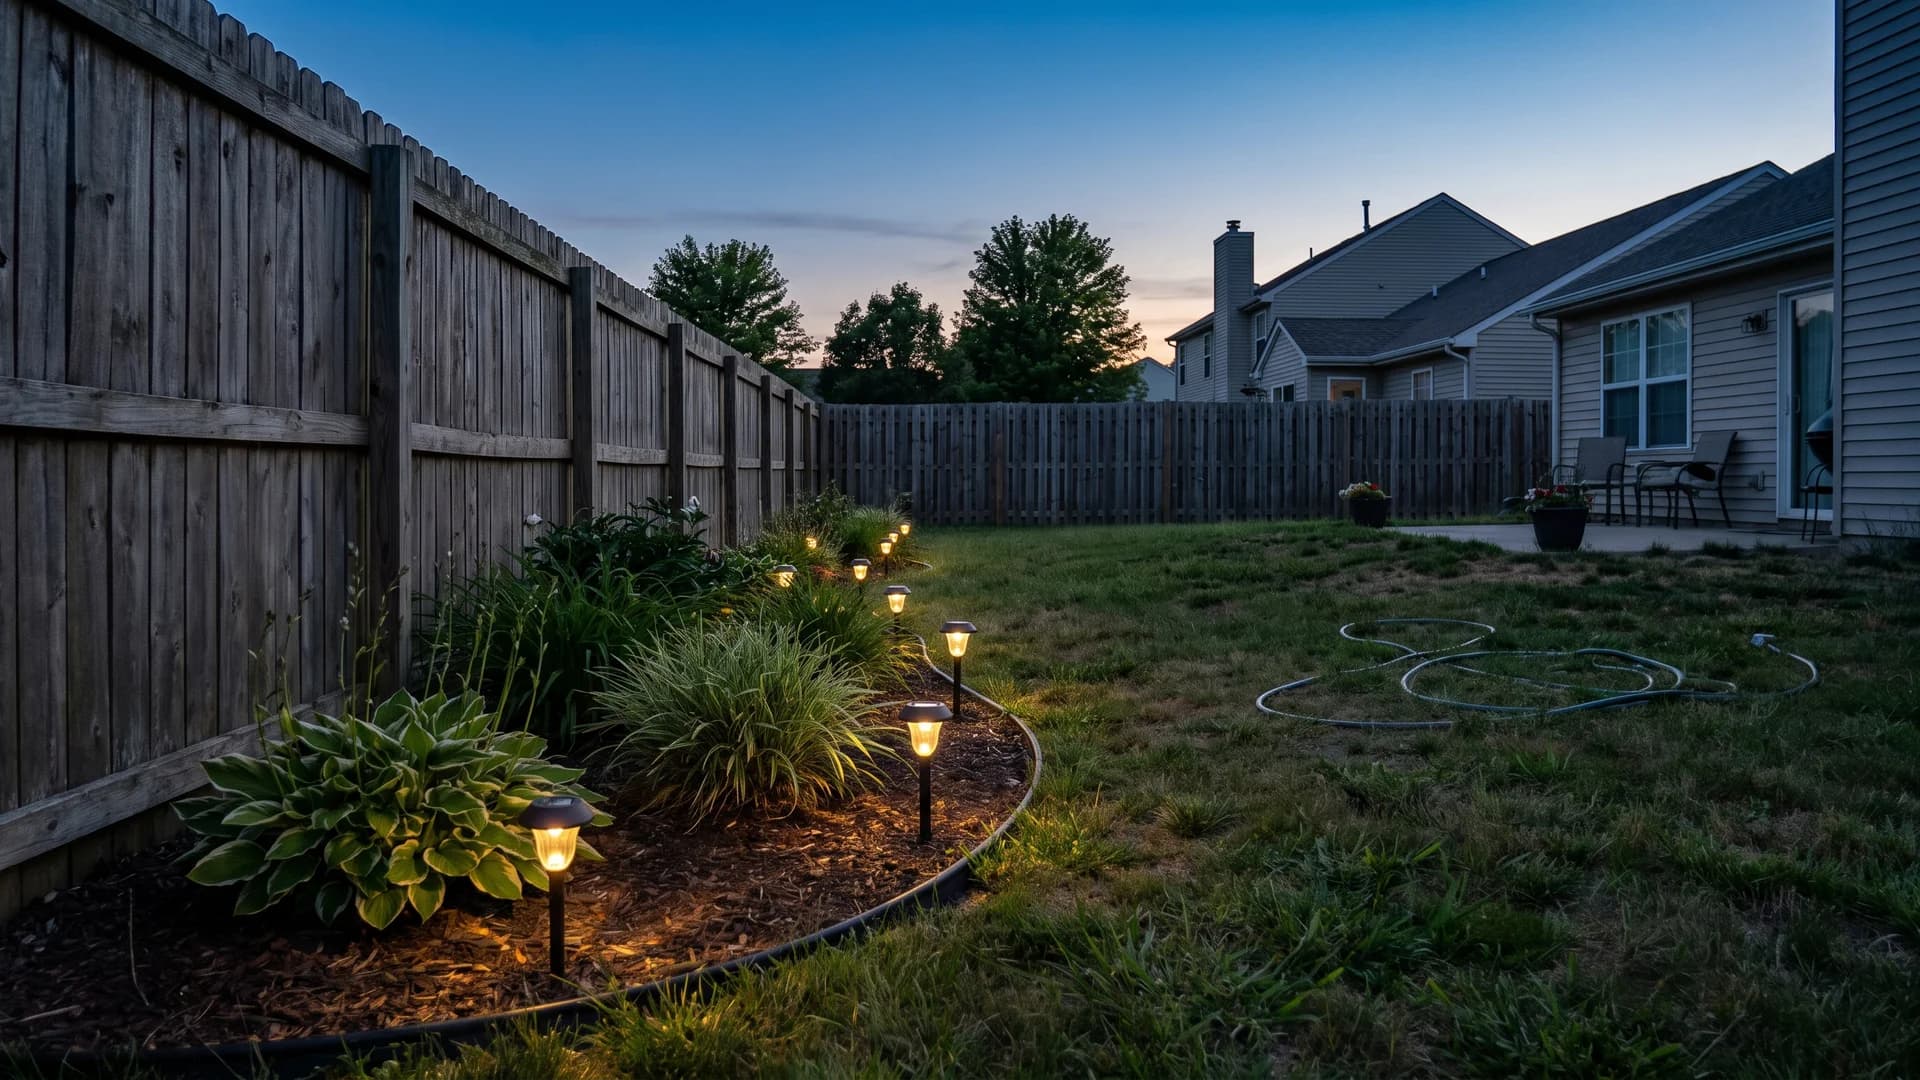
Solar stakes at $4 to $10 each are the cheapest way in, and evenly spacing them down a fence is what makes a yard look like an airport runway. Group them in twos and threes with 6-to-8-foot gaps between clusters instead. Buy fewer, better units and put them where you actually walk. Realistically the batteries give you two or three seasons before the output fades.
Narrow strips and hardscape
21. Plant straight into gravel when the strip is under 18 inches
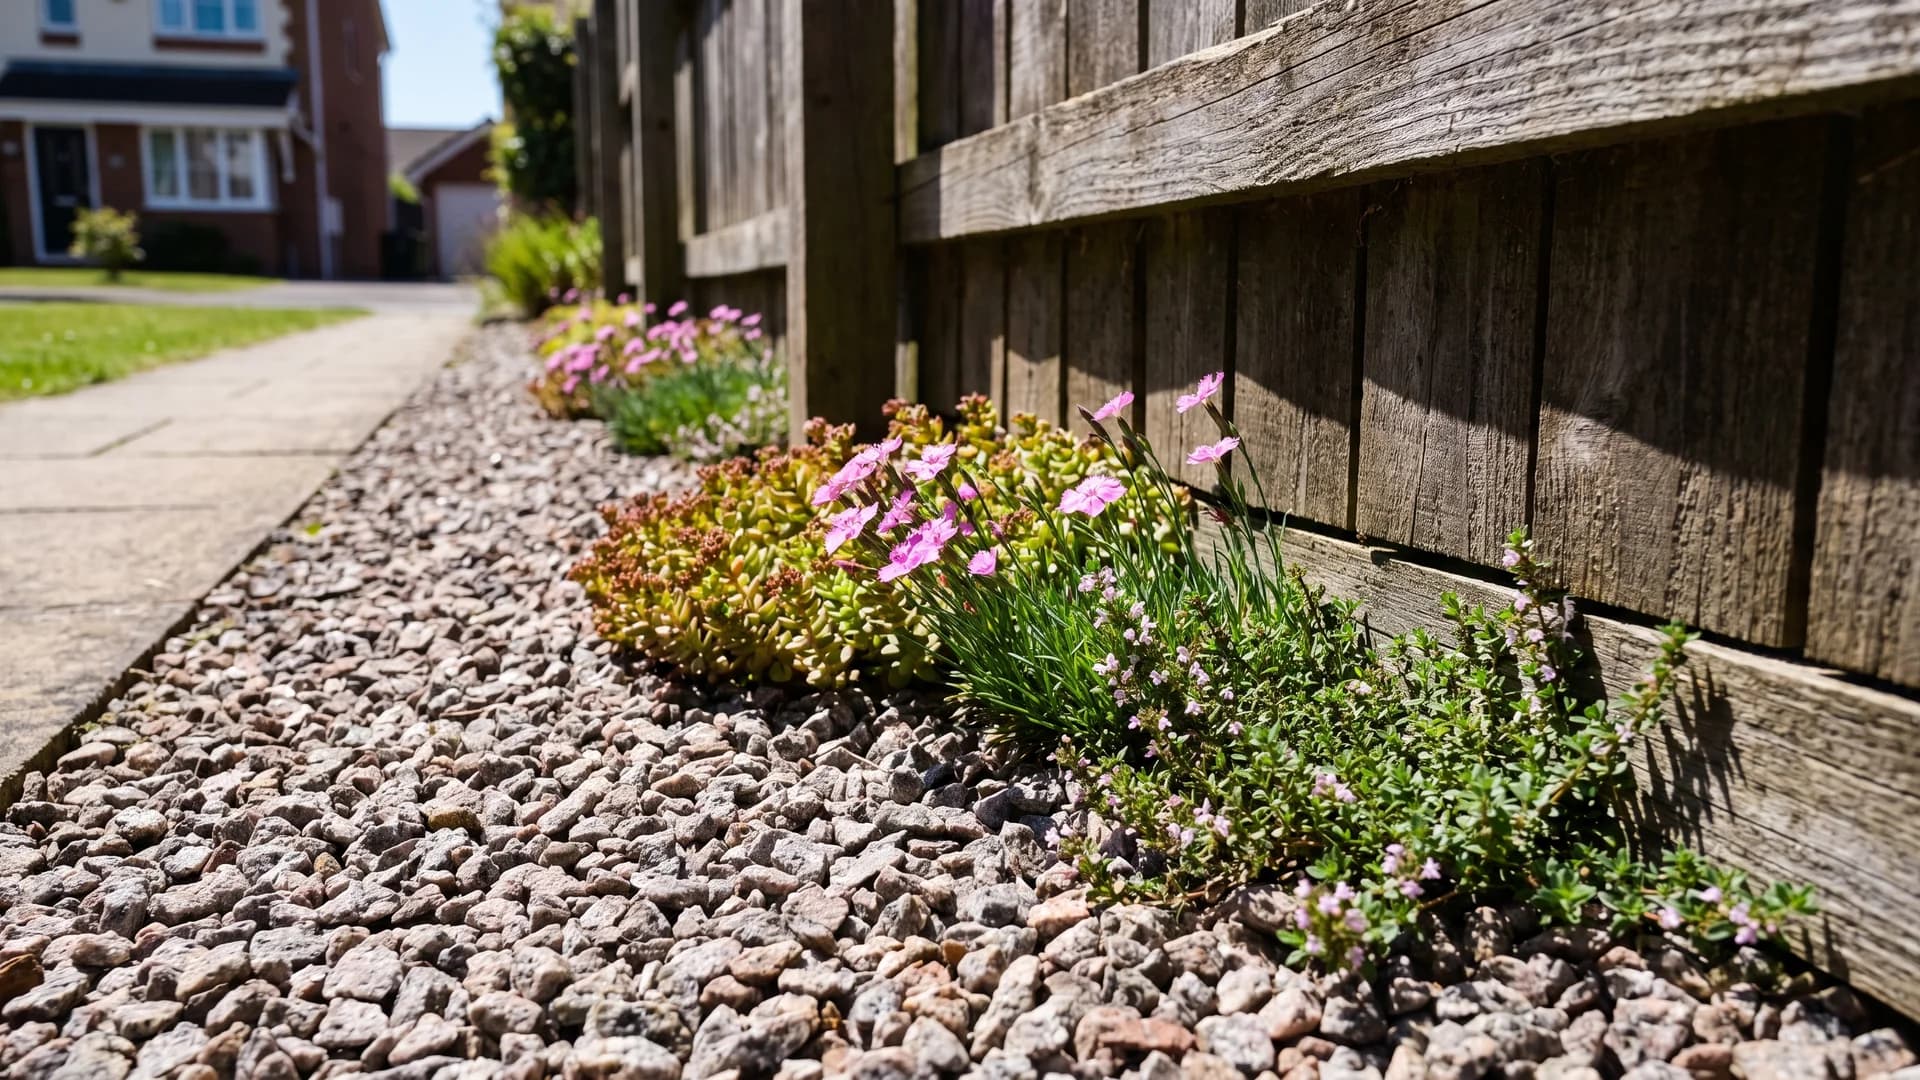
Below 18 inches of width, a bed with edging and mulch looks fussy and dries out anyway. Lay 3 inches of 3/8-inch gravel straight over the soil and plant into it: sedum, dianthus, creeping thyme, anything happy in sharp drainage. Skip the fabric. The gravel is the mulch, and without a barrier the plants seed themselves into the gaps, which is the point.
22. Xeriscape the hot west-facing run
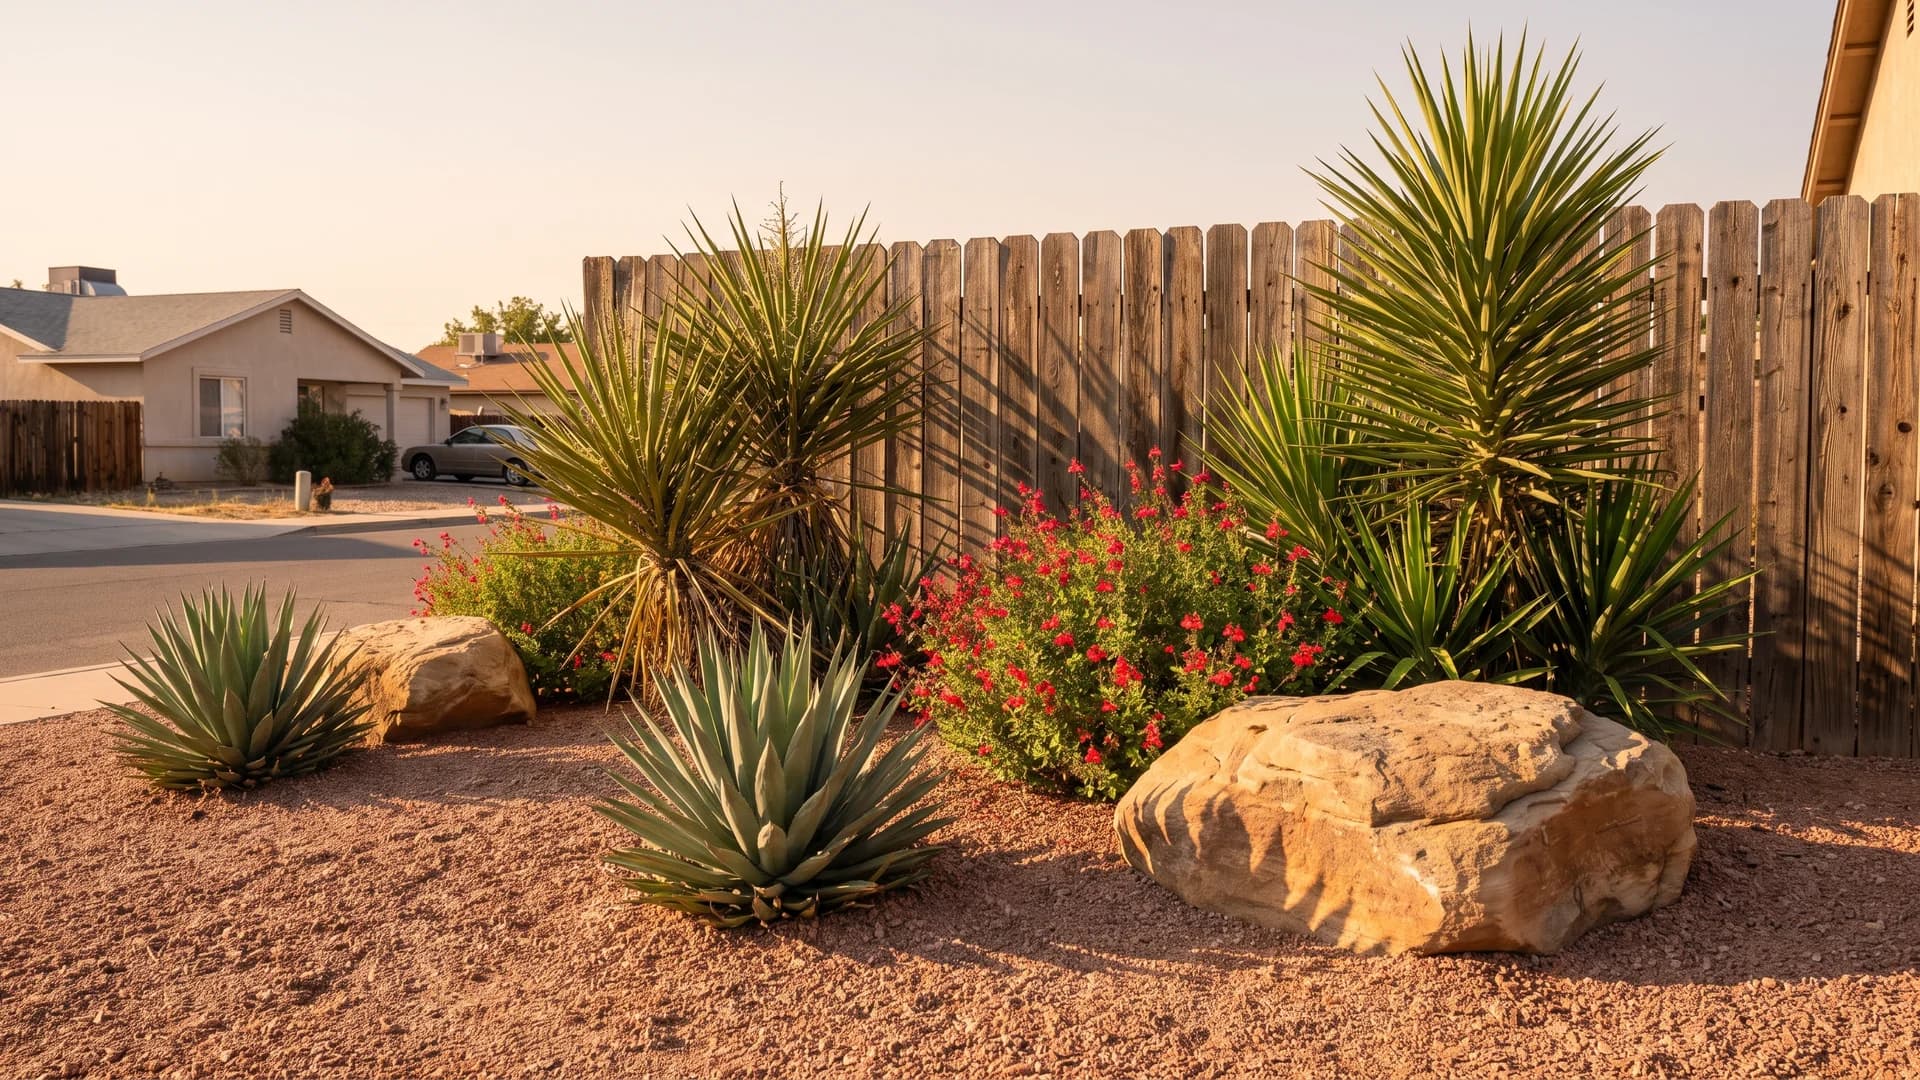
A west-facing fence bakes all afternoon and re-radiates the heat into whatever is planted at its base, which is why the thirsty stuff keeps dying there. Work with it: decomposed granite instead of mulch, drought-tolerant plants like agave, yucca, and autumn sage, and two or three boulders to hold the composition. A drip line on a timer covers establishment. Our rock landscaping guide has the per-ton stone costs if you want to price the base.
23. Cut an 18-inch mulch ribbon and stop there
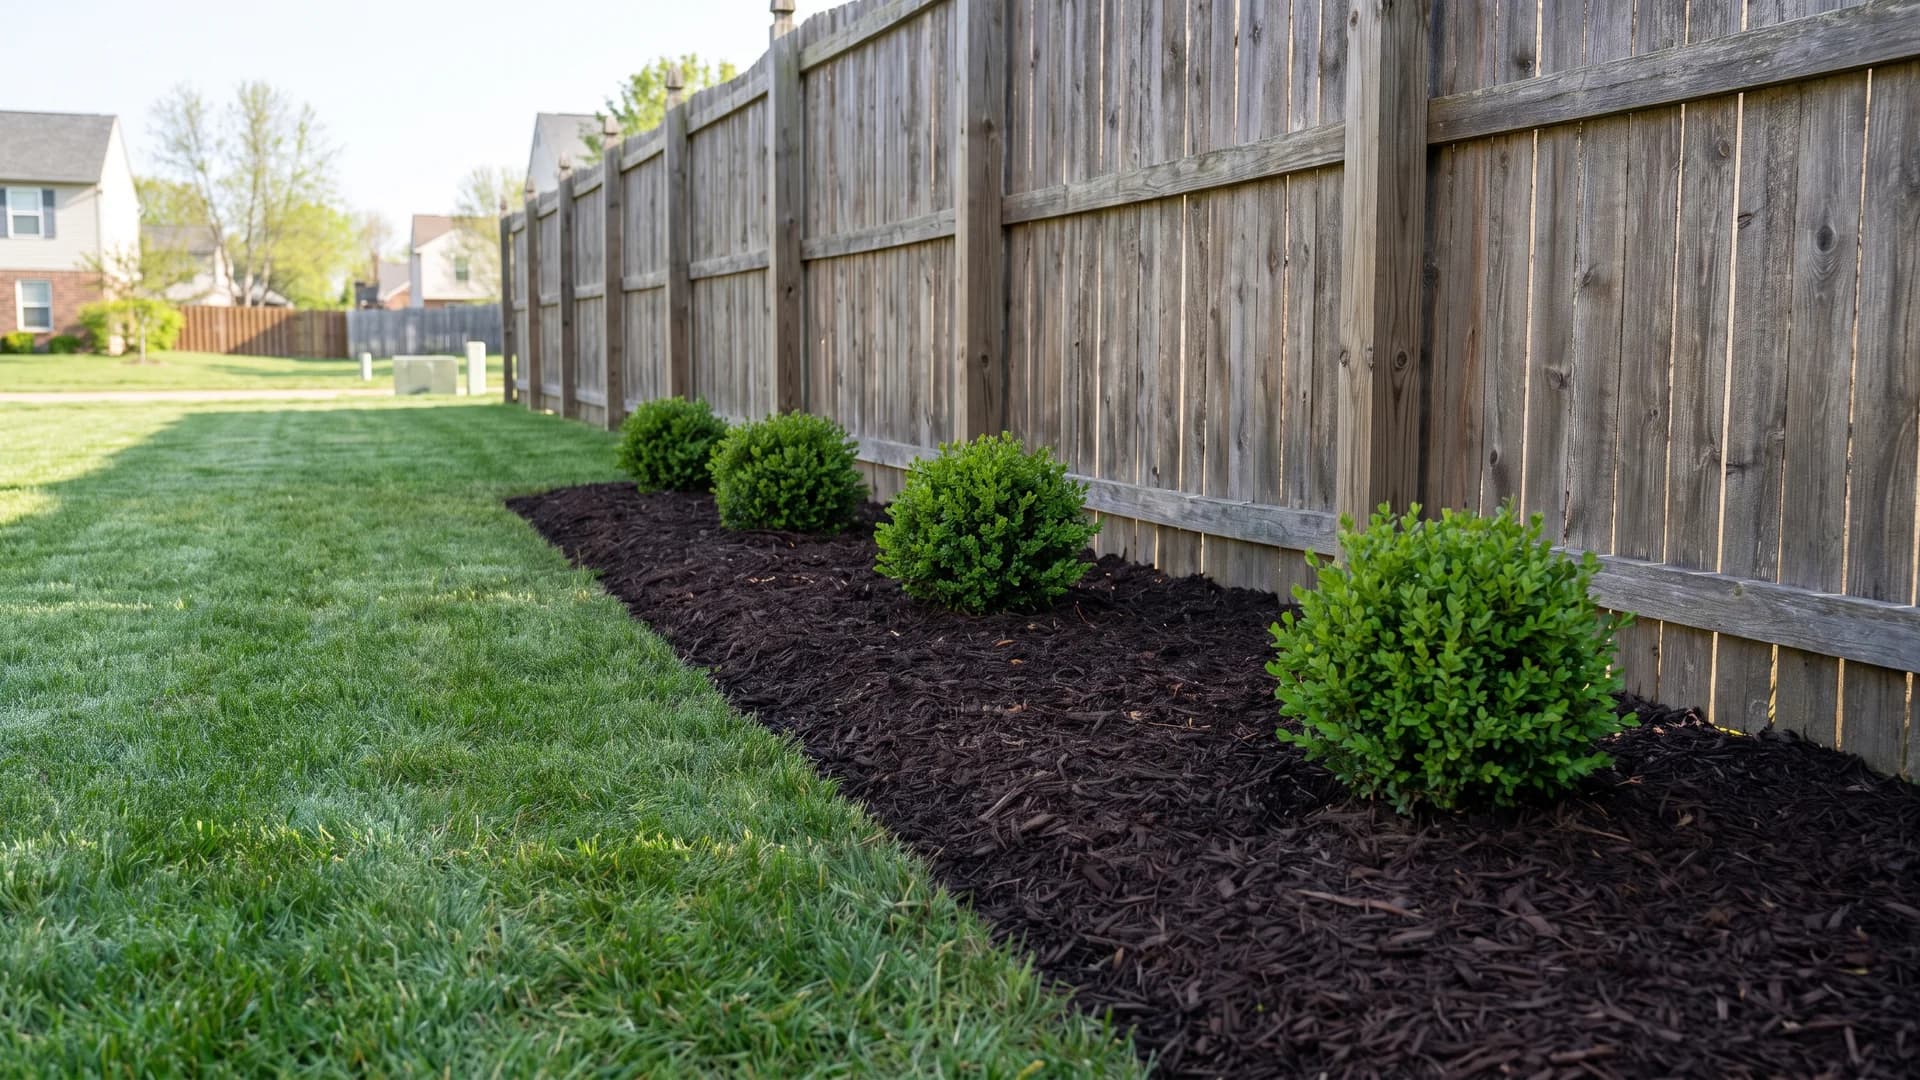
Not every fence needs a border. Eighteen inches of clean mulch with a cut edge is the minimum that reads as designed rather than neglected, and it takes an afternoon. One cubic yard of shredded hardwood at $35 to $50 covers about 108 square feet at 3 inches deep, so a 60-foot ribbon needs roughly a yard. Add three shrubs at intervals later if you want, or leave it clean.
24. Treat a narrow fenced passage as a corridor
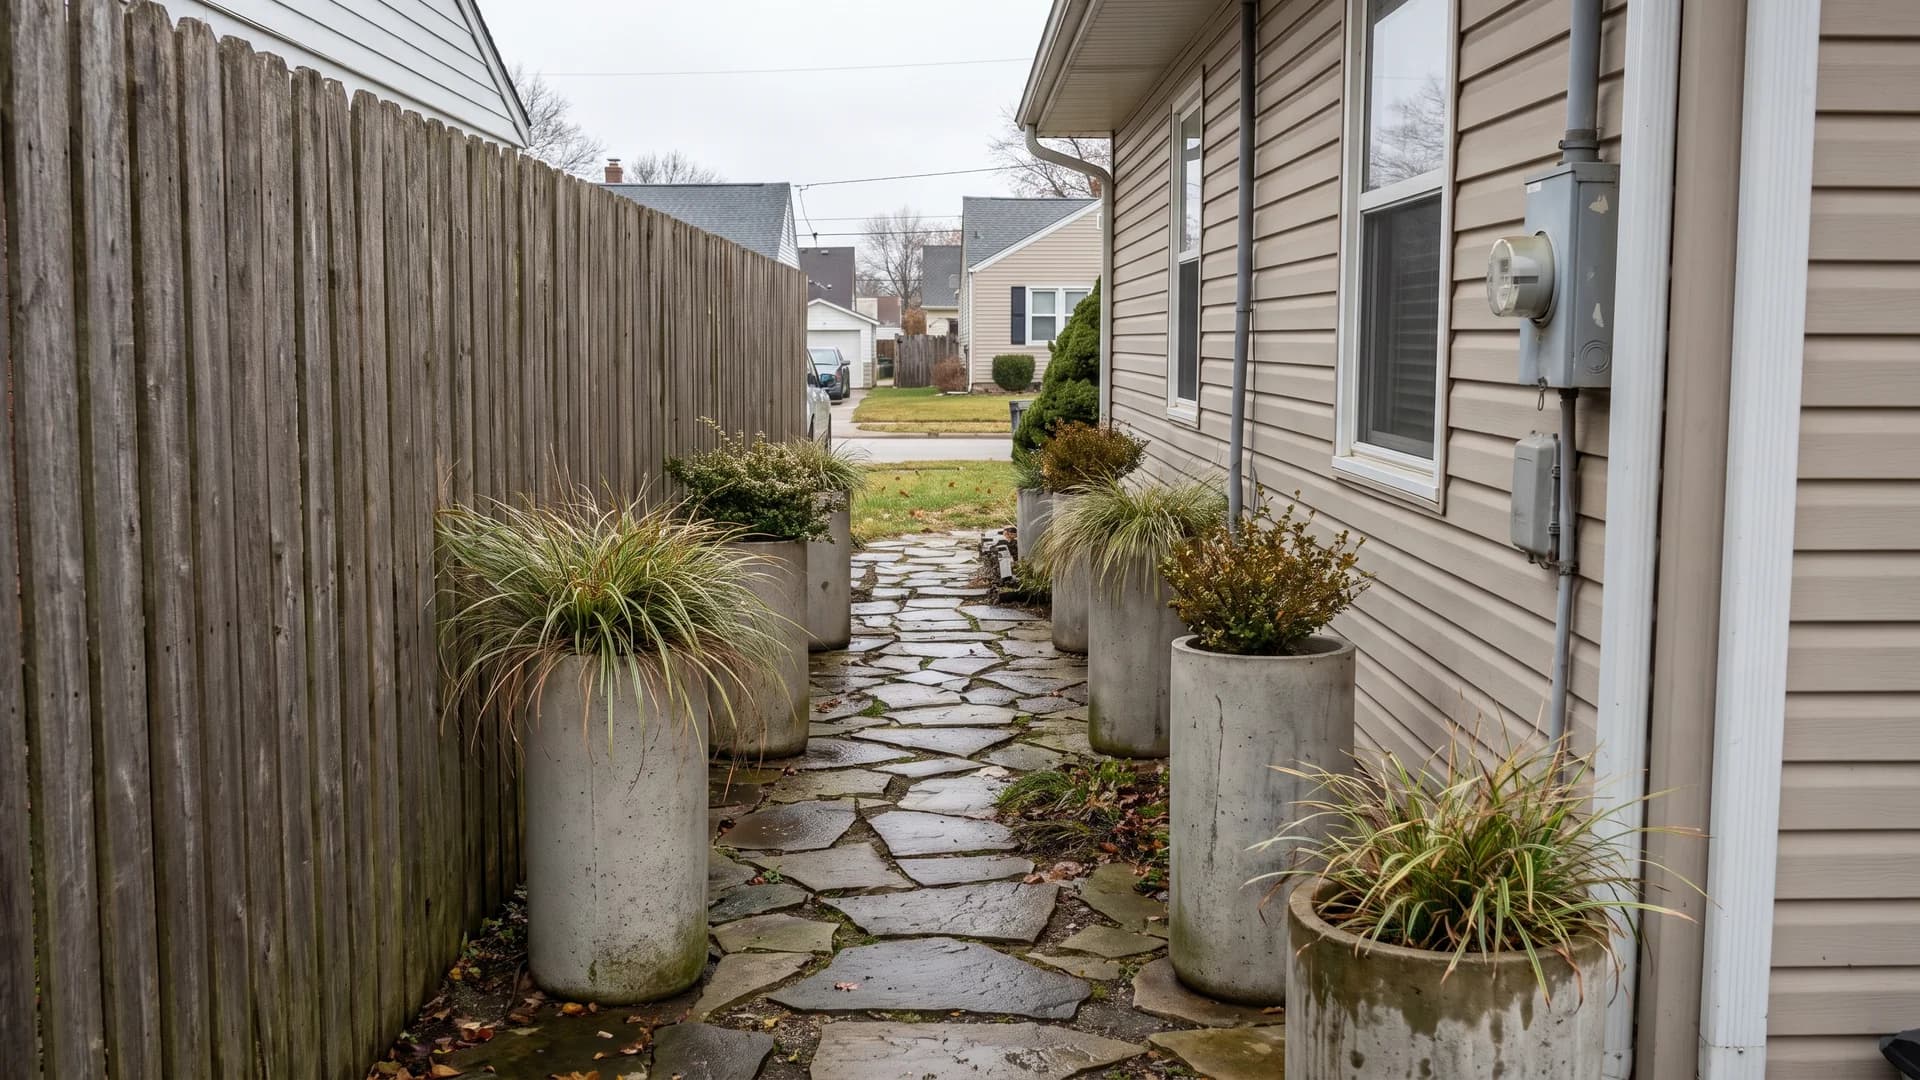
Four feet between a fence and a house wall makes a corridor, not a garden, and you walk it rather than sit in it. Tall cylinder planters at the two ends, steppers down the middle, and a climber on the fence give a corridor a beginning and an end. Keep 36 inches clear for passage. If your whole problem is the strip beside the house rather than the fence itself, the side yard landscaping guide covers that space properly.
25. Edge the bed where it meets the lawn
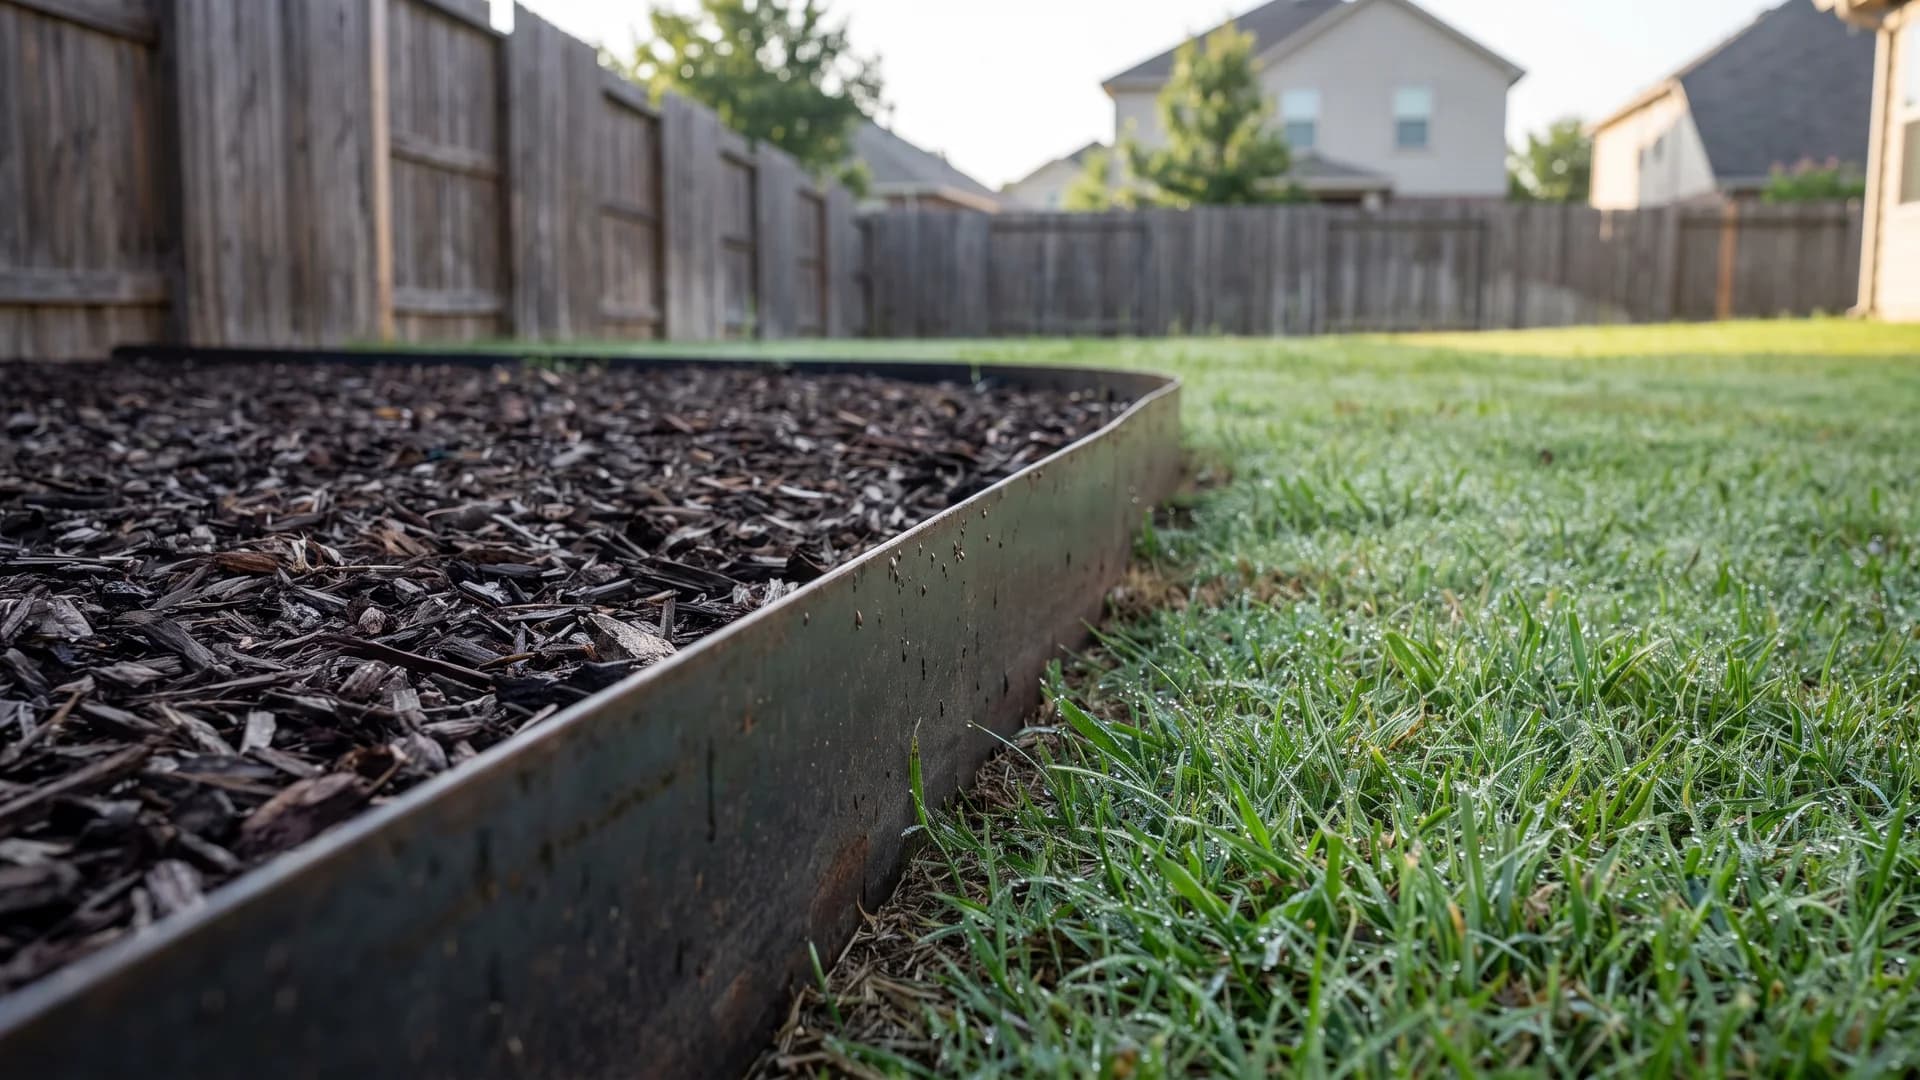
The difference between planted and landscaped is usually a hard line at the front of the bed. Four-inch steel landscape edging runs $3 to $6 per linear foot and lasts decades, where plastic heaves out of the ground the first hard winter. It also halves the trimming, since the mower wheel rides the edge and nothing needs a string trimmer against the boards.
Dressing the fence itself, cheaply
26. Paint or stain the fence before you plant anything
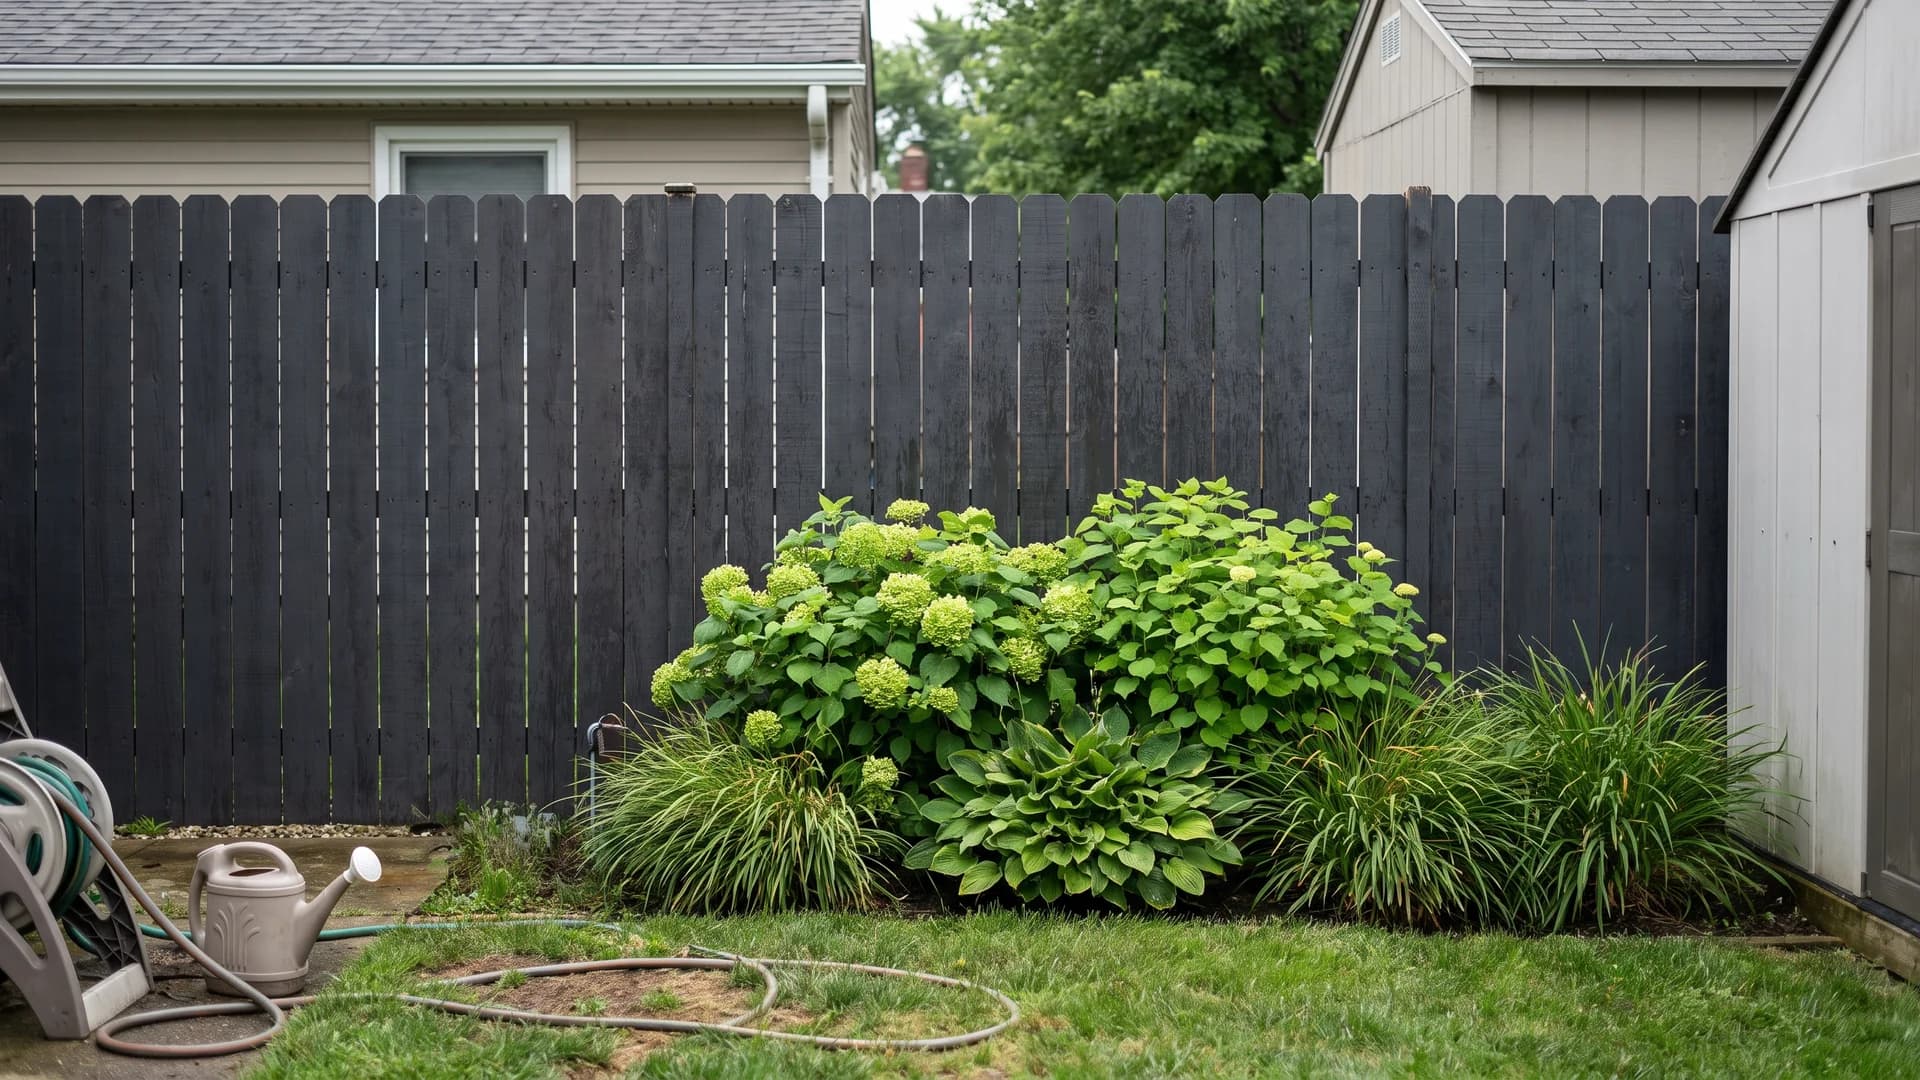
Cheapest transformation on the list, and it should come first because painting behind established shrubs is miserable. A dark charcoal, black, or deep green fence recedes visually and makes foliage jump forward, where orange-toned cedar competes with everything you plant. Five gallons covers roughly 250 to 300 square feet at two coats, so a typical run costs $150 to $250 and a weekend.
27. Screen a tired fence with slat panels
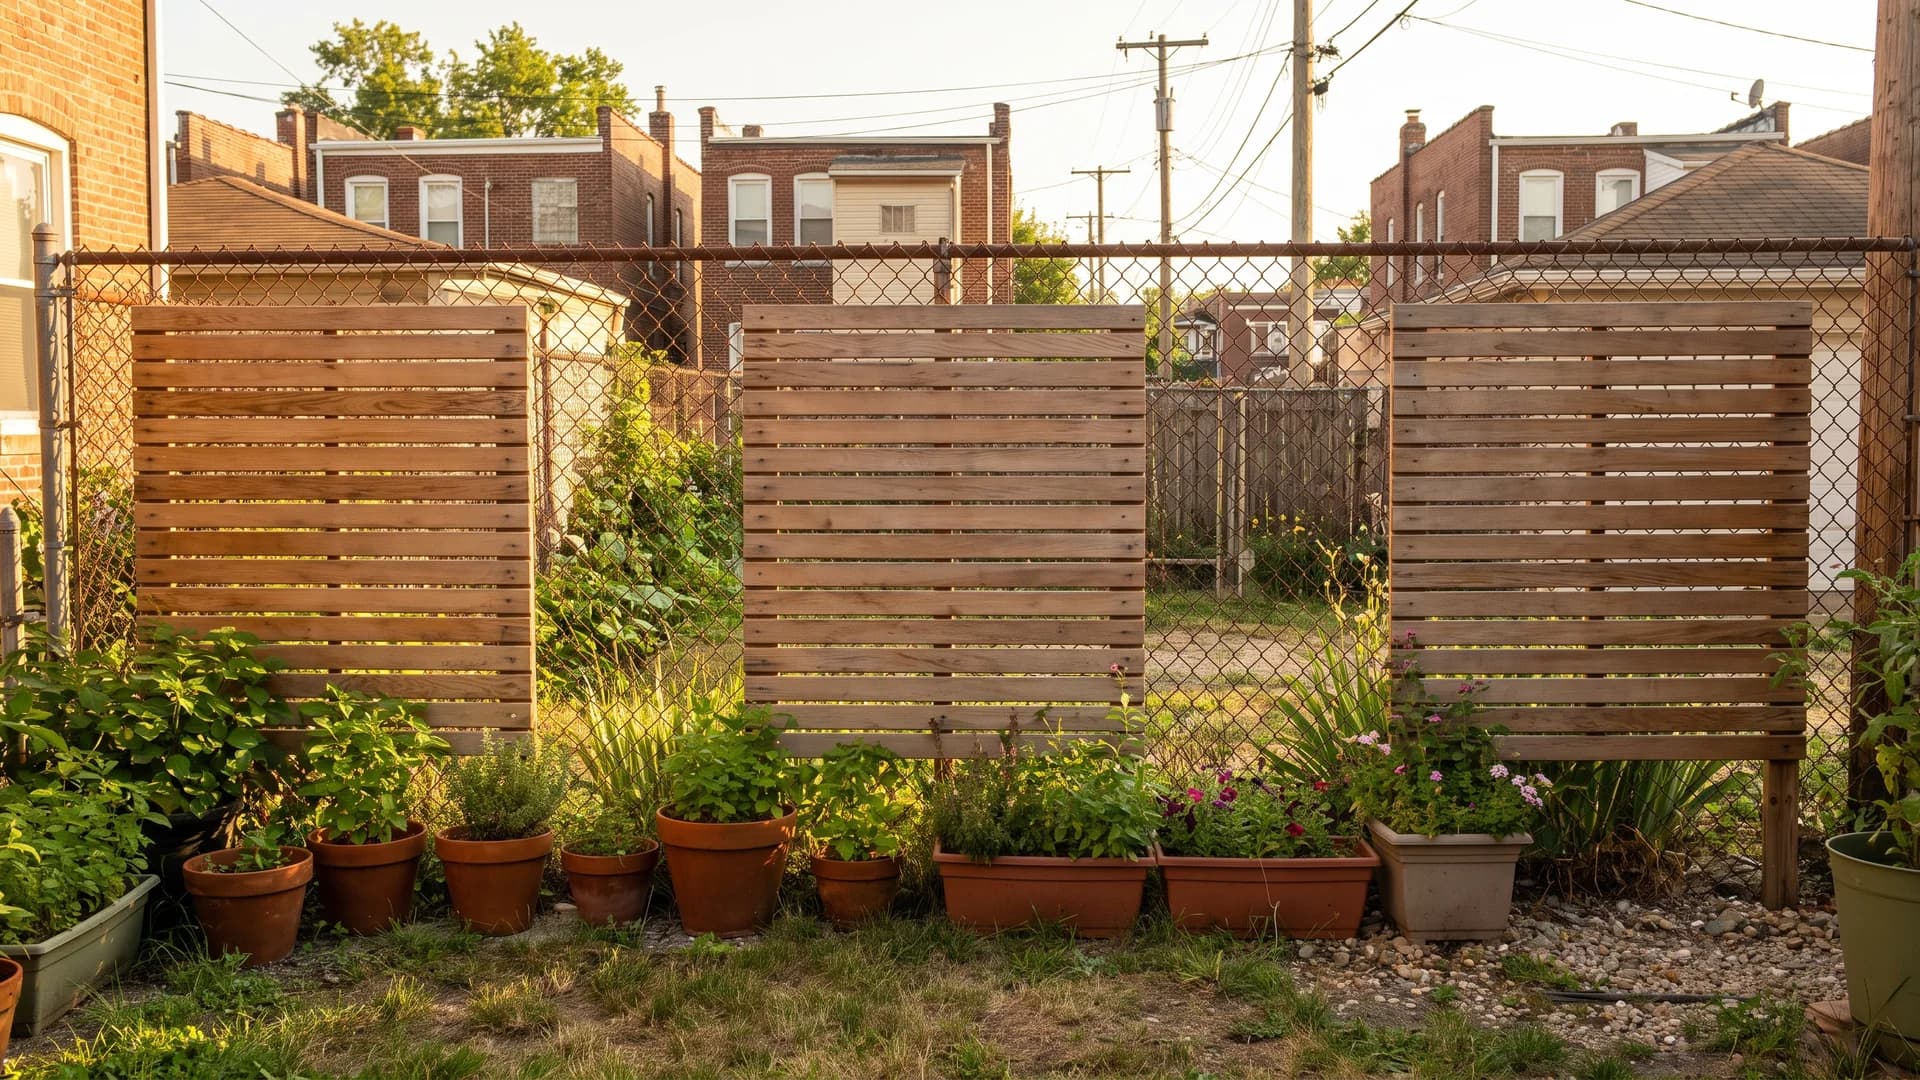
When the boards are ugly but sound, cover instead of replace. Horizontal slat or laser-cut panels screwed to battens give a run an architectural face for a fraction of a rebuild. Chain link and aluminum take this well: run 2x4 battens across the posts first, then the panels. Composite slat inserts woven into chain link are the lower-effort version, at roughly $3 to $6 per linear foot.
28. Break up a privacy fence you already own
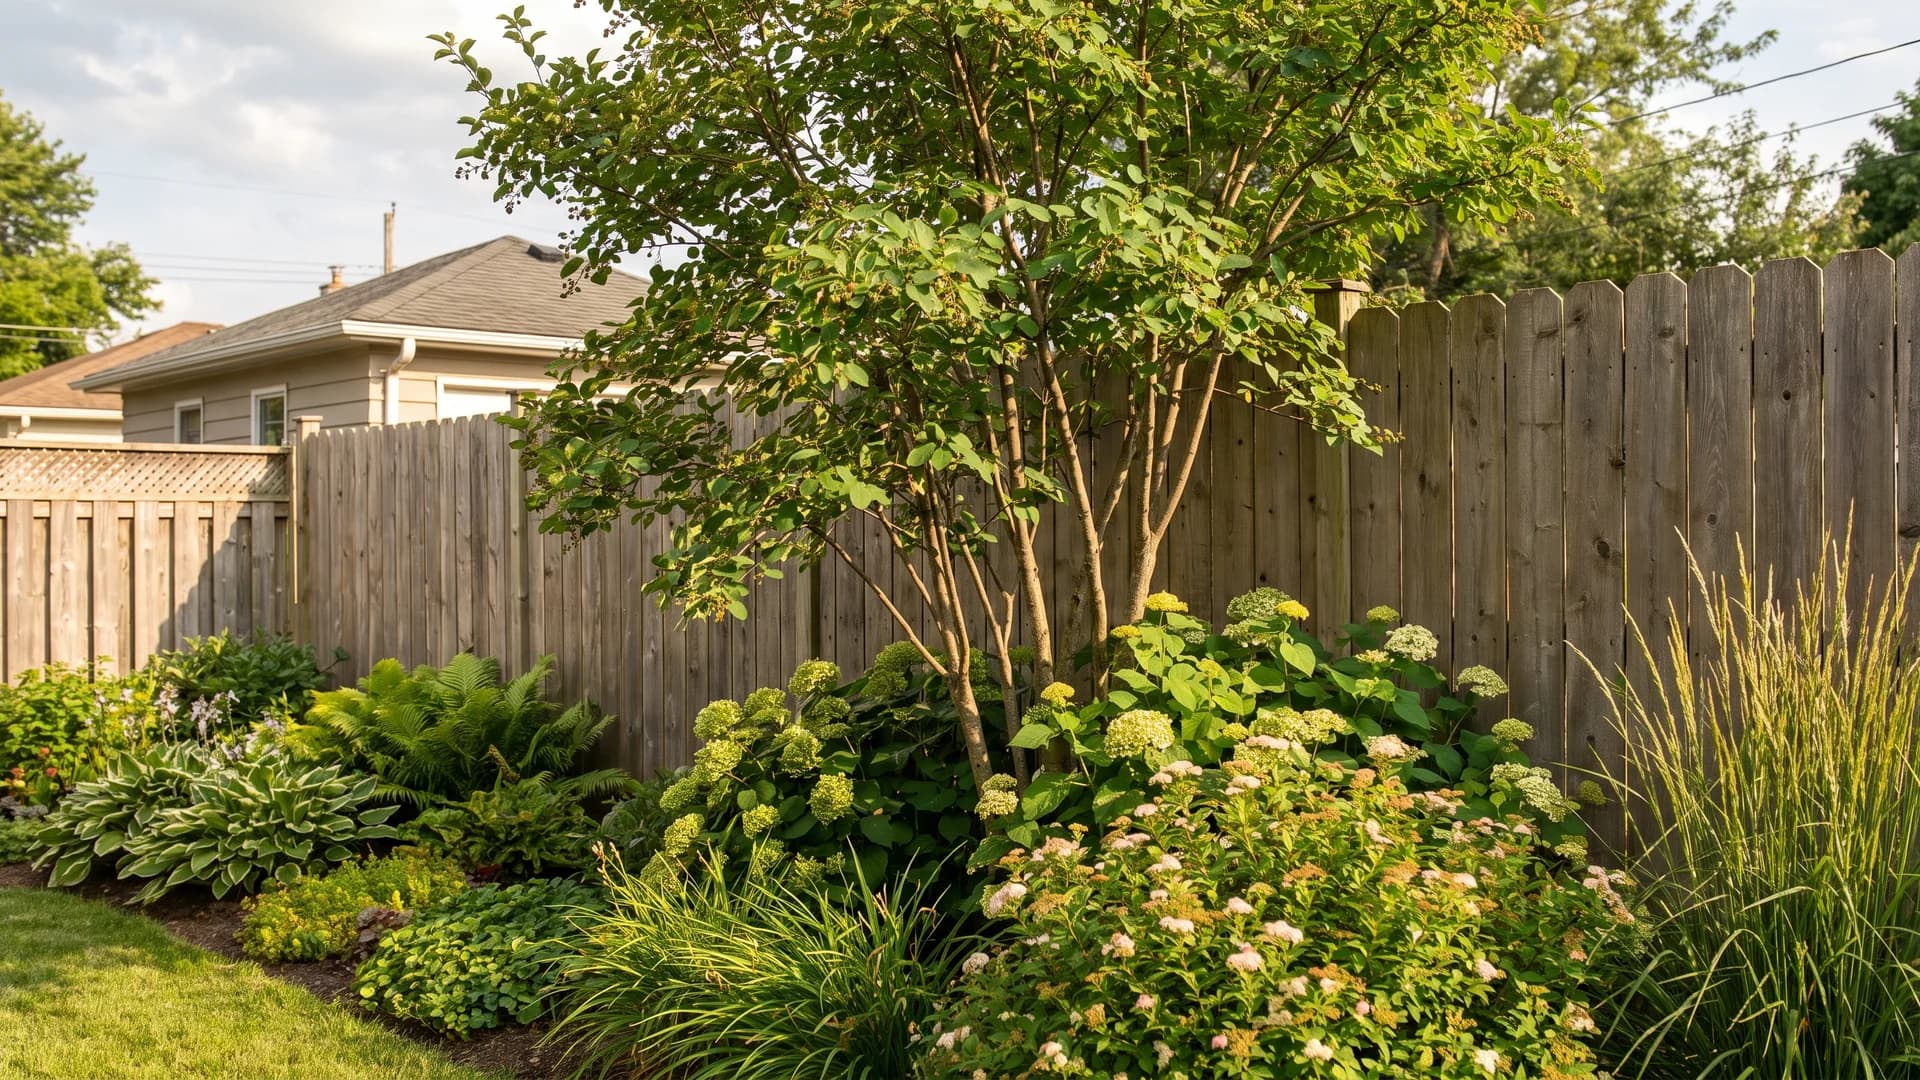
Six feet of unbroken board is a lot of flat surface, and hedging the entire length just swaps one wall for another. Dress it in sections instead: one small multi-stem tree, a mid-height mass of shrubs beside it, then a stretch of low planting that lets the fence show. The variation is what makes the boards stop registering. If you are still deciding on the fence itself, we compared the options in privacy fence alternatives.
29. Divide perennials and walk them down the run
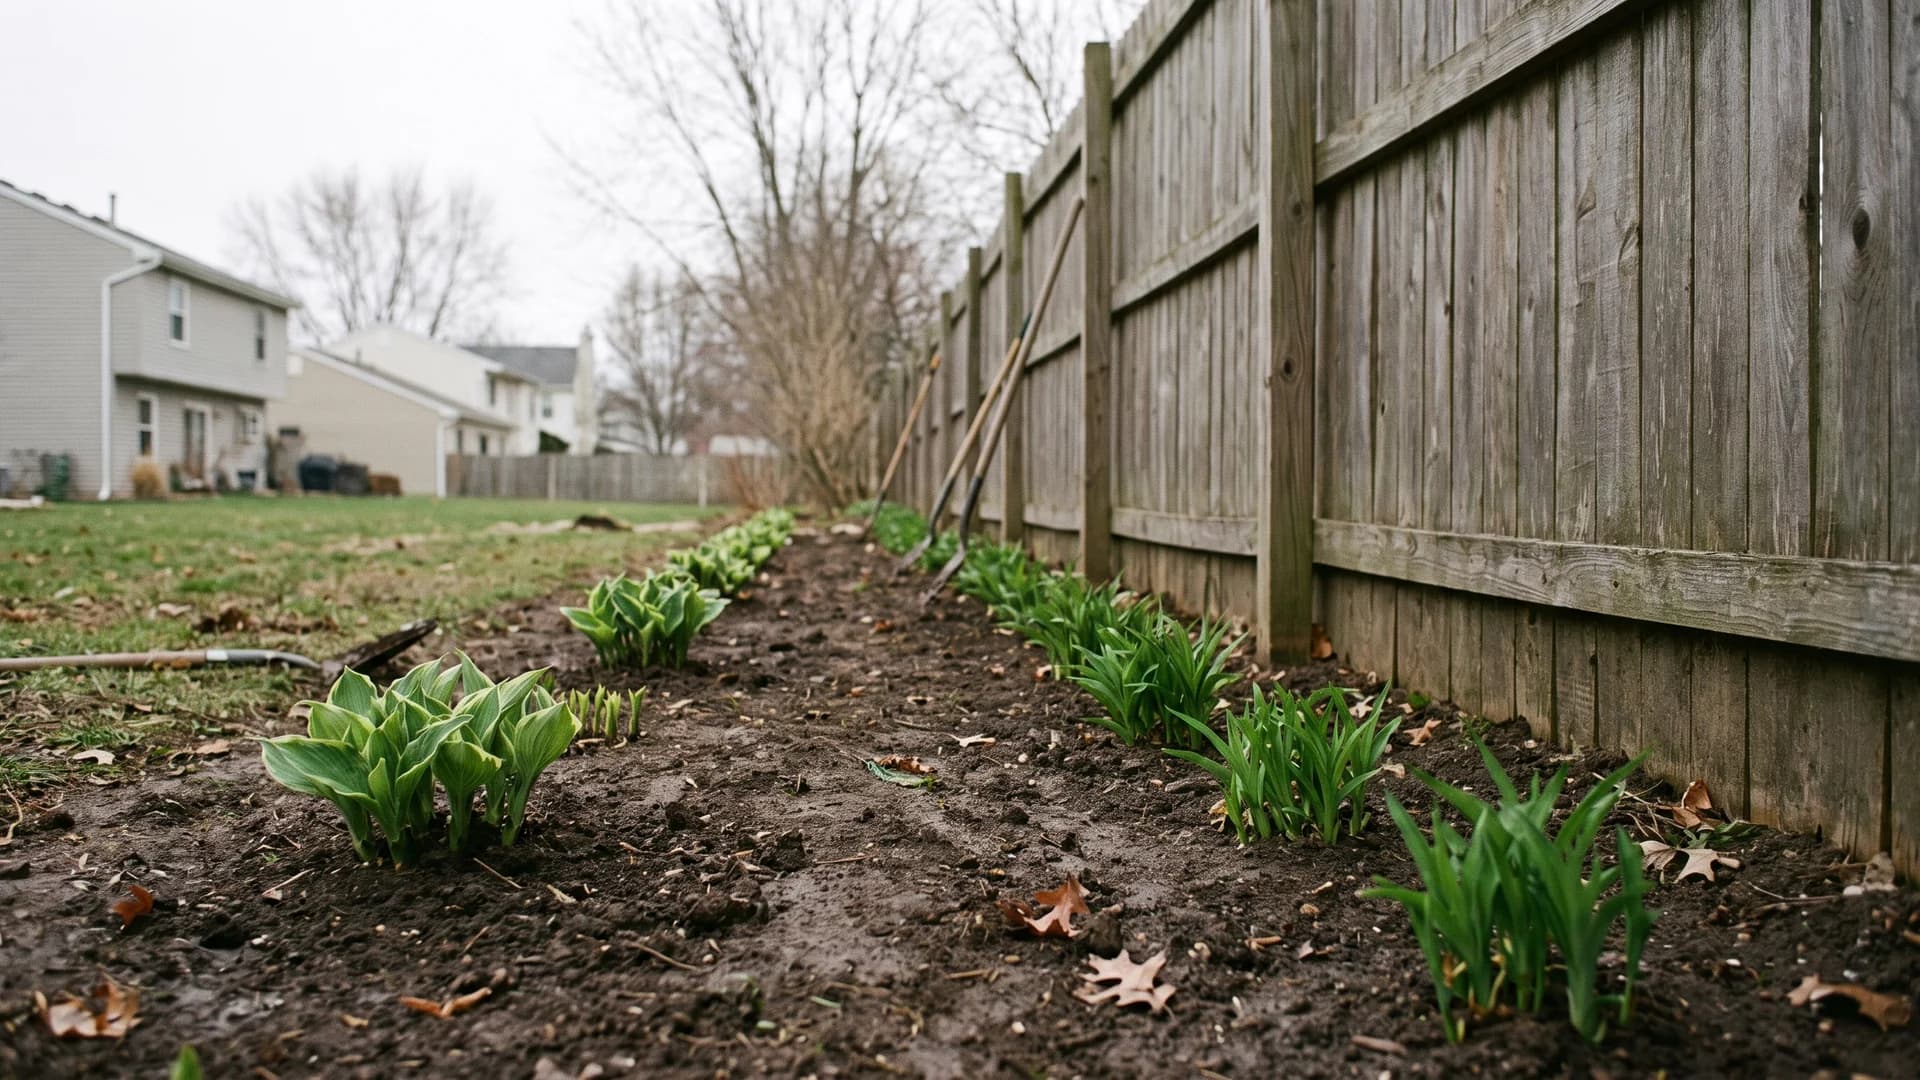
Hosta, daylily, sedum, and most ornamental grasses want dividing every three years anyway, and a fence line is exactly where the divisions should go. One mature clump splits into four, and those four split again two seasons later. Do it in early spring or fall, water hard for a month, and a 30-foot run fills in for the cost of nothing. Neighbors dividing their own beds will hand you more.
30. Buy hedging bare-root in winter
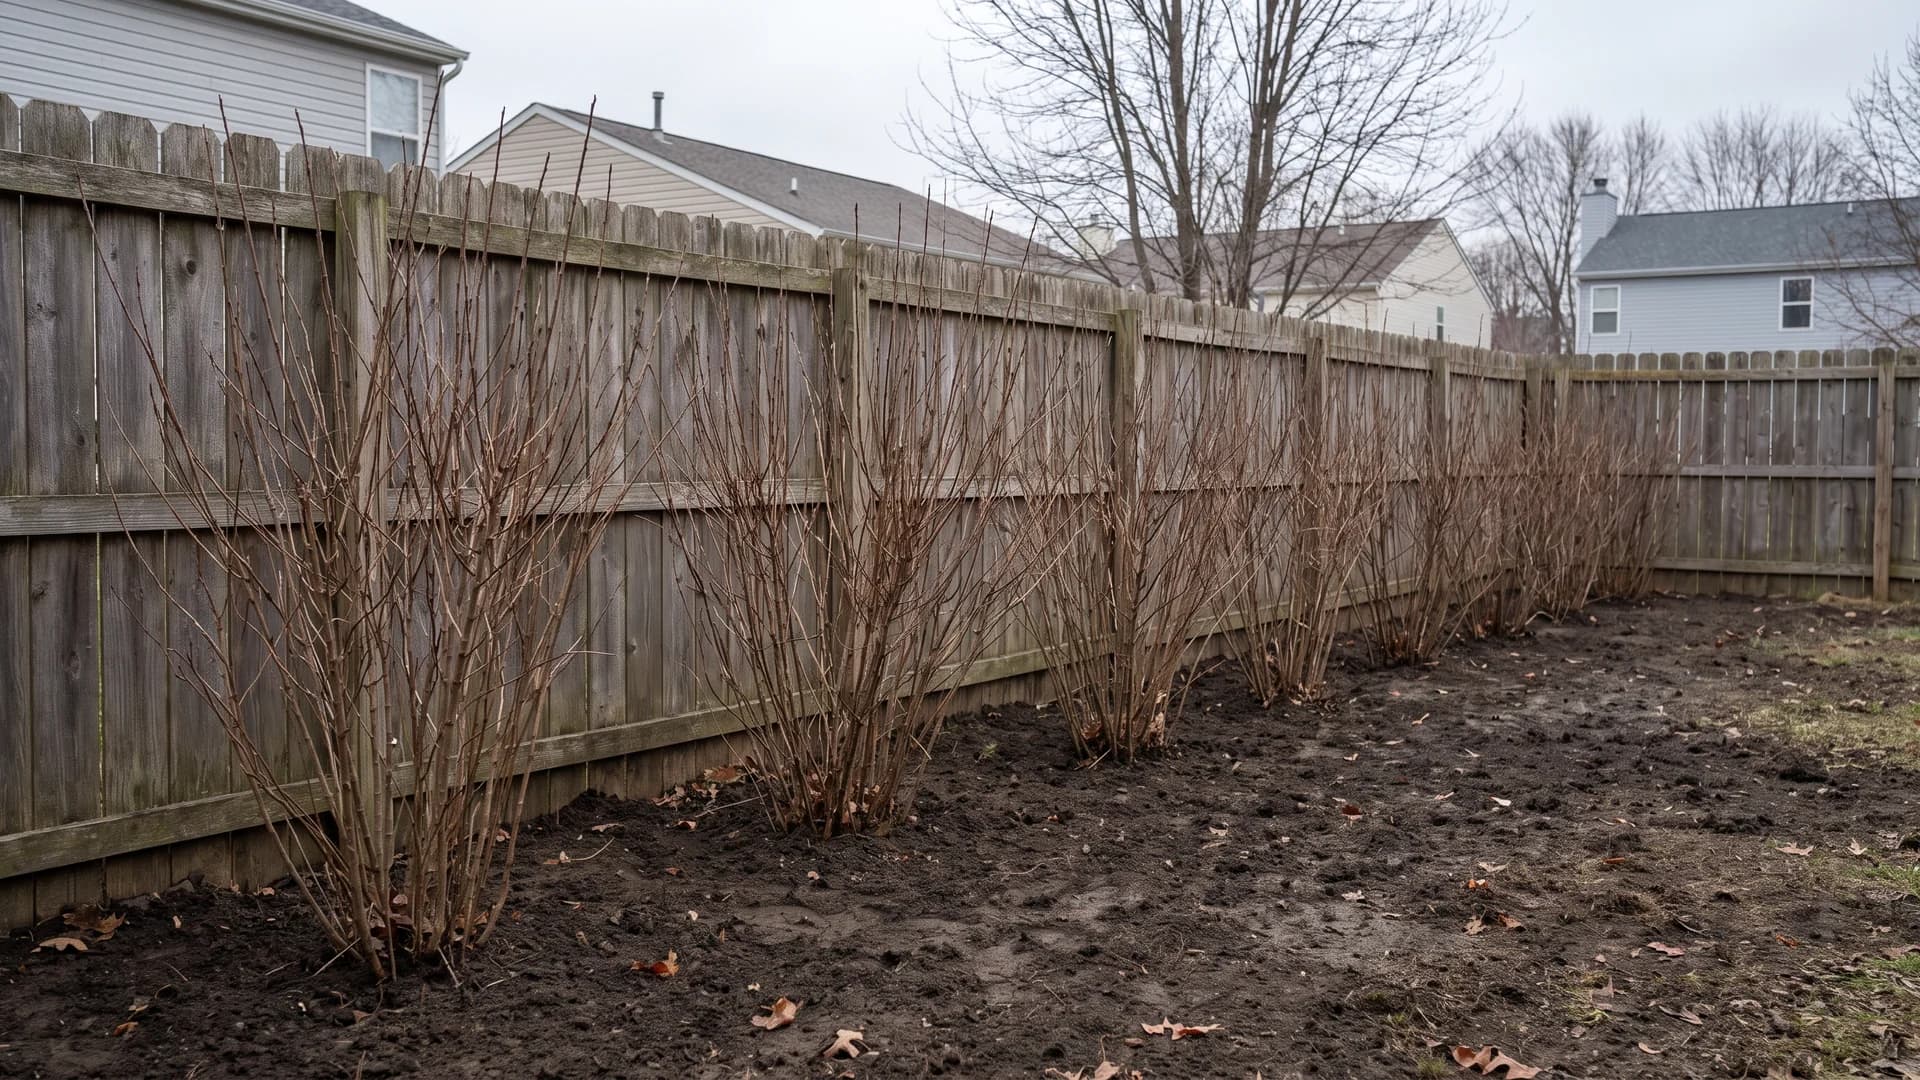
A potted hornbeam costs $40 to $80. The identical plant as a bare-root whip, shipped dormant between November and March, costs $2 to $5. Plant whips in a staggered double row on 18-inch centers and you get a dense hedge one season behind the potted version, at a tenth of the price. The catch is timing: bare-root only ships in the dormant window, and it must go in the ground within a day or two of arriving.
The fence-line rules nobody writes down
How close to the property line can you plant?
Assume the fence is not the line. Pull your survey or plat before you dig, and plant so that half the plant's mature width still sits on your side, not half of its nursery-pot width. In most US states a neighbor may legally cut back roots and branches that cross onto their property, right to the boundary, which turns a badly placed hedge into a half-hedge. Some municipalities also cap hedge height on front boundaries or near a driveway sight line, so a quick call to the local planning office is cheaper than a replant. Call 811 before any digging regardless; utility easements often run right along a fence.
Space by mature width, not by pot size
Nursery spacing is not planting spacing. What fits today is not the question:
| Plant | Mature width | Plant every | Off the fence |
|---|---|---|---|
| 'Green Giant' arborvitae | 8 to 12 ft | 5 to 6 ft | 5 ft |
| 'Emerald Green' arborvitae | 3 to 4 ft | 3 ft | 2 ft |
| Red tip photinia | 5 to 8 ft | 5 to 6 ft | 4 ft |
| 'Sky Pencil' holly | 2 to 3 ft | 3 ft | 18 in |
| Feather reed grass | 18 to 24 in | 18 to 24 in | 18 in |
Leave yourself a way in
You will need to stain, repair, or replace boards eventually. An 18-inch service gap behind the planting sounds wasteful until the year you are trying to get a paint roller behind a mature hedge.
Do not pile soil against the wood
Raised beds and mulch mounded against the boards hold water at the base of every picket and rot a cedar fence years early. Keep soil 3 to 4 inches below the bottom rail and slope the bed to drain away from the fence.
What it costs per linear foot
Bare-root whips: $2 to $4. Gravel strip with grasses: $8 to $12. Potted 3-to-5-gallon shrubs at hedge spacing: $8 to $18. That range is why idea 30 exists.
Match the idea to your fence
- Solid privacy fence, 6 feet of flat board: 26 first, then 28 and 7.
- Chain link, aluminum, or a fence you would rather not look at: 27, then 14.
- Split rail or wrought iron where light comes through: 6, 10, and 11.
- White vinyl: 13 and 26 are the two moves that stop it glaring.
- Under 24 inches of soil to work with: 5, 21, and 15.
- Hot, dry, west-facing run: 22, plus the stone pricing in our rock landscaping guide.
- Renting, or working with concrete at the fence base: 17 and 15.
- Almost no budget: 26, 29, and 30, in that order.
- Front boundary rather than the backyard: 9 and 26, and the wider curb-appeal sequence is in our low maintenance front yard landscaping guide.
FAQ
How do you landscape along a fence line?
Work in this order: paint or stain the fence, cut a bed at least 18 inches deep with a hard edge, then plant in three layers with tall shrubs at the back and groundcover at the front. Set every plant by its mature width rather than its current size, and leave a service gap behind the planting so you can still reach the boards. Lighting goes in last, once you know where the plants sit.
What can I plant along a fence line?
For screening, arborvitae, columnar holly, wax myrtle, or clumping bamboo, depending on your zone. For color, viburnum and ninebark at the back, catmint, salvia, and coneflower in the middle, and creeping thyme or lady's mantle at the front. On sun-baked runs use agave, yucca, and ornamental grasses. Match everything to your hardiness zone first, because a plant that screens reliably in zone 6 may not survive zone 9 at all.
How close to a fence can I plant a hedge?
Plant so that half the shrub's mature width sits inside your property line, which for most screening evergreens means 3 to 5 feet off the fence, not the 12 inches the pot suggests. Check your survey rather than assuming the fence marks the boundary, since fences are commonly set inside or off the line. Most US states let a neighbor trim anything that crosses onto their side, and some towns limit boundary hedge height, so confirm local rules before planting a long run.
How do I landscape along a fence on a budget?
Stain the fence, divide perennials you or a neighbor already own, and buy hedging as bare-root whips in the dormant season at $2 to $5 a plant. Those three moves cover a 60-foot run for a couple of hundred dollars. Mulch is the other cheap win: a clean 18-inch ribbon at roughly $40 a cubic yard makes an untouched fence line look maintained in one afternoon.
How can I make my backyard fence look better?
Color first: a dark stain makes the fence recede and everything planted in front of it read as the feature. Then add one vertical element, either a climber on wires or a couple of trellis panels, and one lit specimen so the run still exists after dark. If you want to see the change before committing to paint or plants, AI fence design renders the options onto a photo of your actual fence.
What is the rule of 3 in landscaping?
It is the habit of planting in odd-numbered groups, usually threes, because odd groupings read as natural while pairs and fours read as arranged. Along a fence it applies twice: group each plant type in threes or fives, and repeat that group at intervals down the run so the border has rhythm instead of a random sequence. It is a guideline, not a law, and single specimen plants used as focal points break it on purpose.